Key features
- Testnet support: accepts the
testnetparameter in the browser. - Supports W5: the latest wallet smart contract standard for TON Blockchain.
Wallet setup
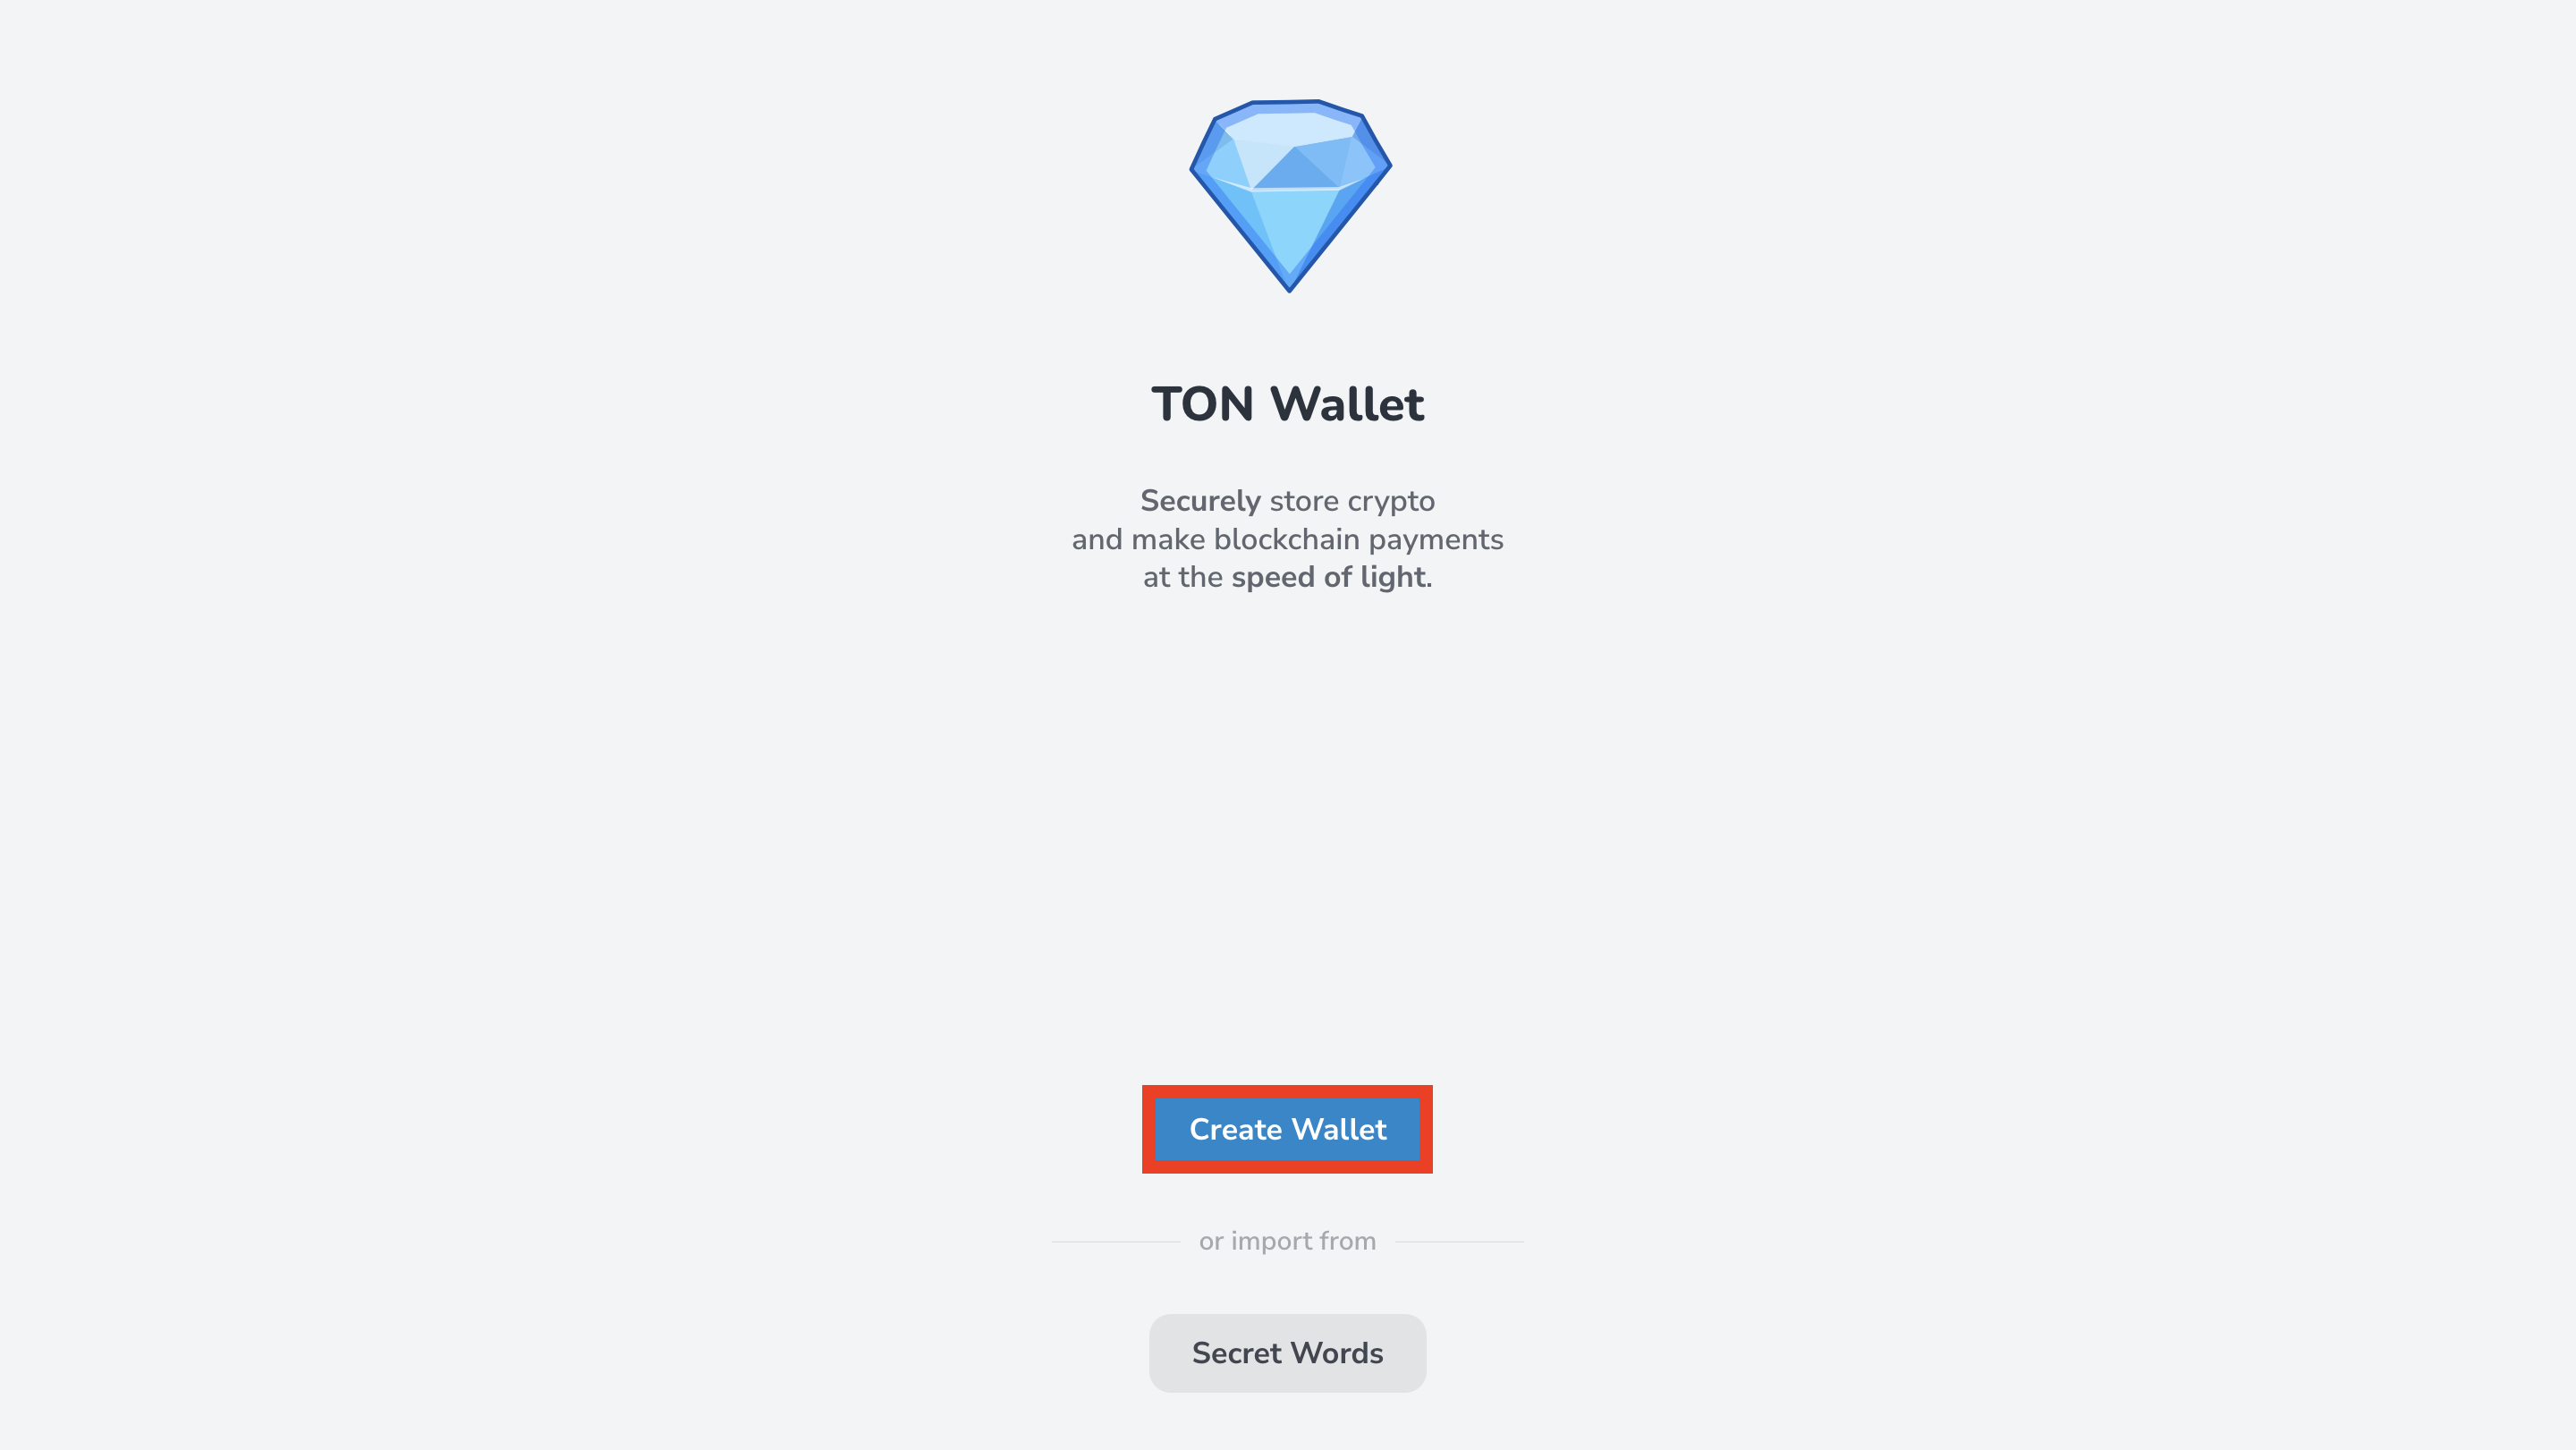
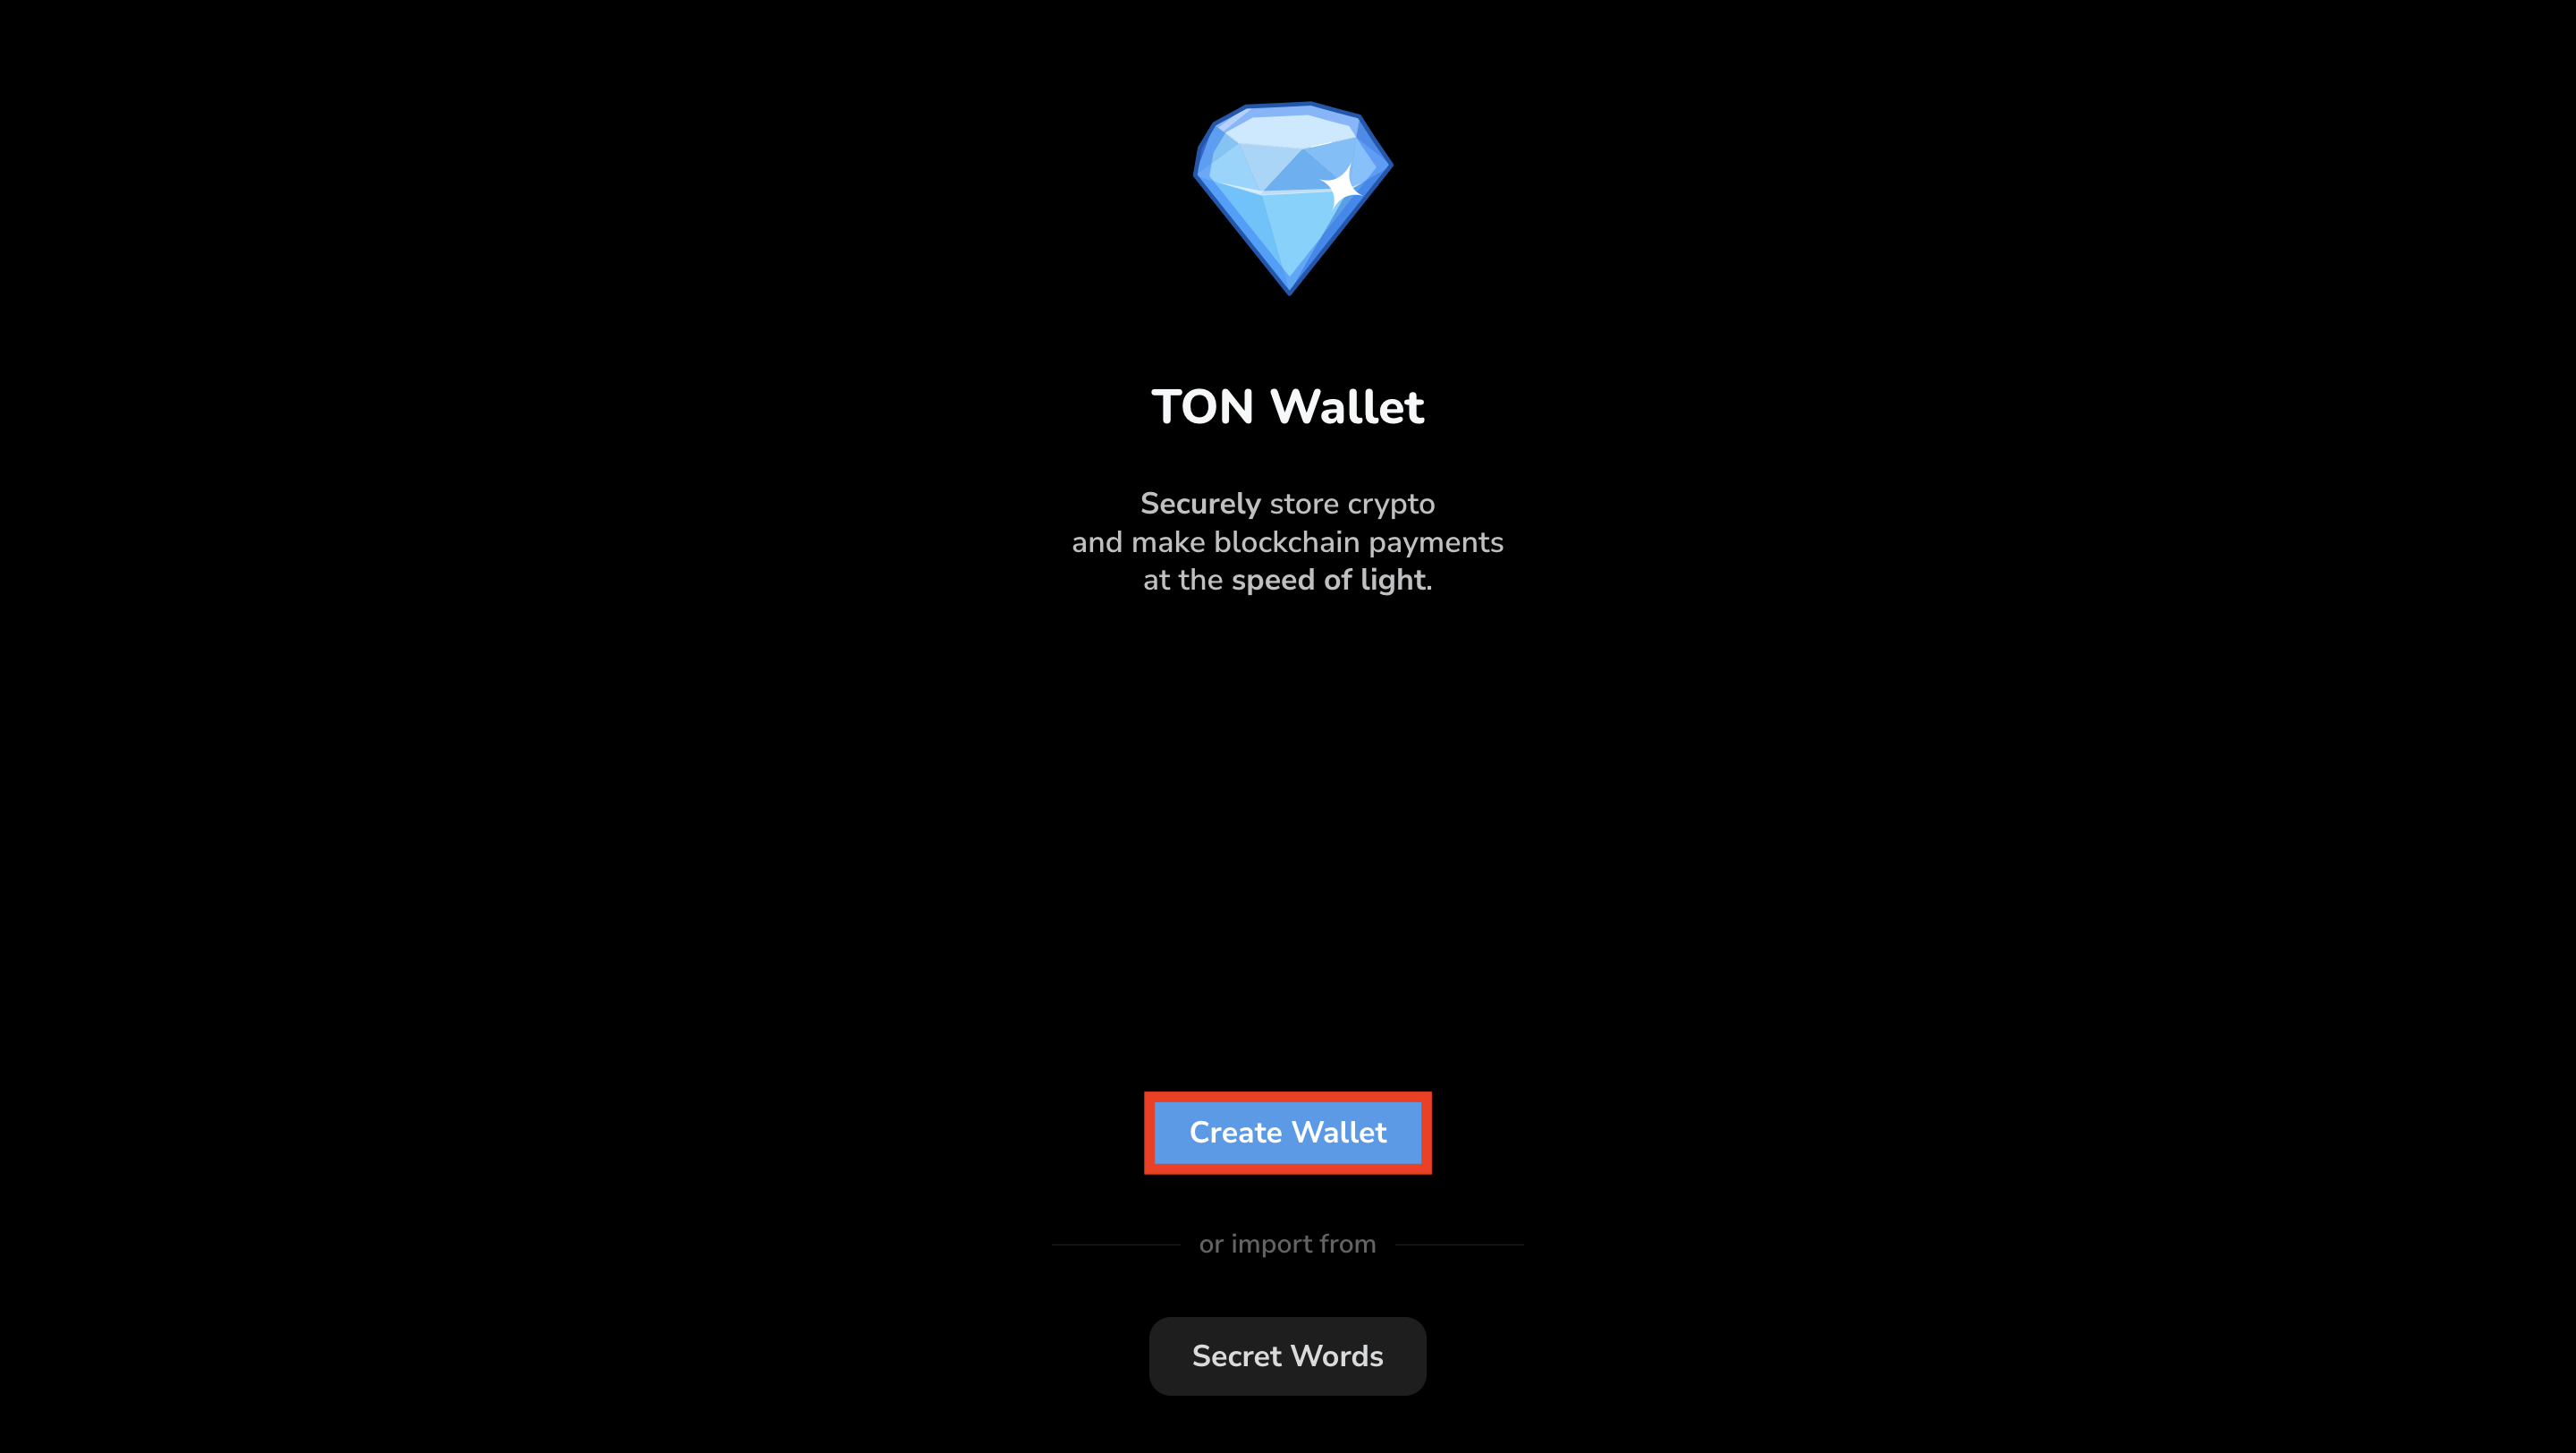
To get started, set up your wallet.ton.org, a web-based wallet interface.- Open wallet.ton.org.
- Click “Create Wallet” to create a new wallet.
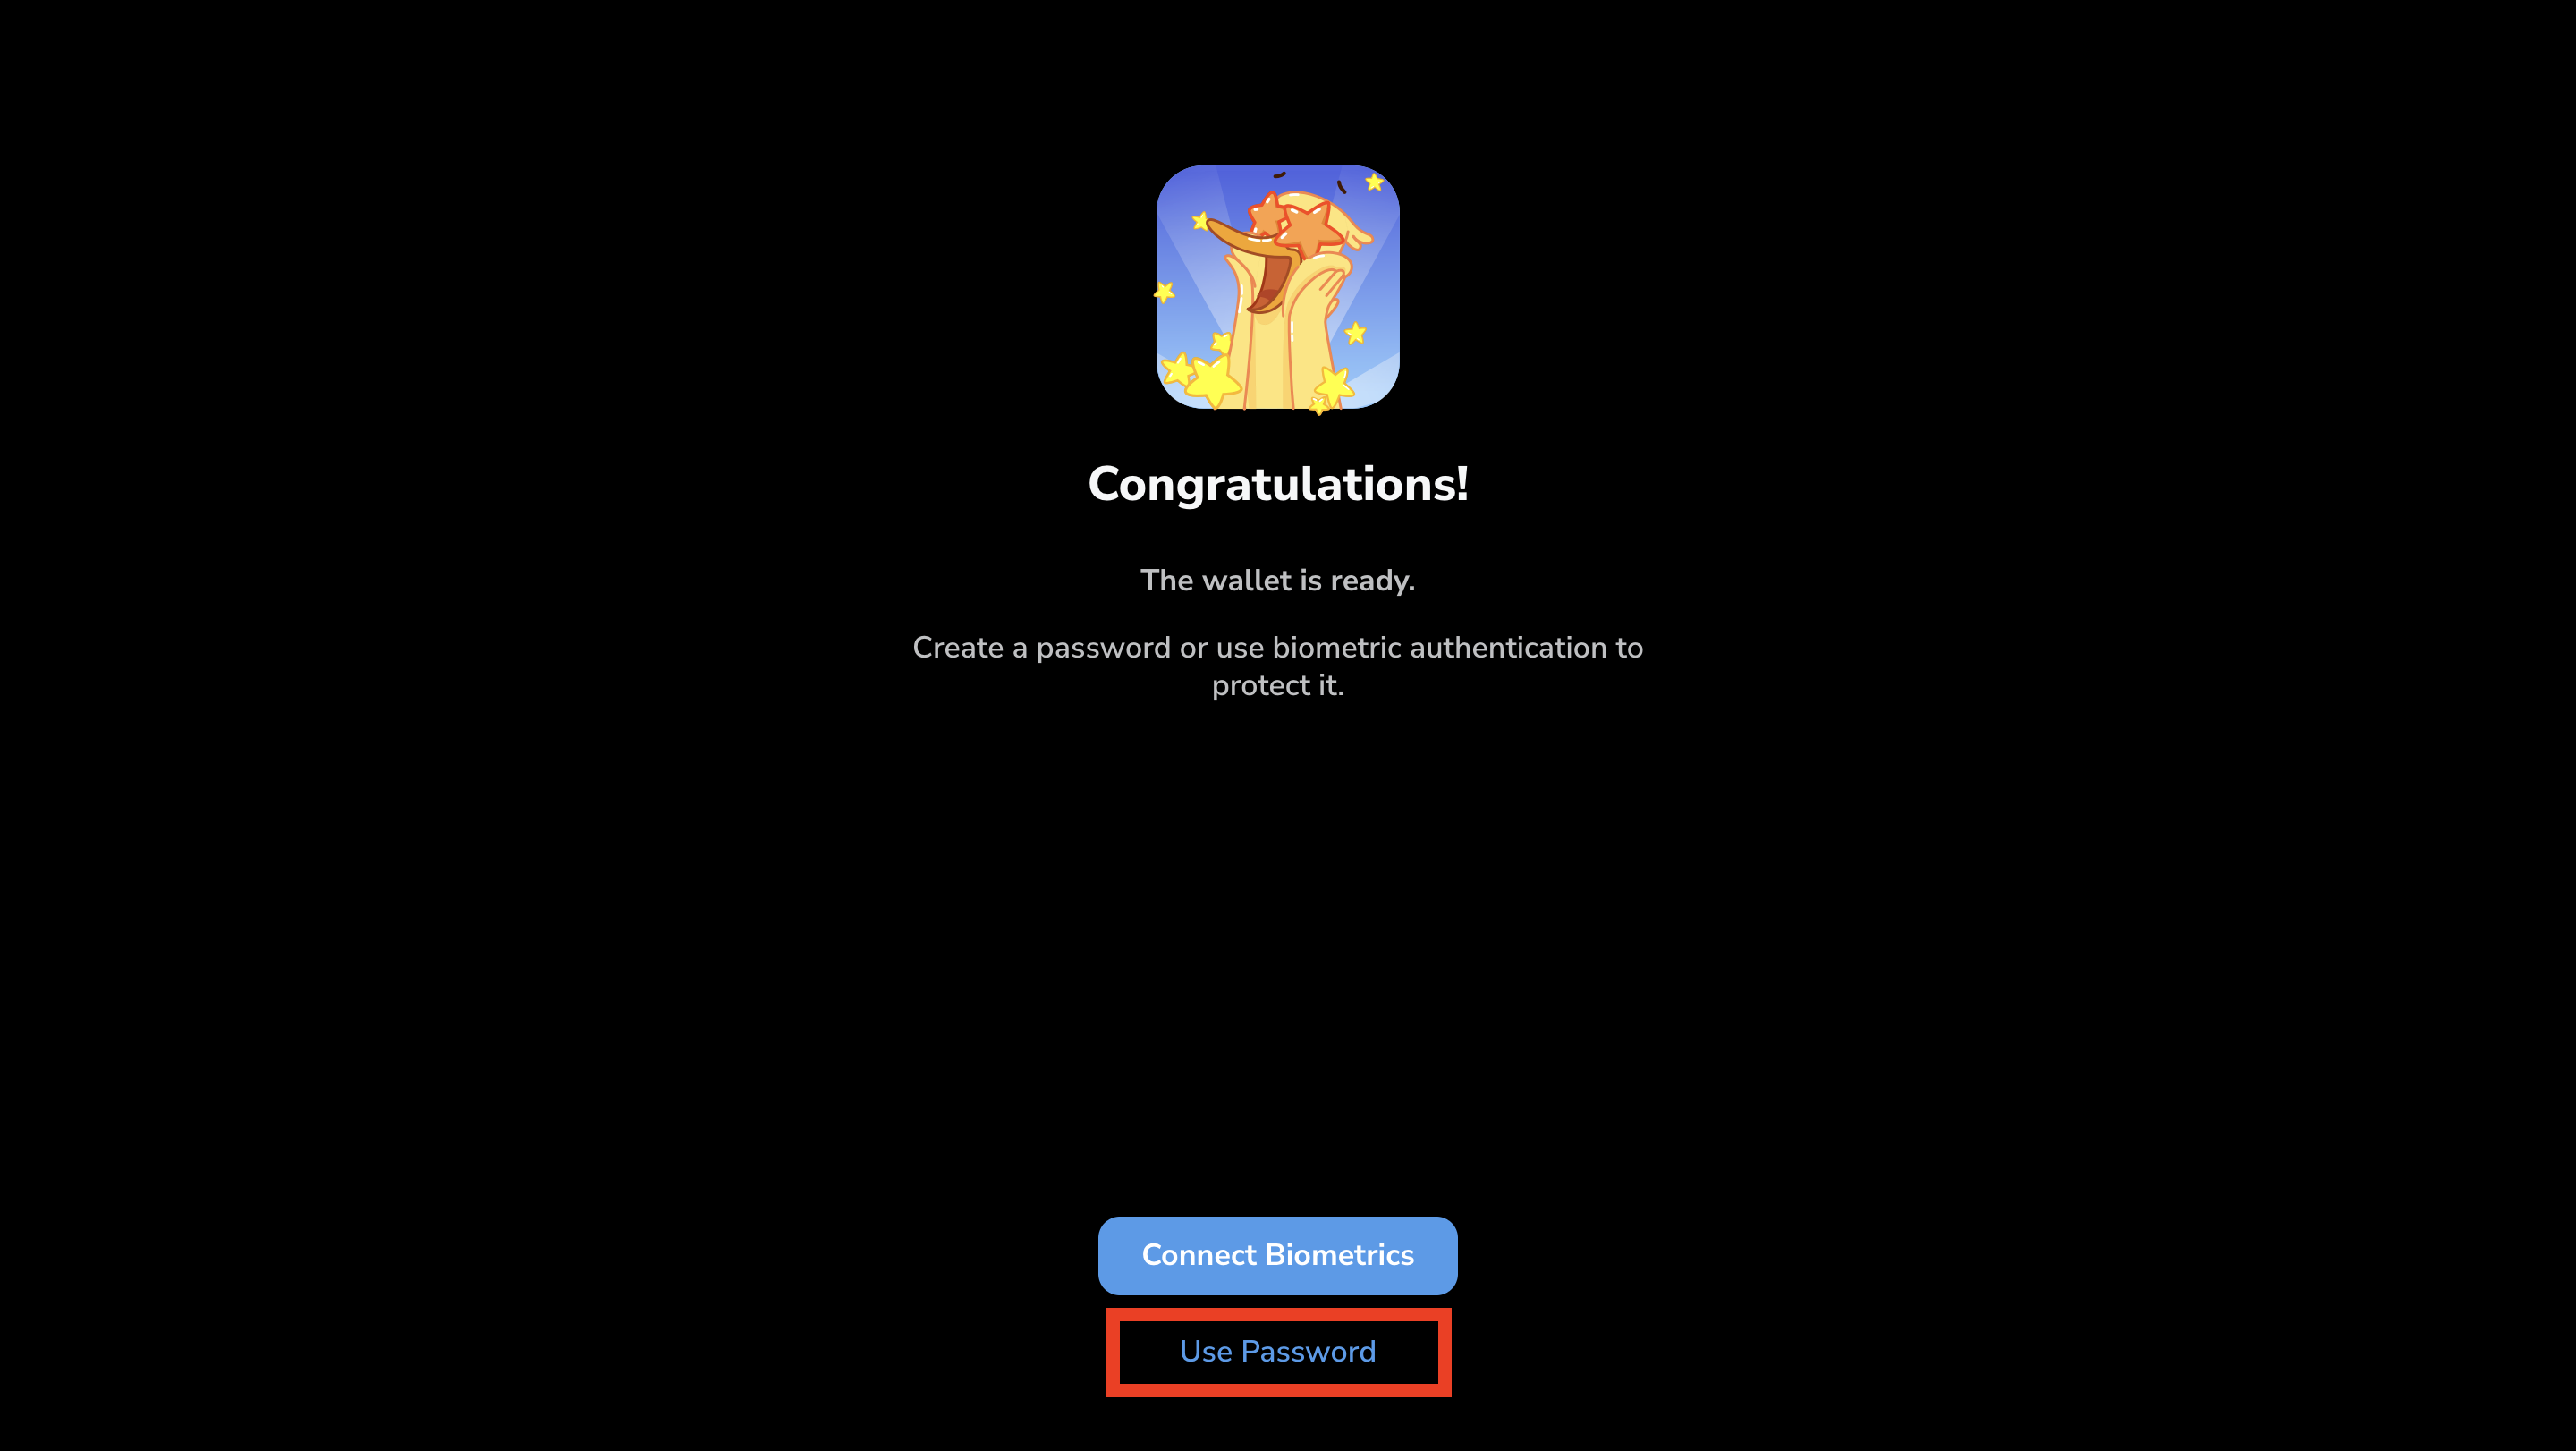
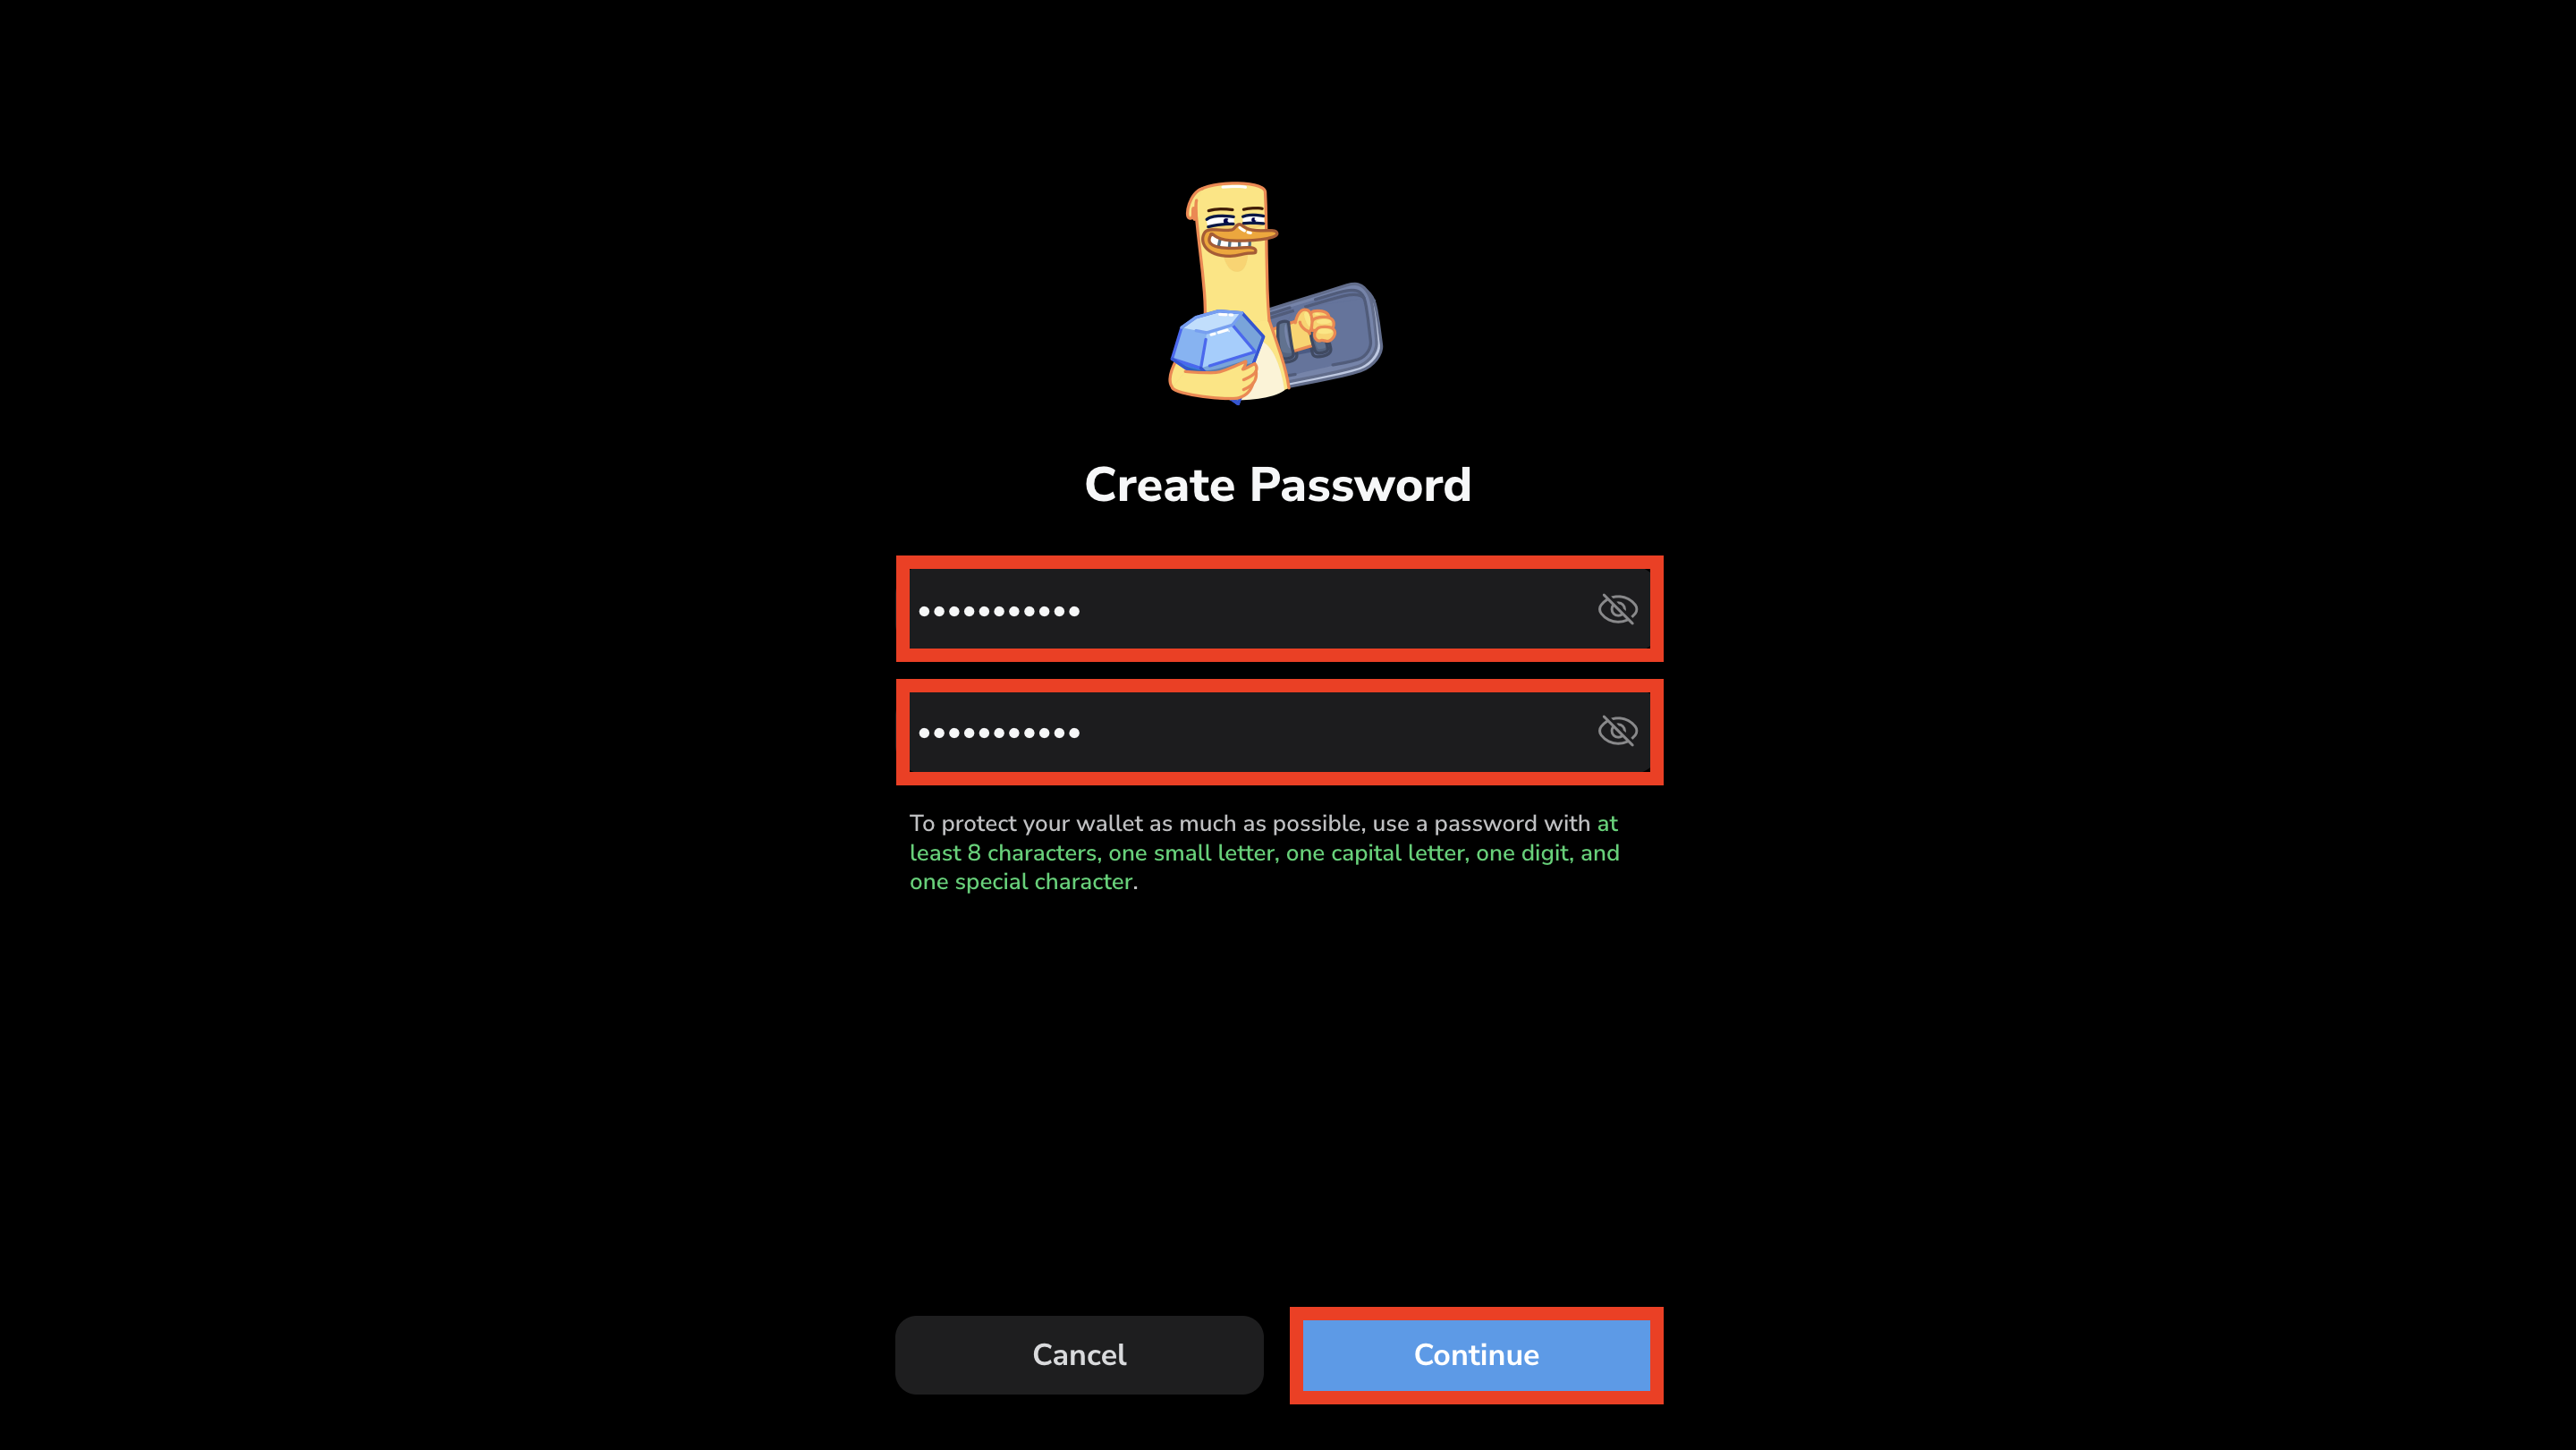
- Next, choose “Use Password” to protect your wallet:

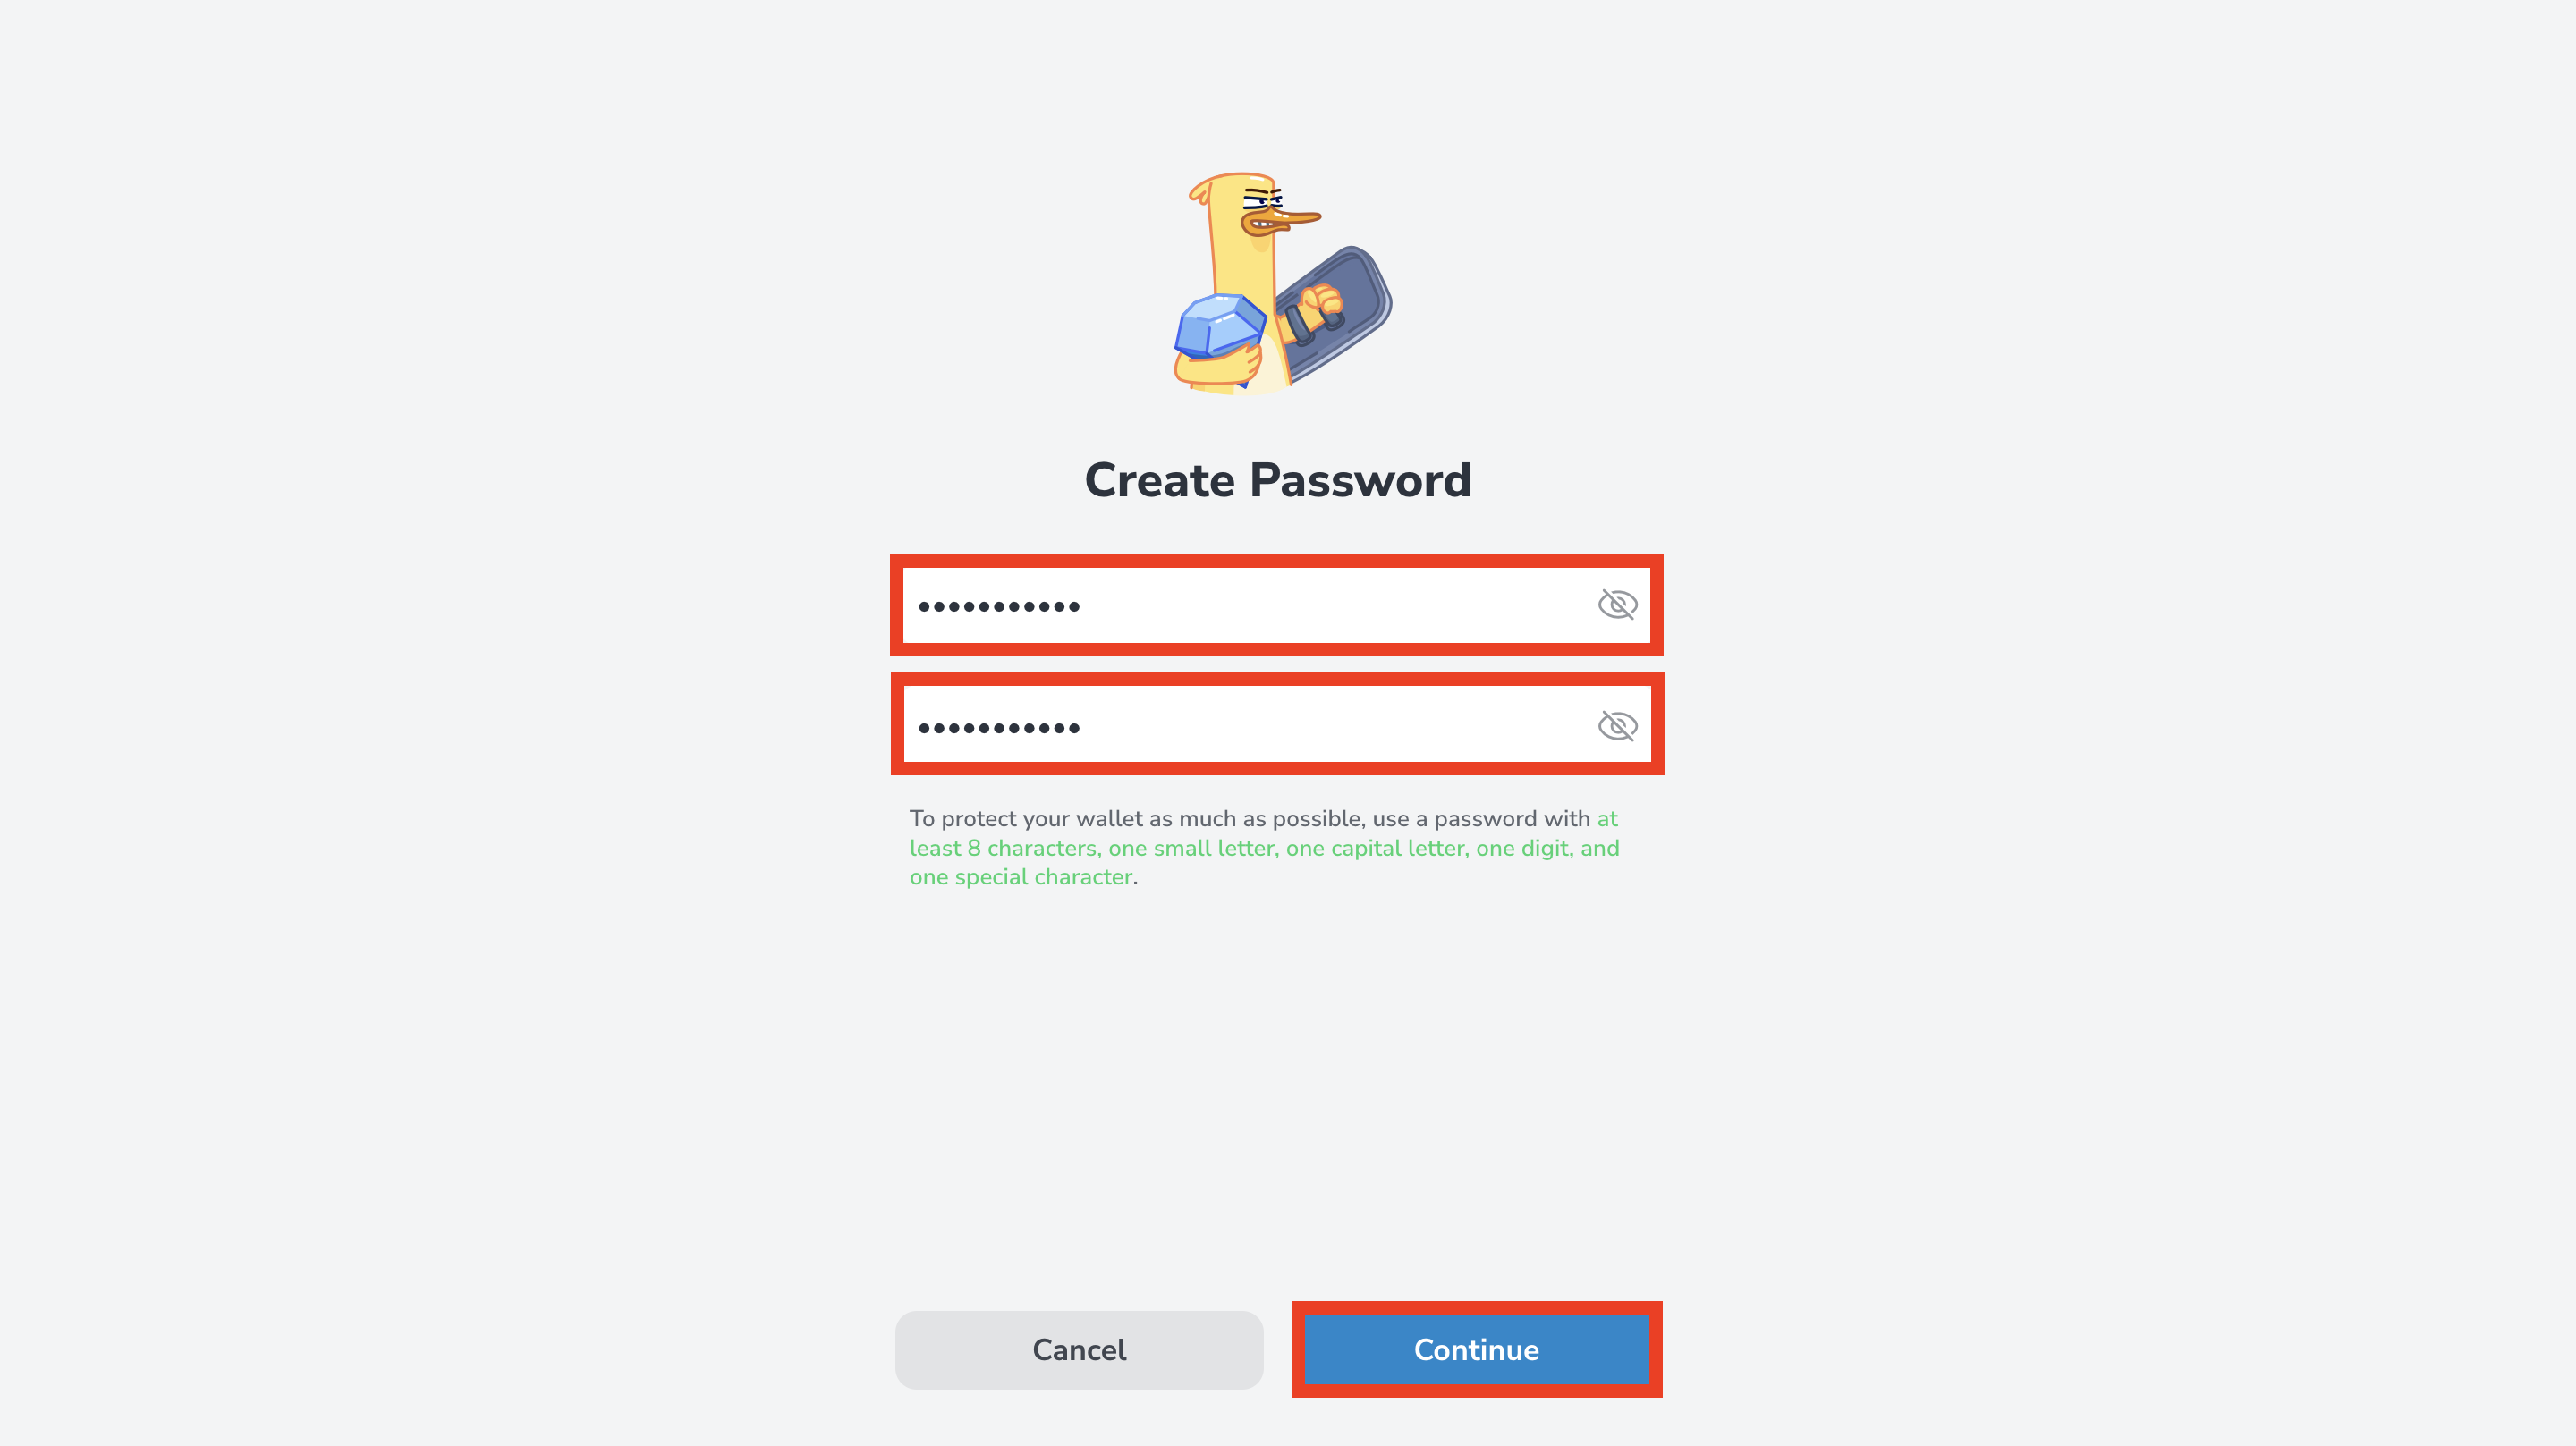
- Set and confirm your password. Ensure you use a strong and unique password to protect your wallet.
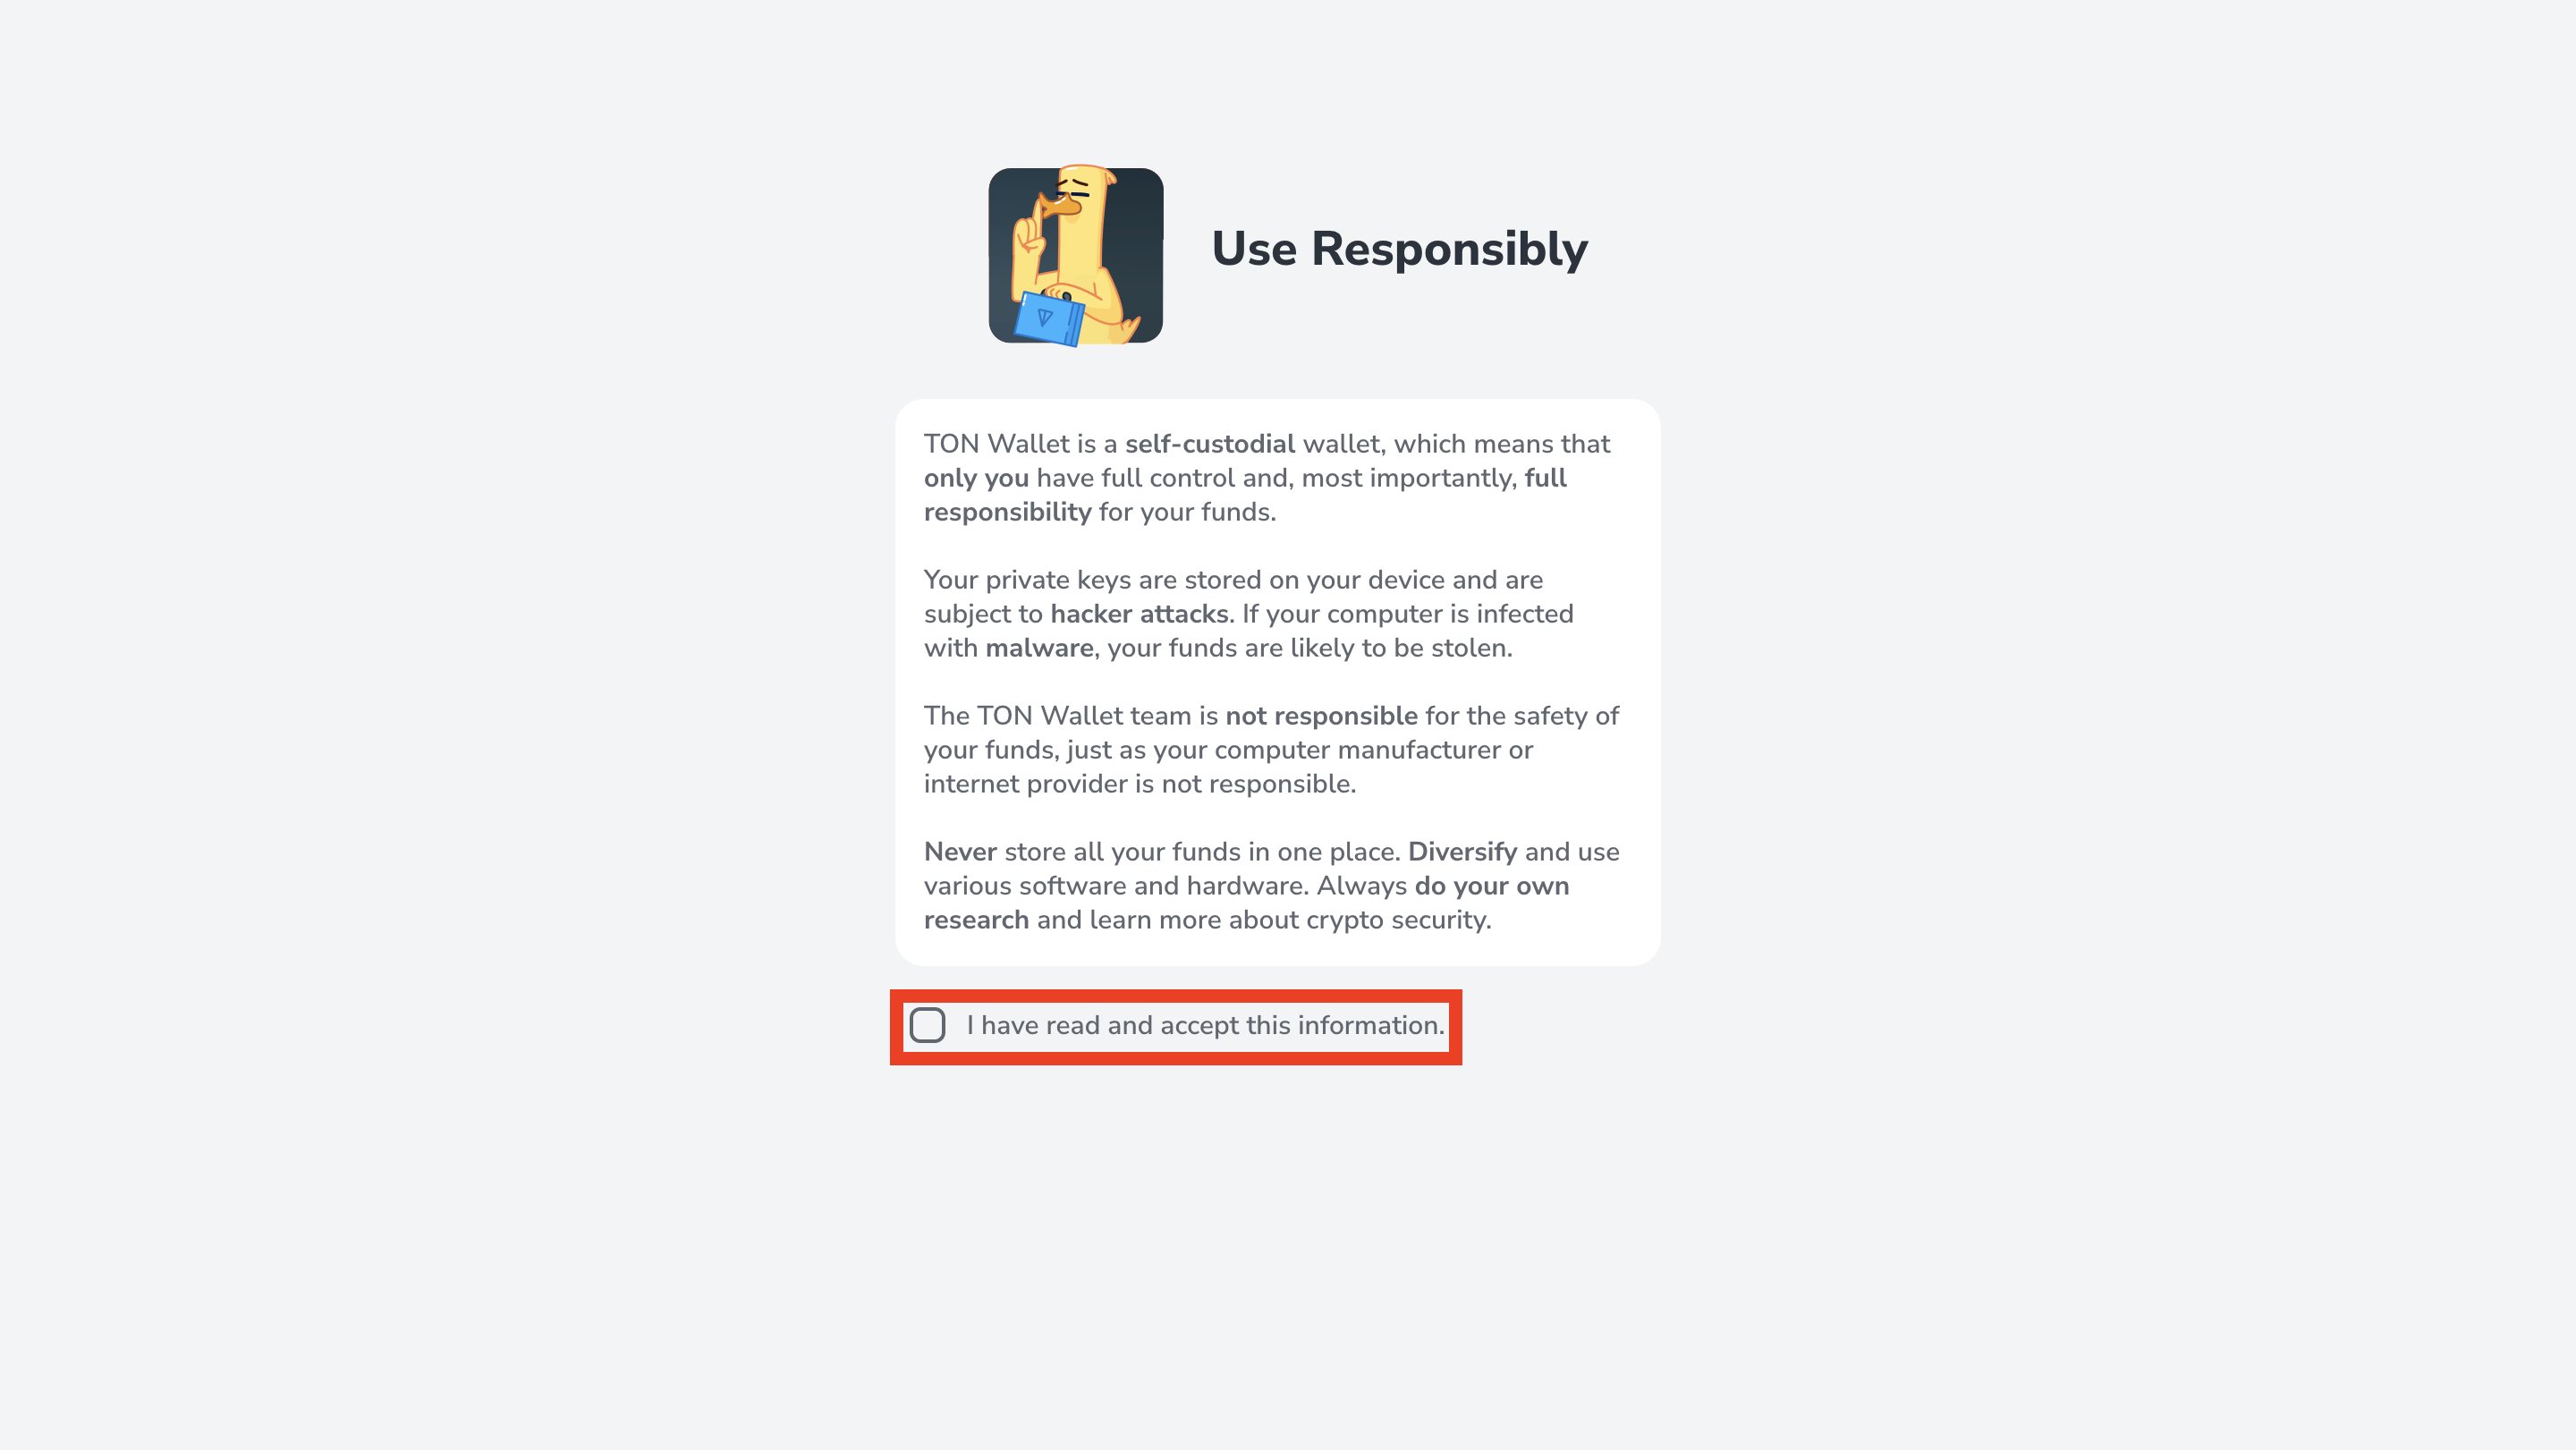
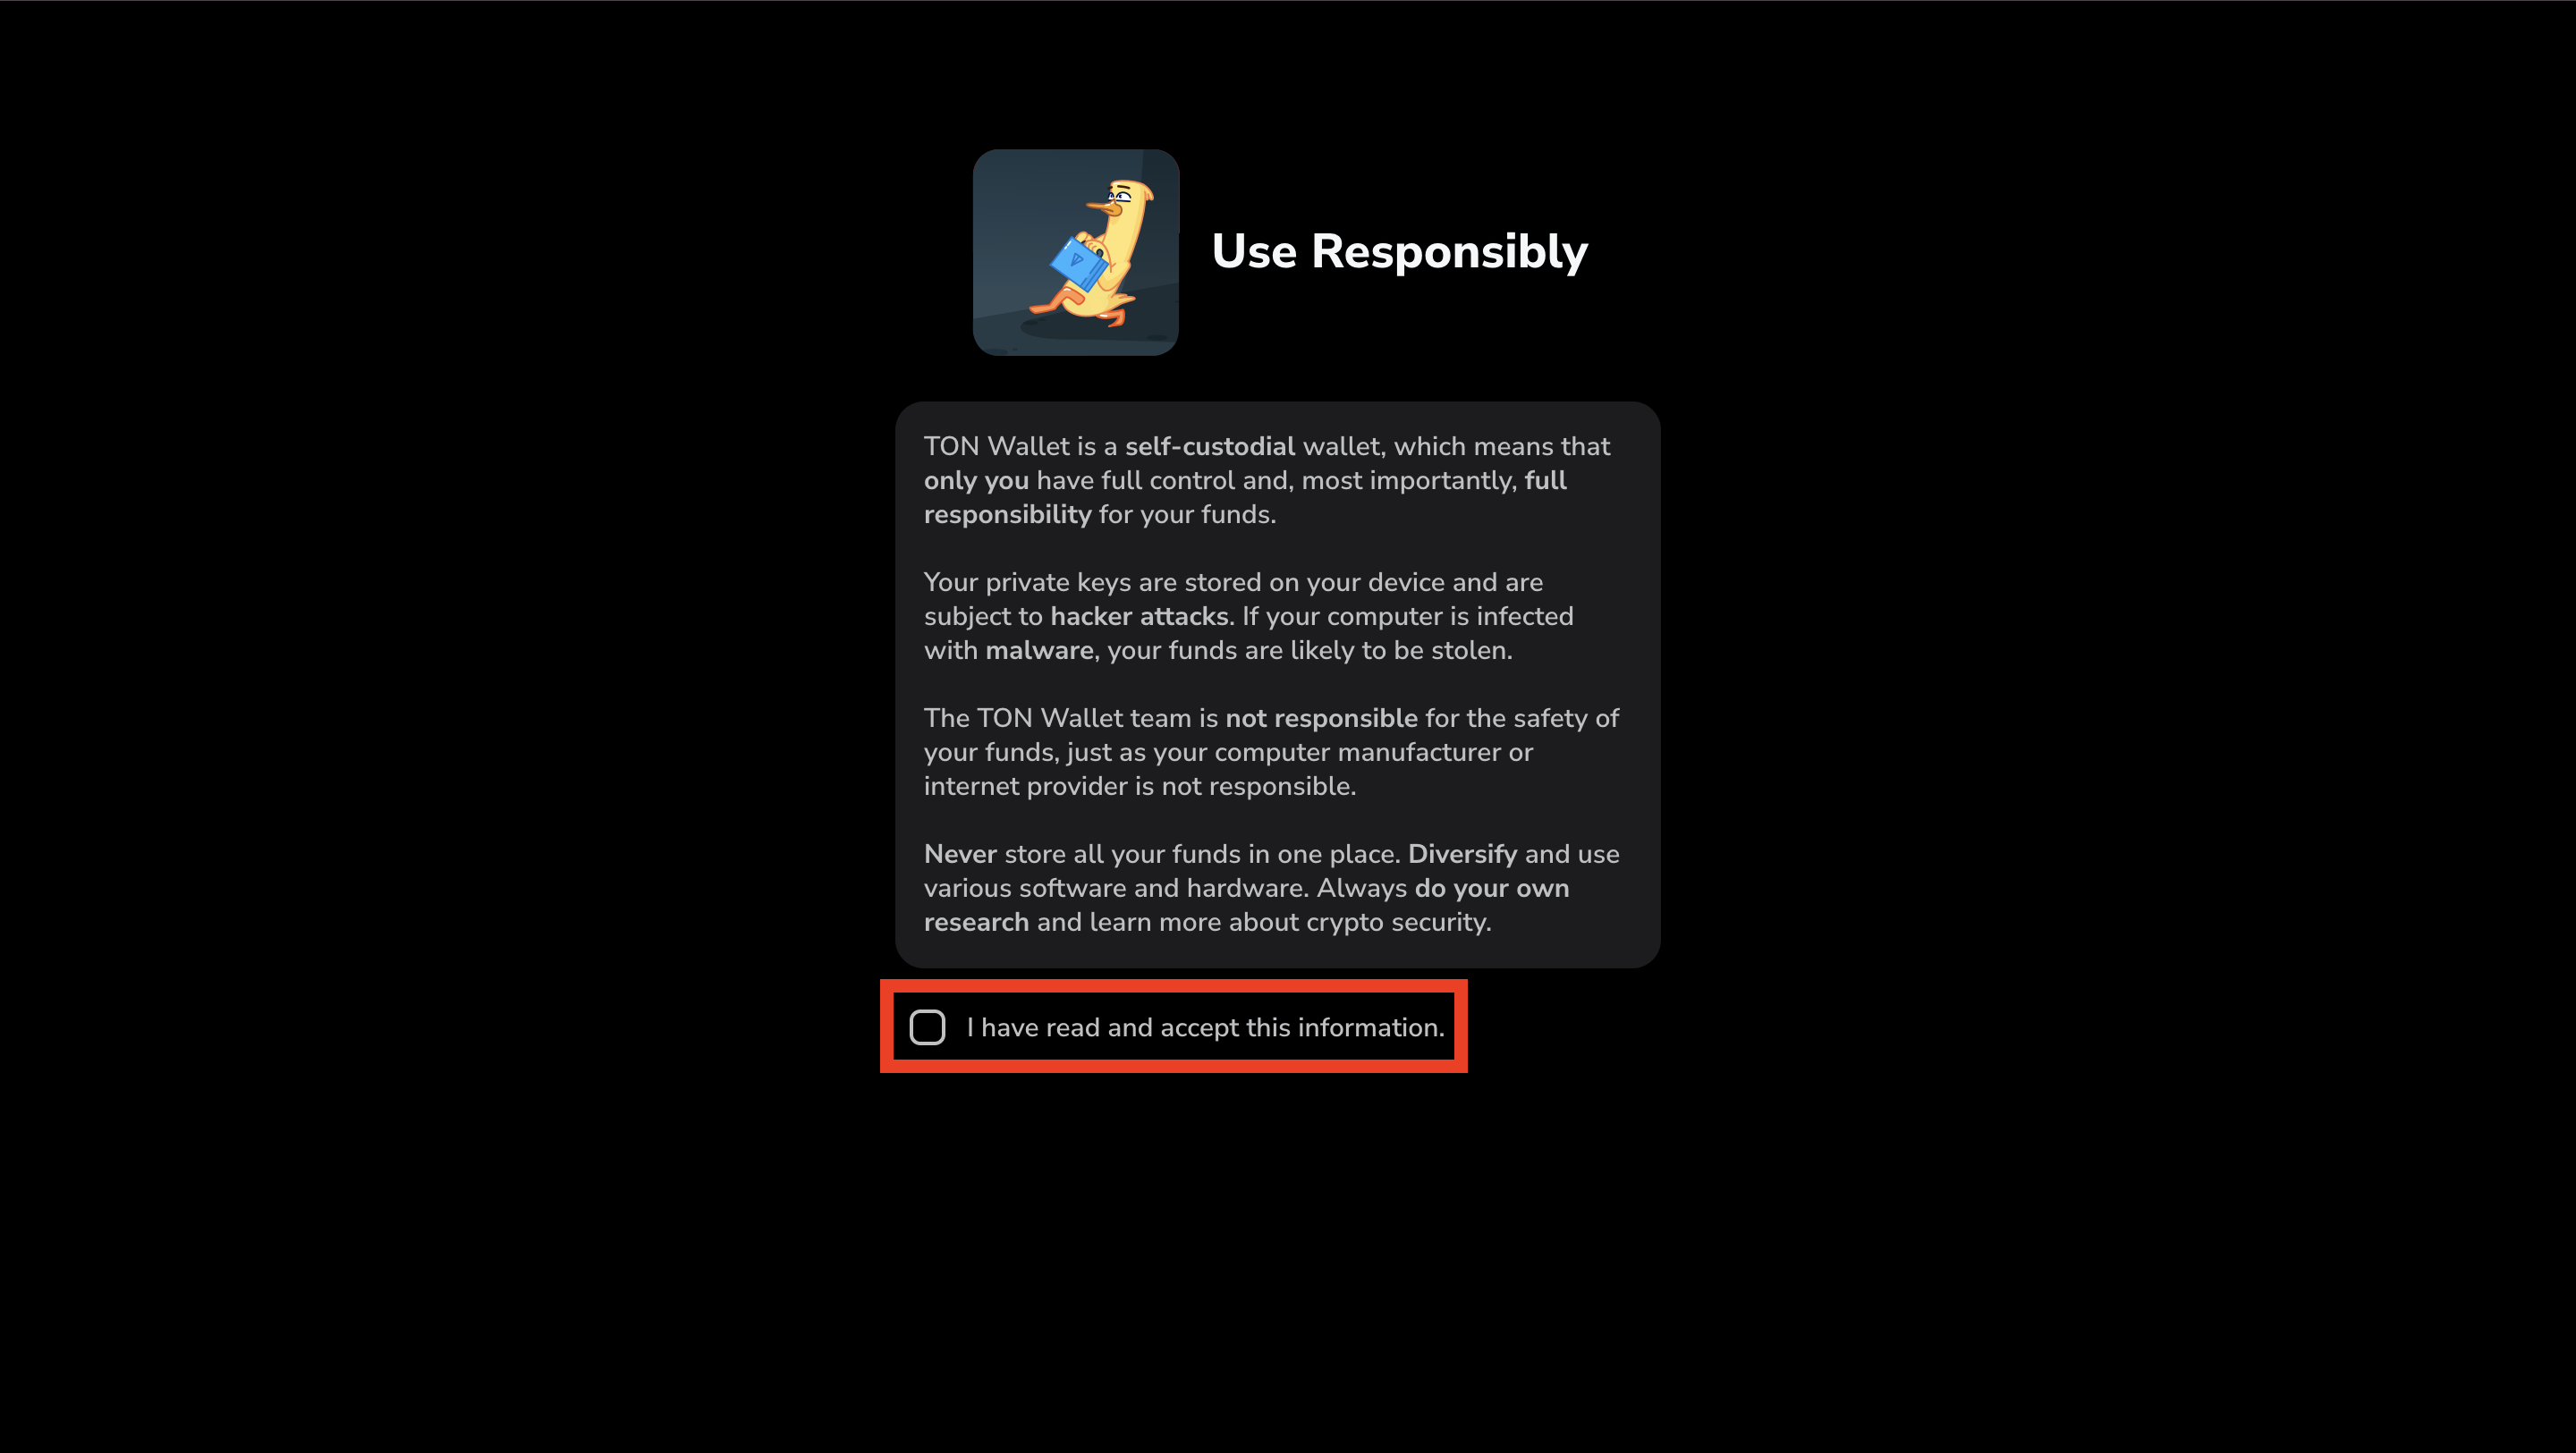
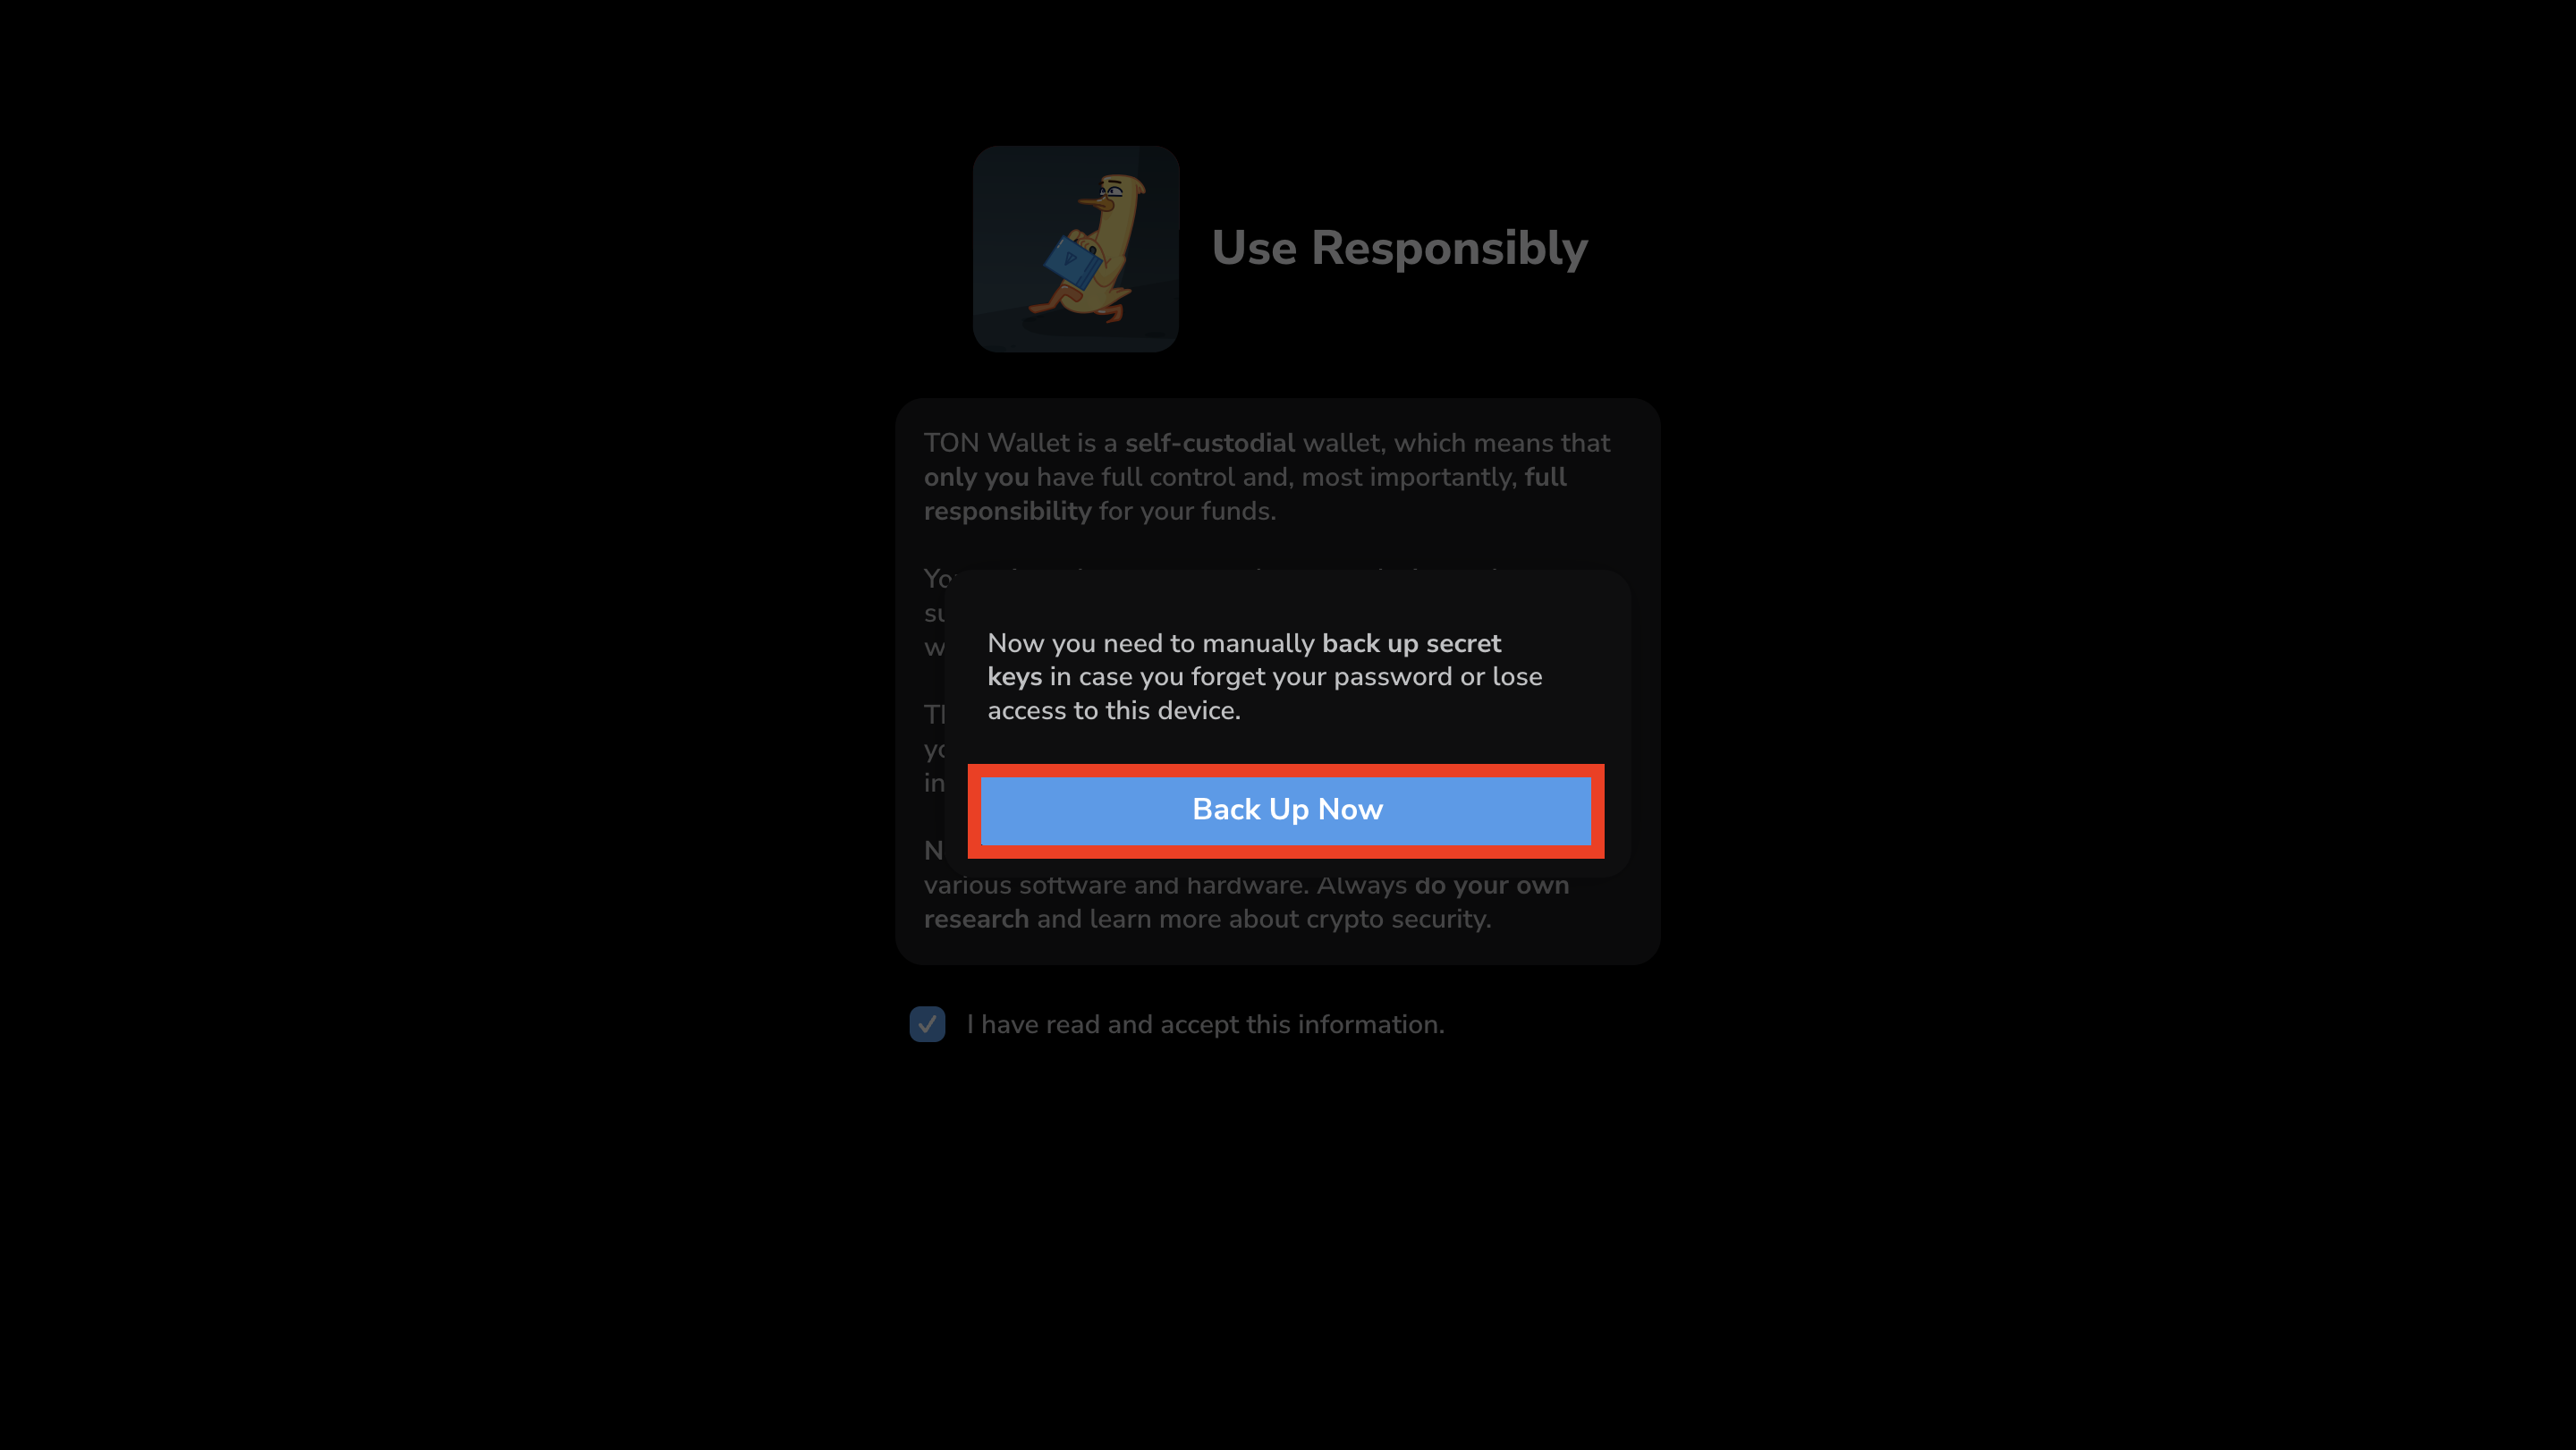
- Read the “Use Responsibly” notice and check the box to confirm that you have read and accepted this information.
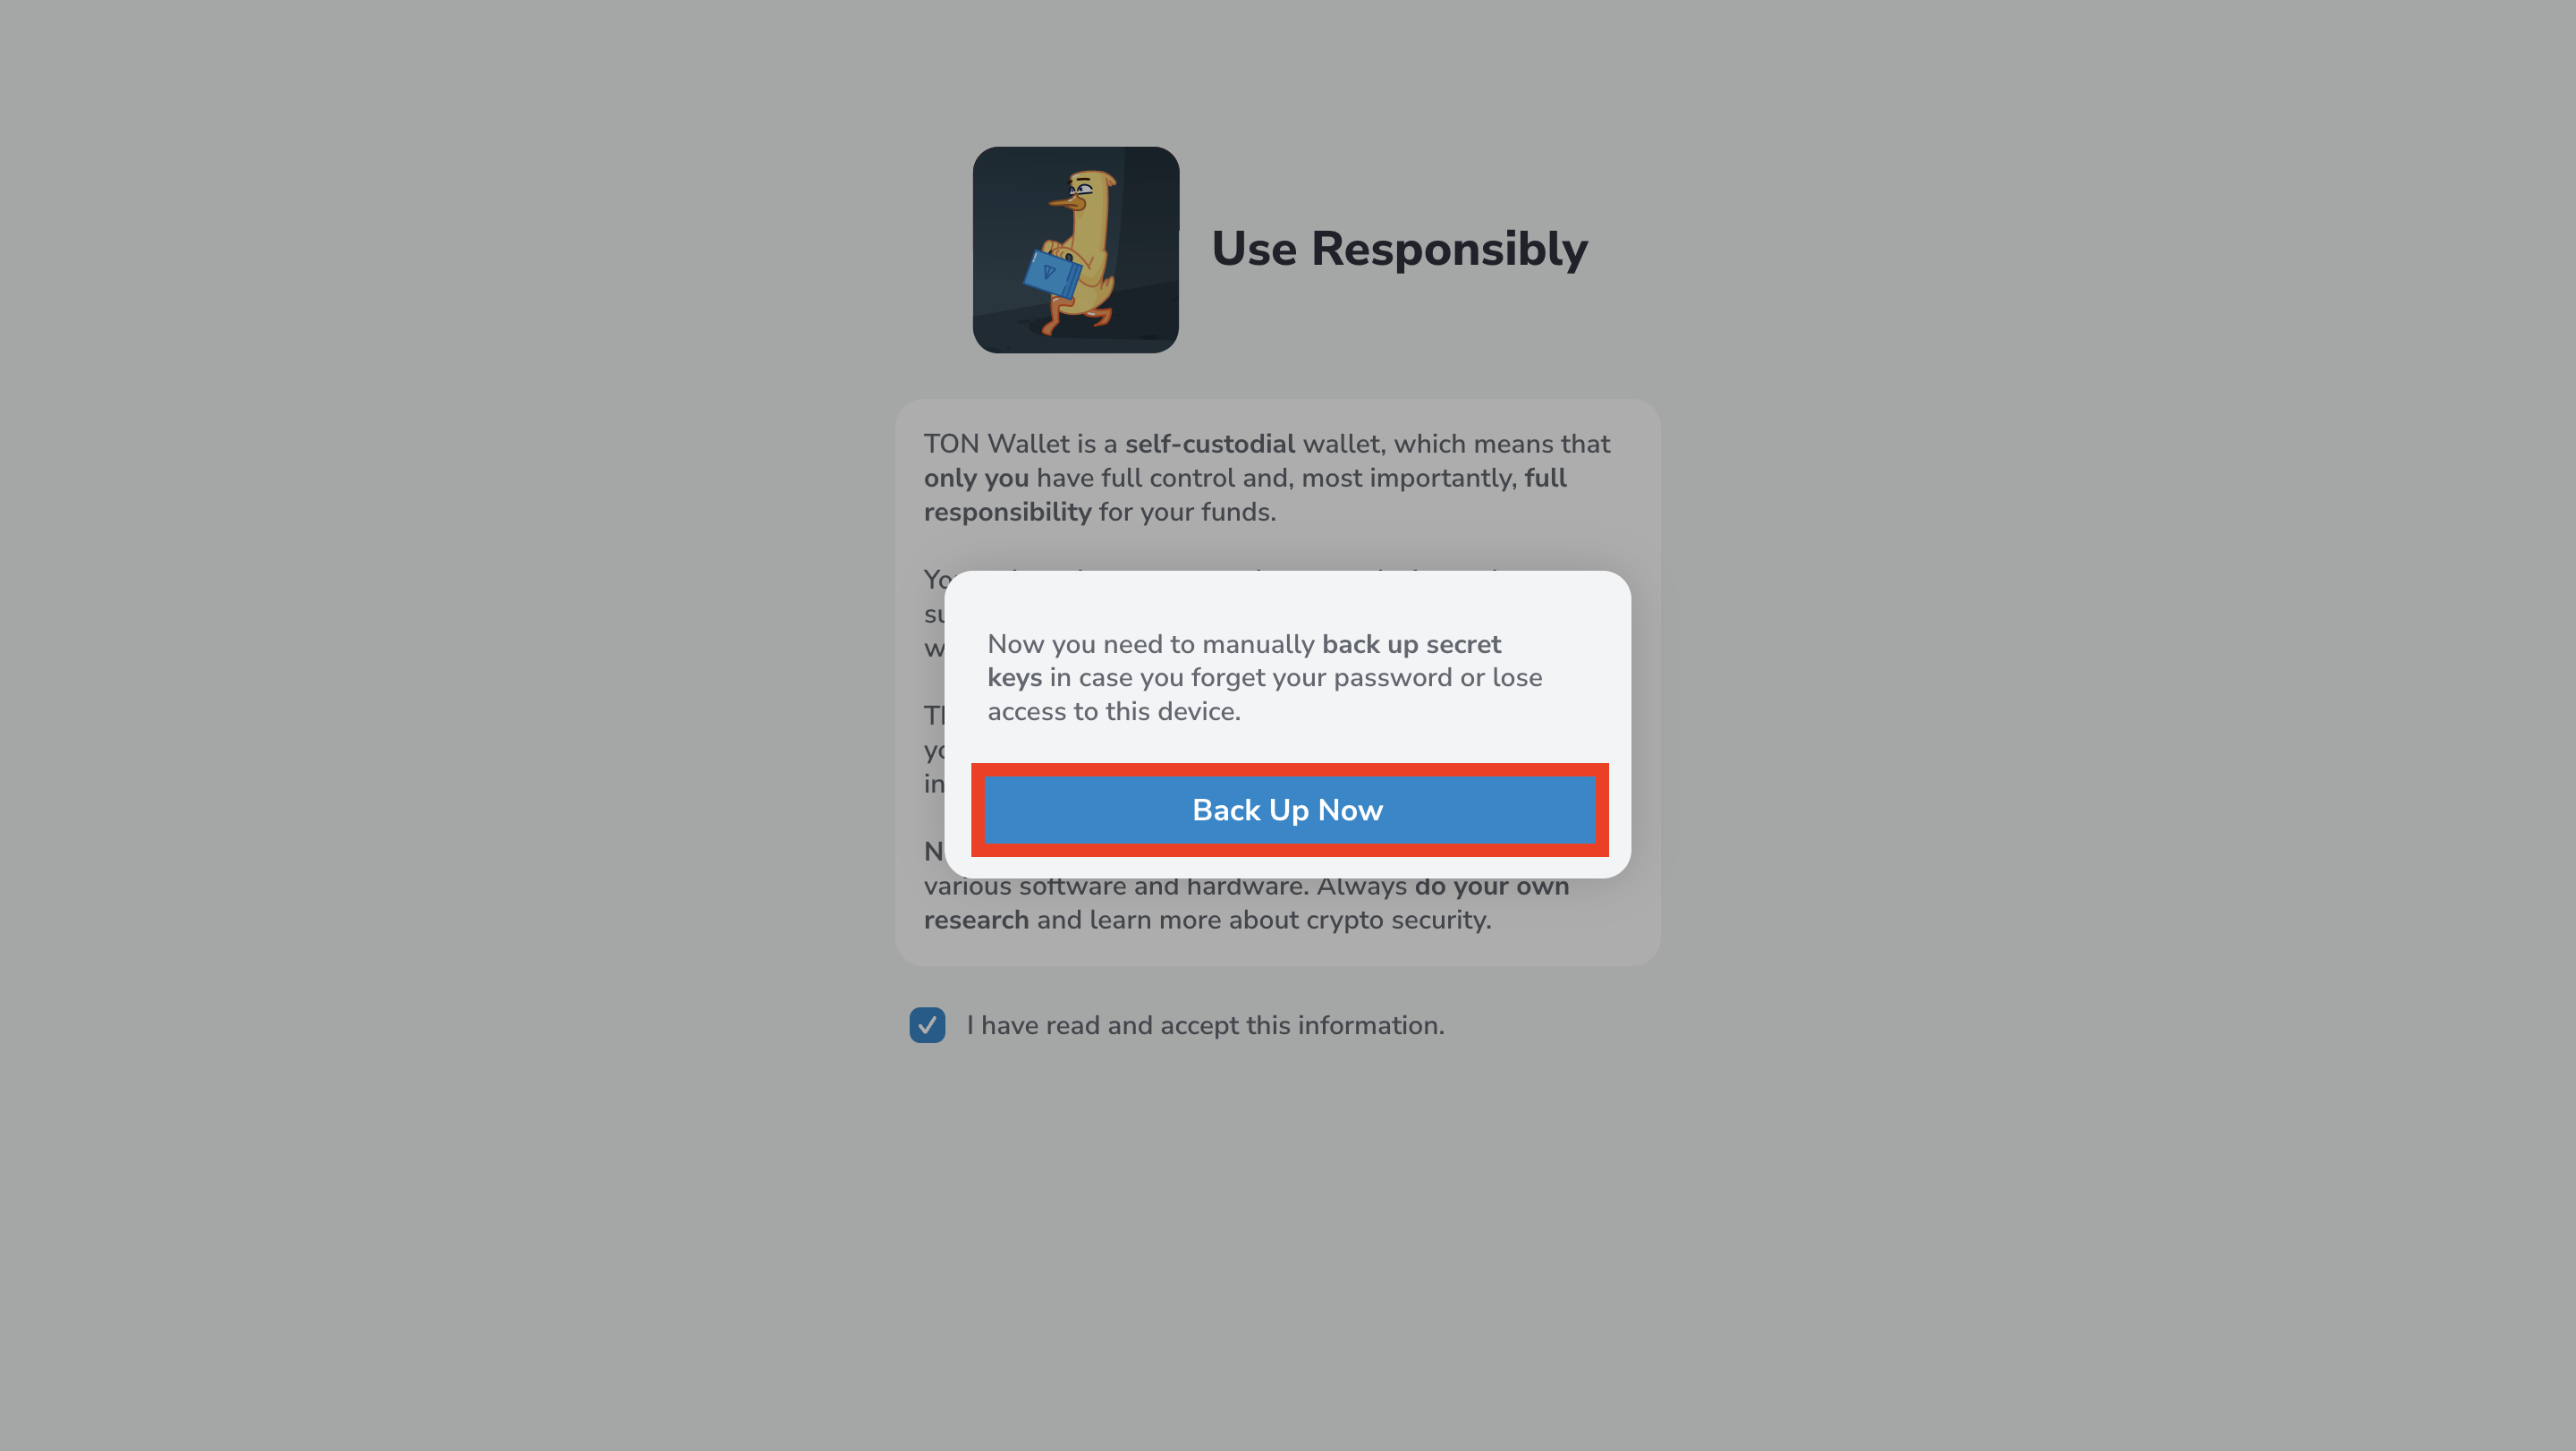
- After confirming, you’ll be prompted to manually back up your secret key. This key is the only way to recover access to your wallet if you lose your password or device. Click “Back Up Now” to continue.
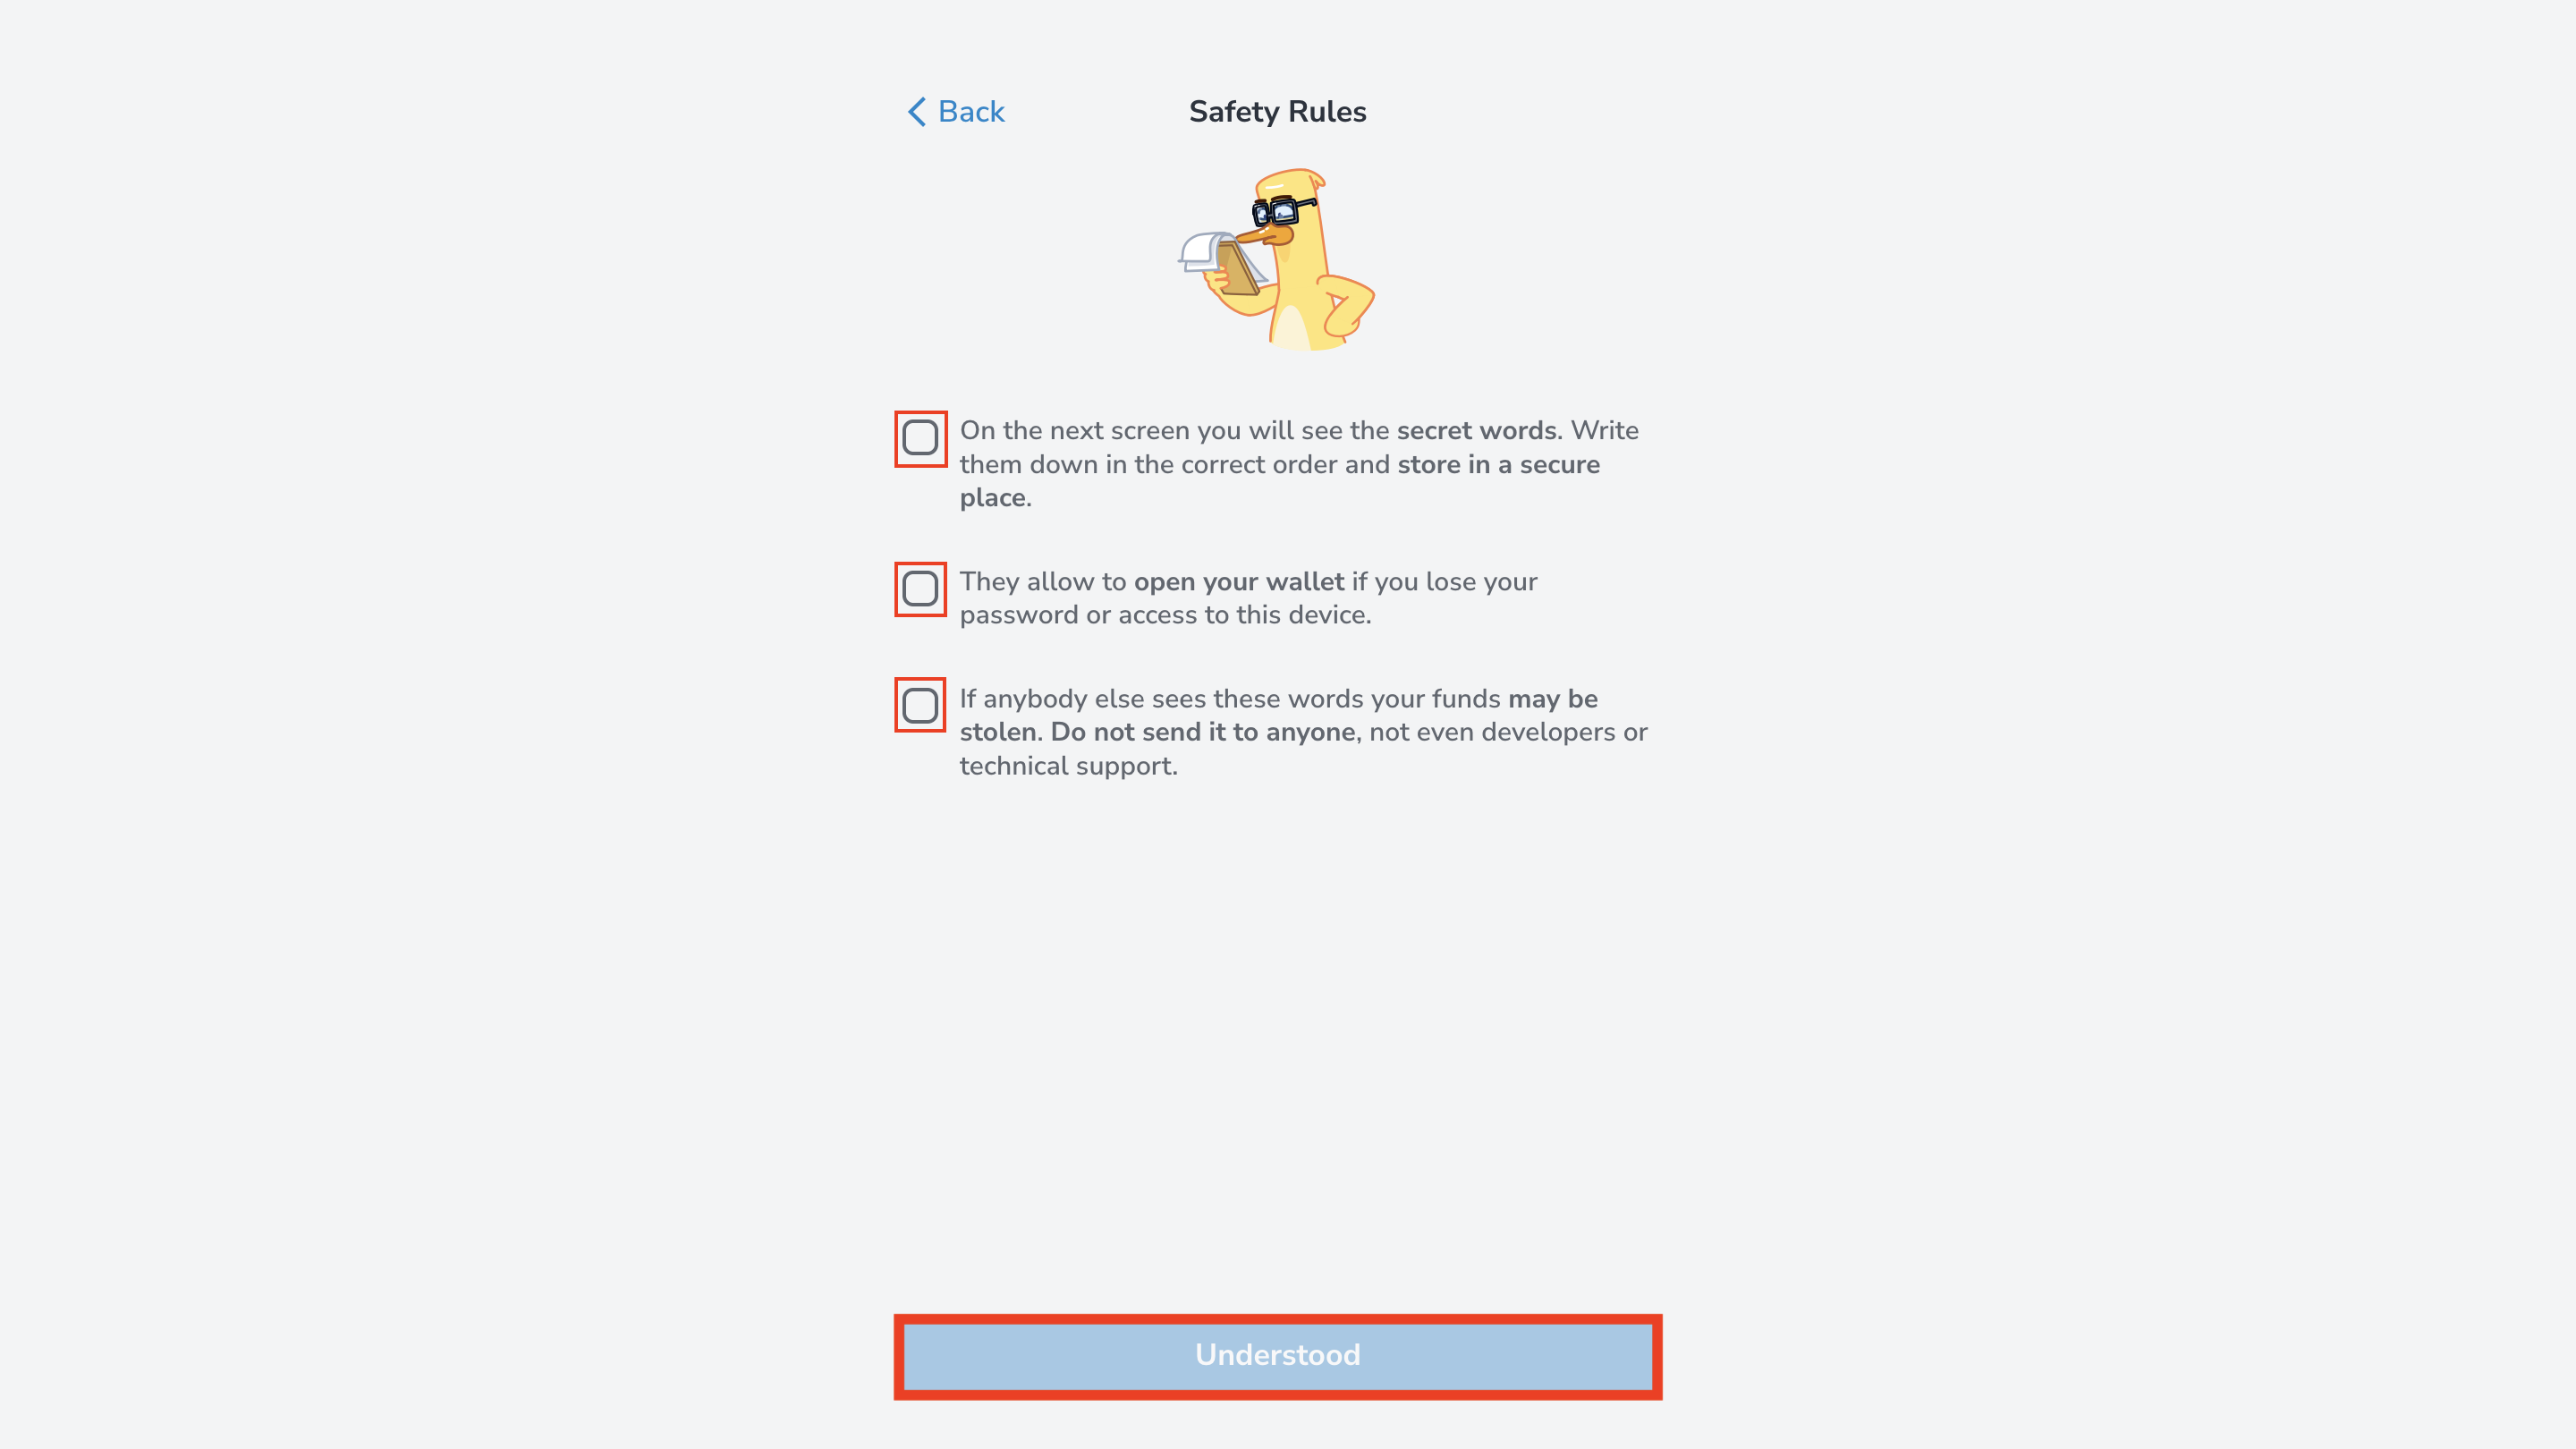
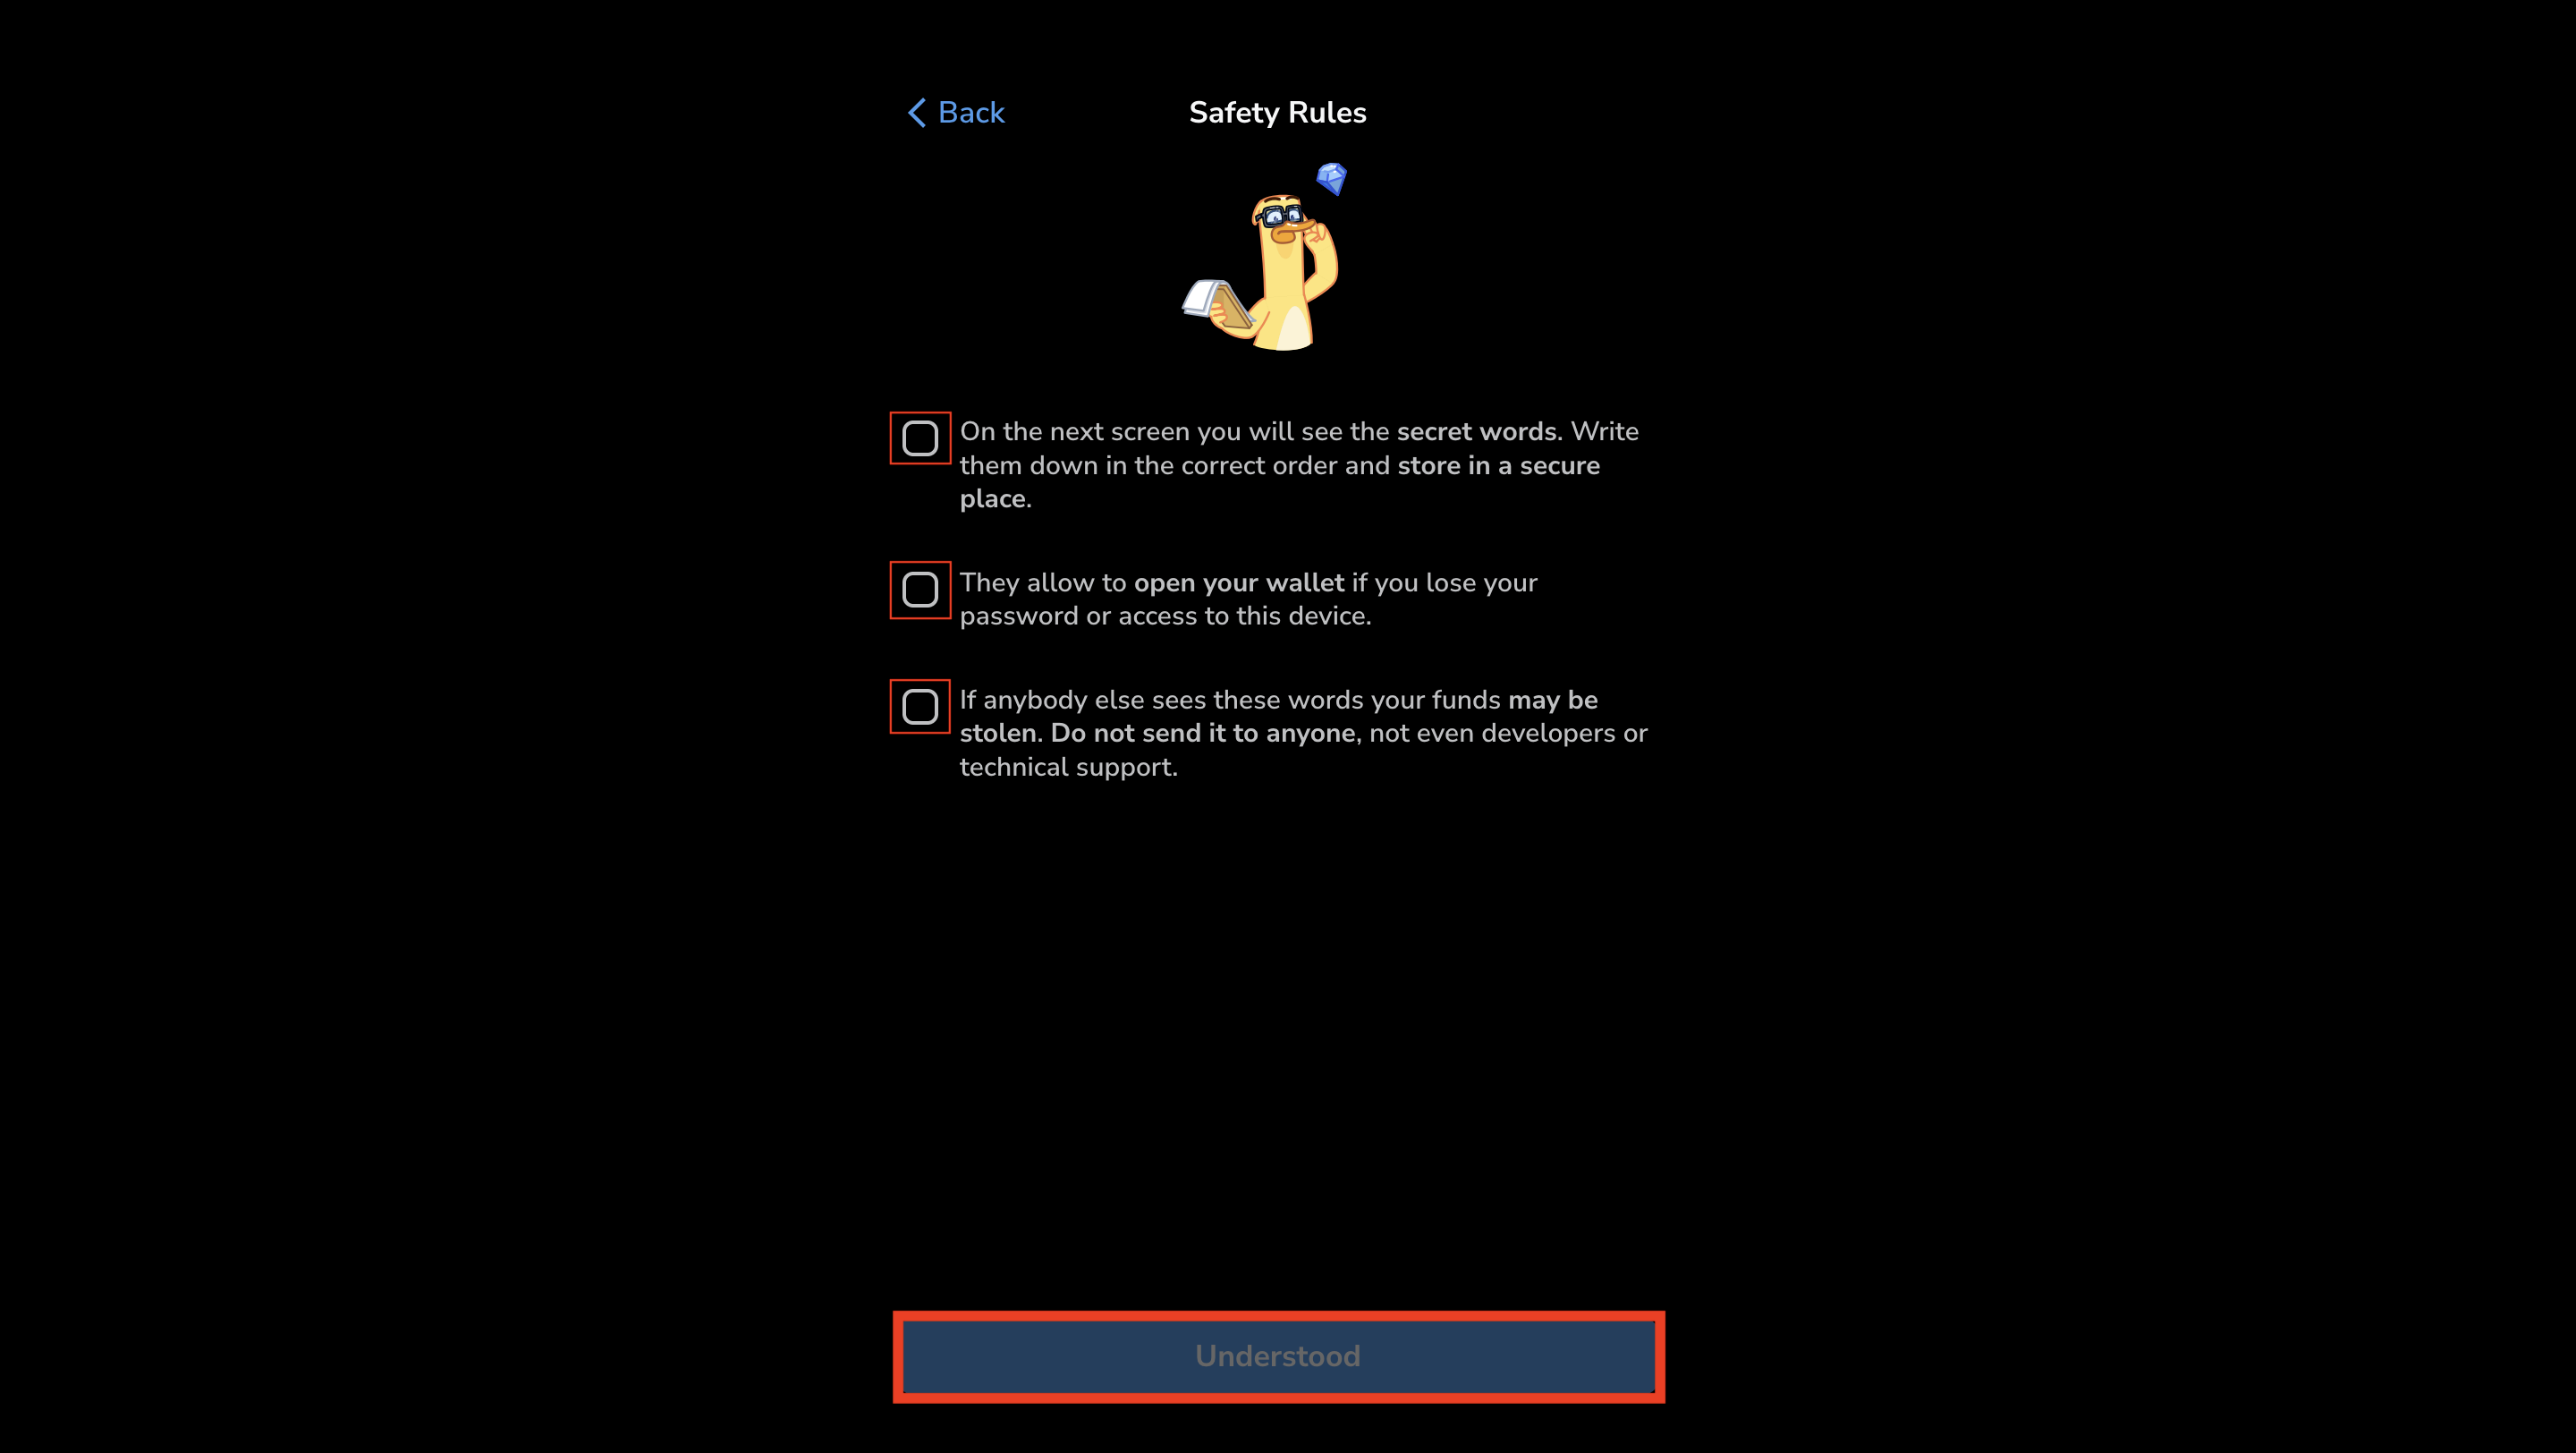
- Read the “Safety Rules” carefully, check all the boxes to confirm that you understand them. Then click “Understood” to continue.
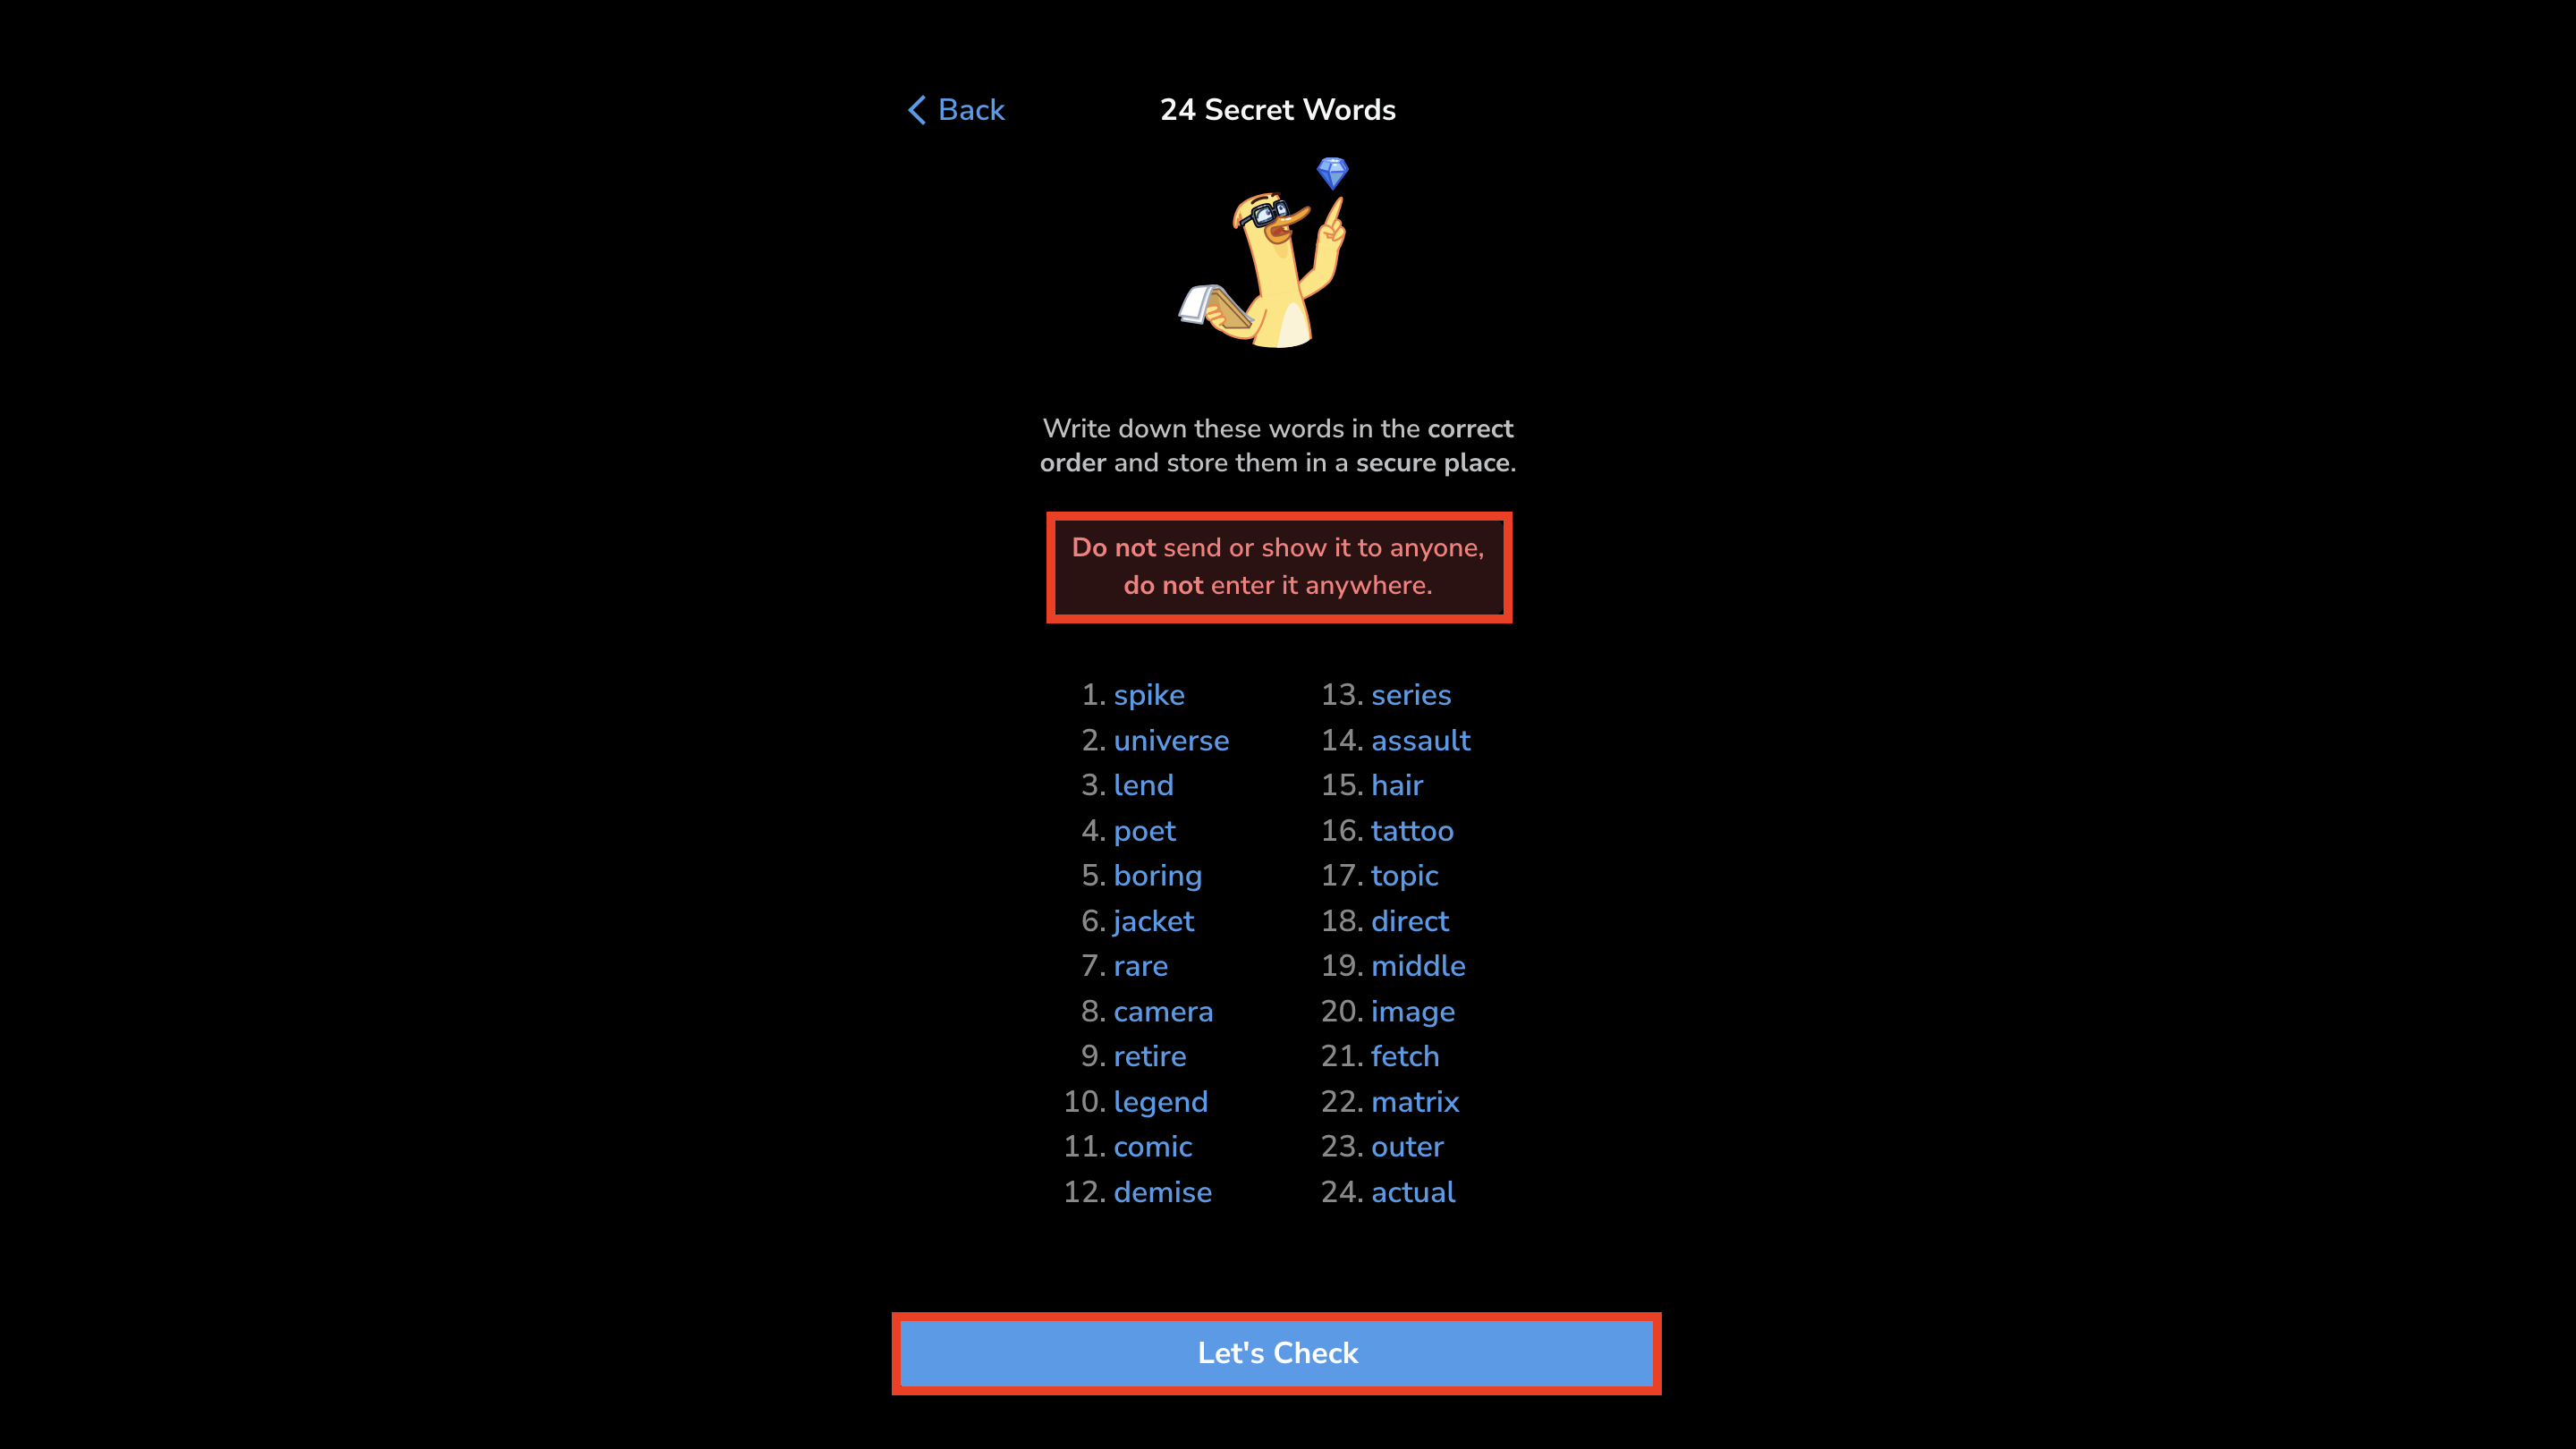
- Write down your 24 recovery words and store them in a safe place. Never share them with anyone or enter them anywhere else.
Secrets at riskAnyone who sees your recovery words can take control of your wallet and move funds.
If you suspect exposure, create a new wallet and transfer all funds immediately.
Do not store recovery words digitally; write them down and keep them offline.
Applies to both Testnet and Mainnet.
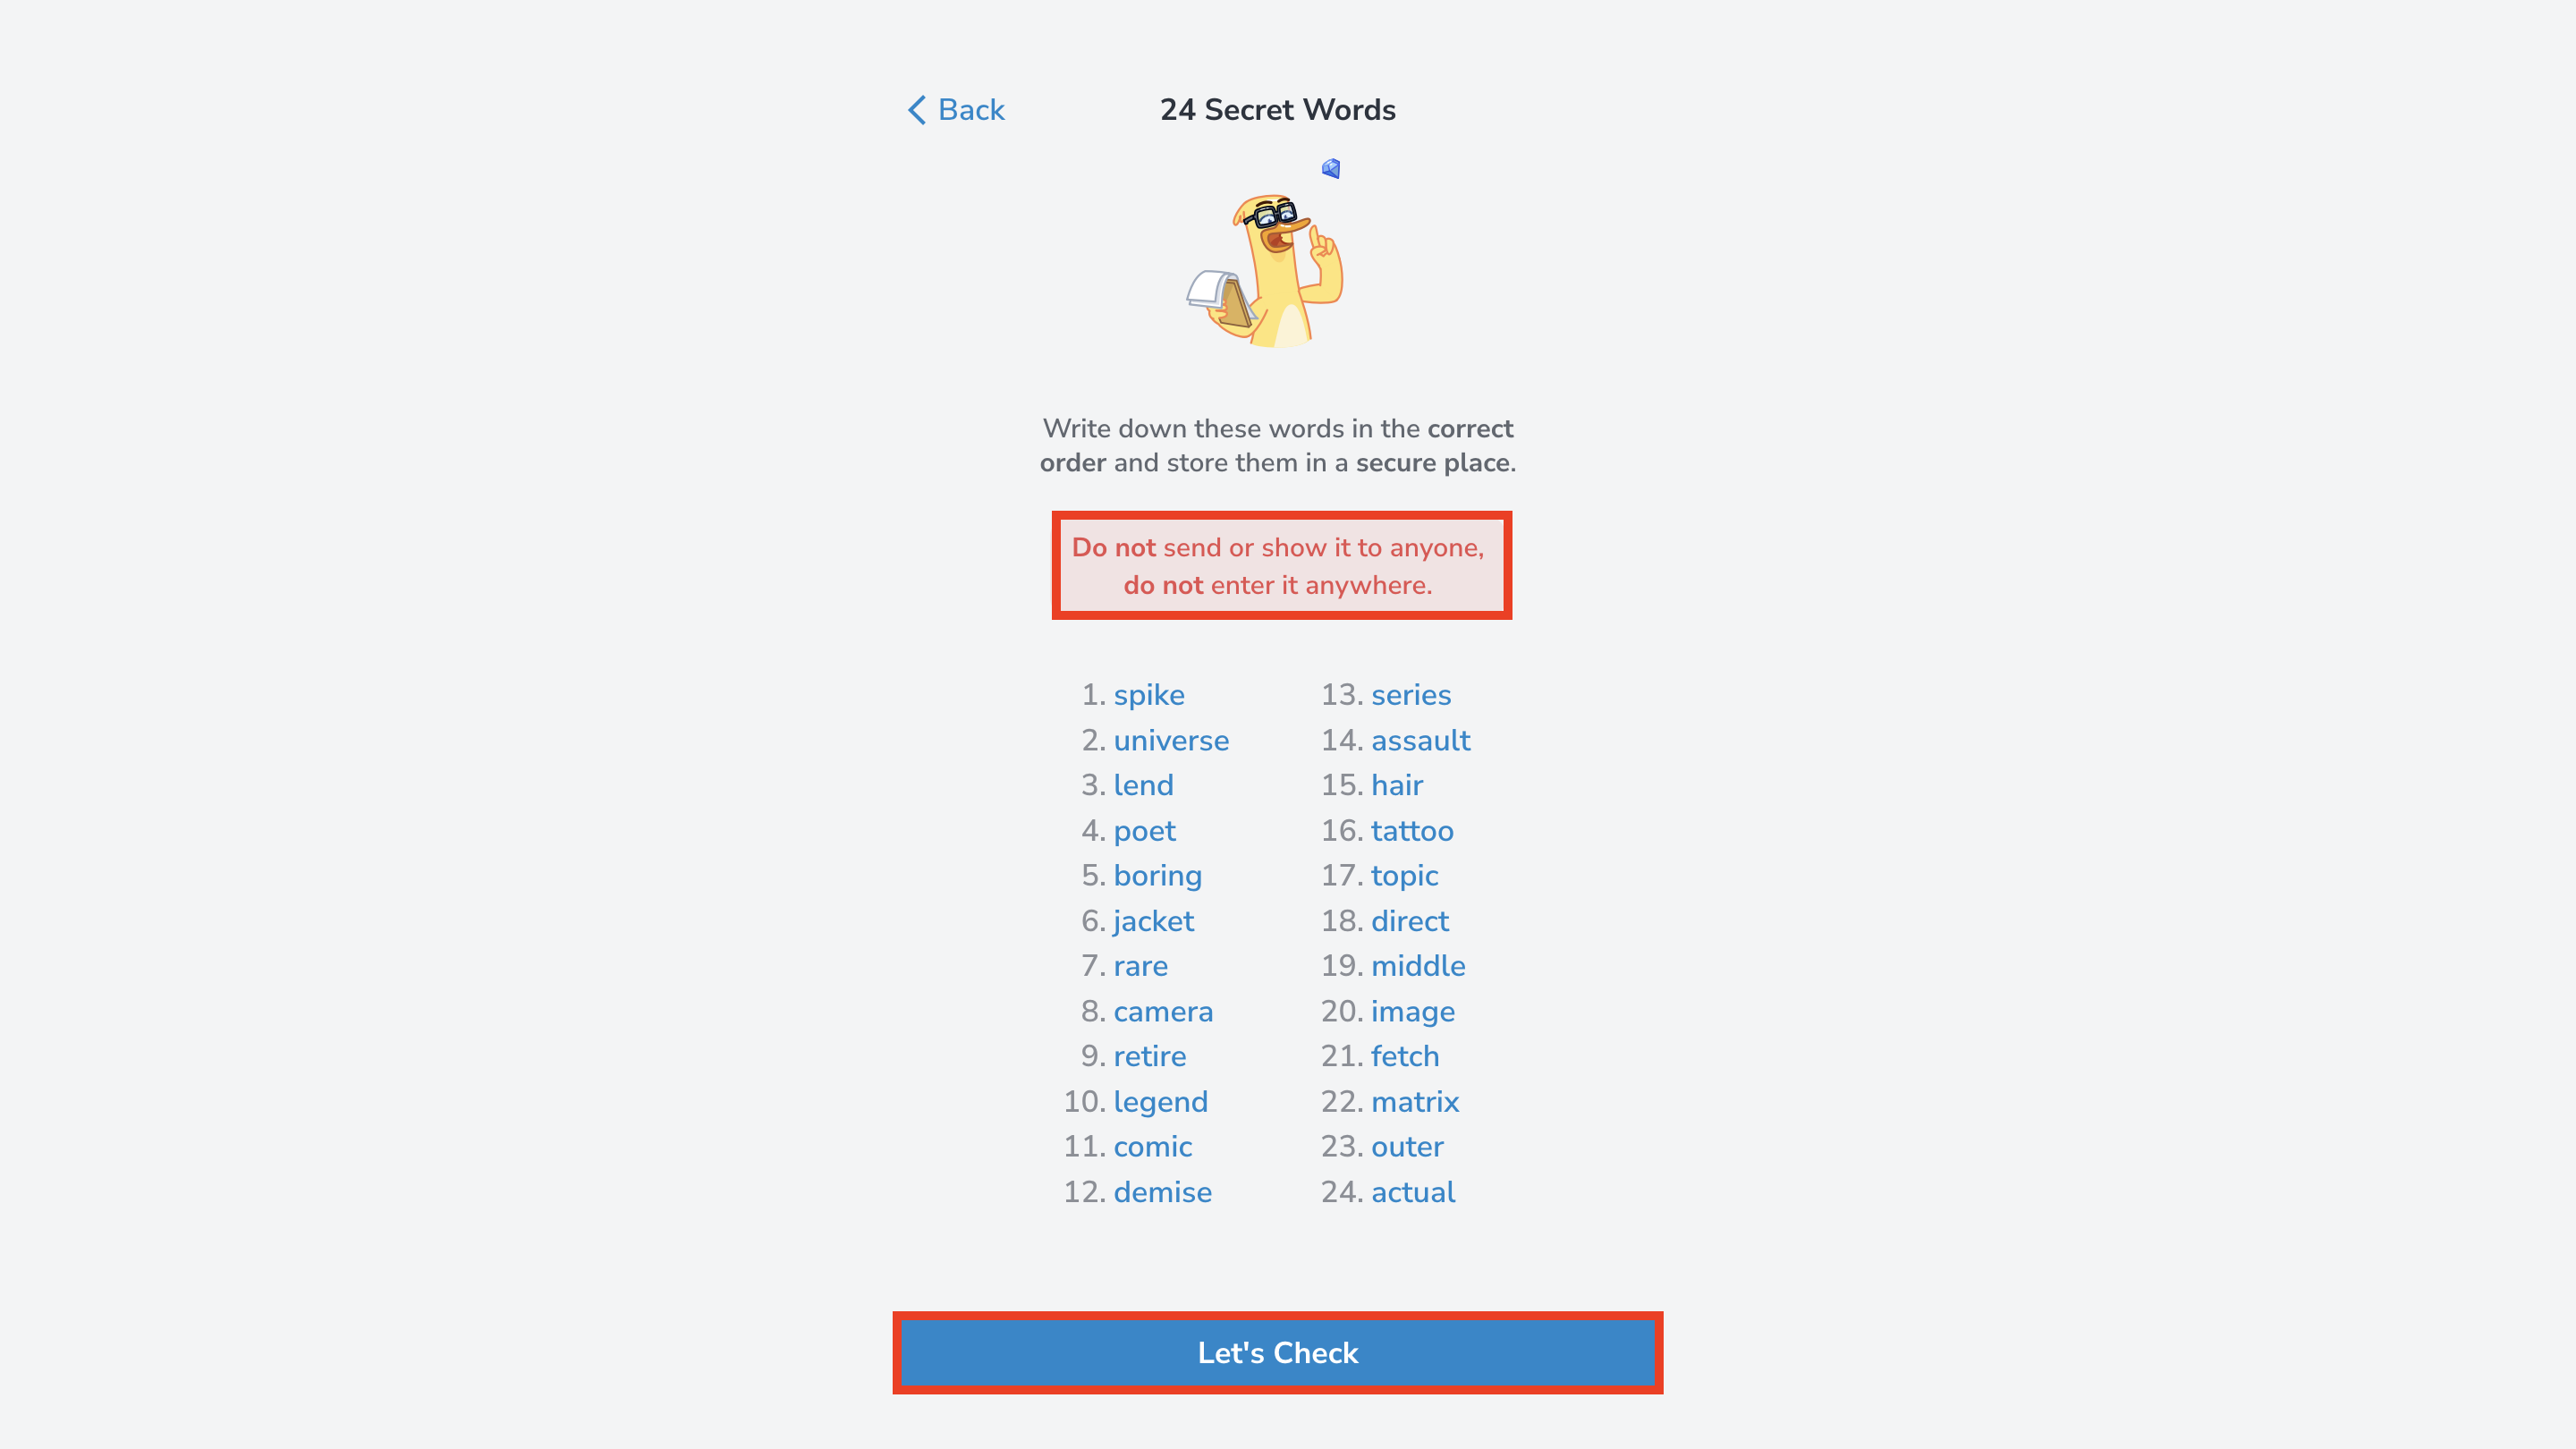
- In the “Let’s Check” step, enter the requested words to make sure your recovery phrase was saved correctly.
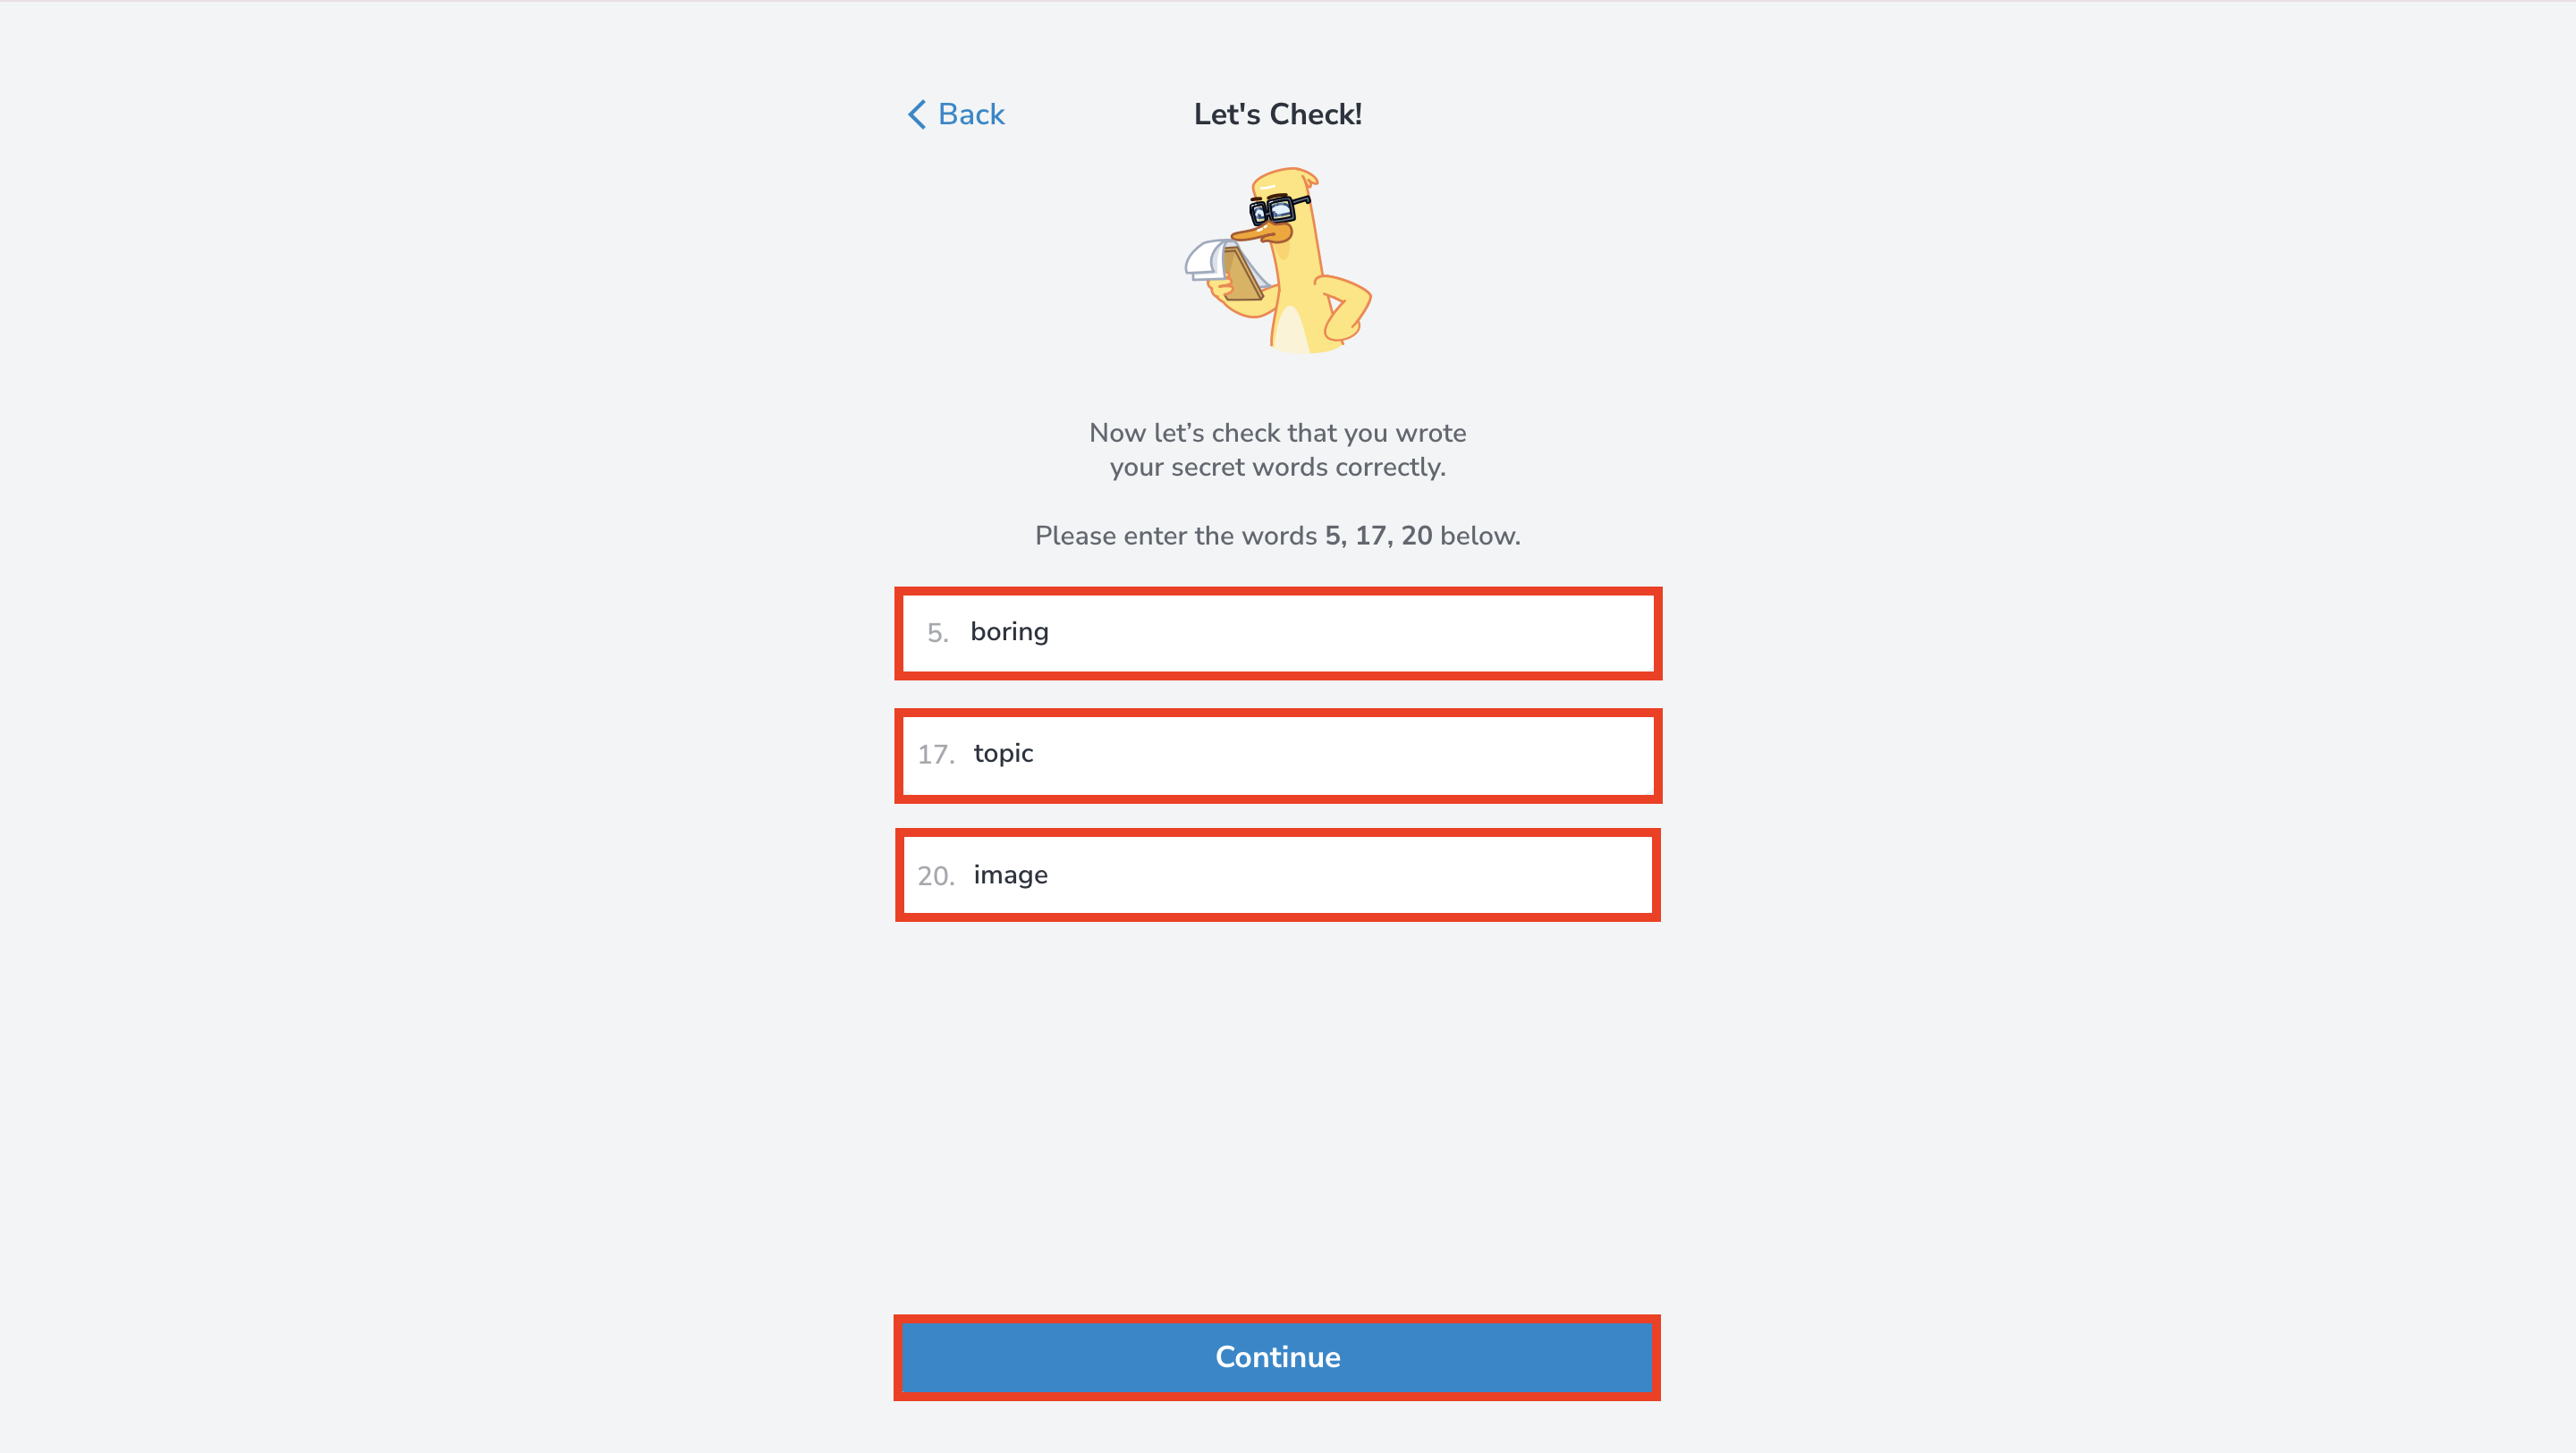
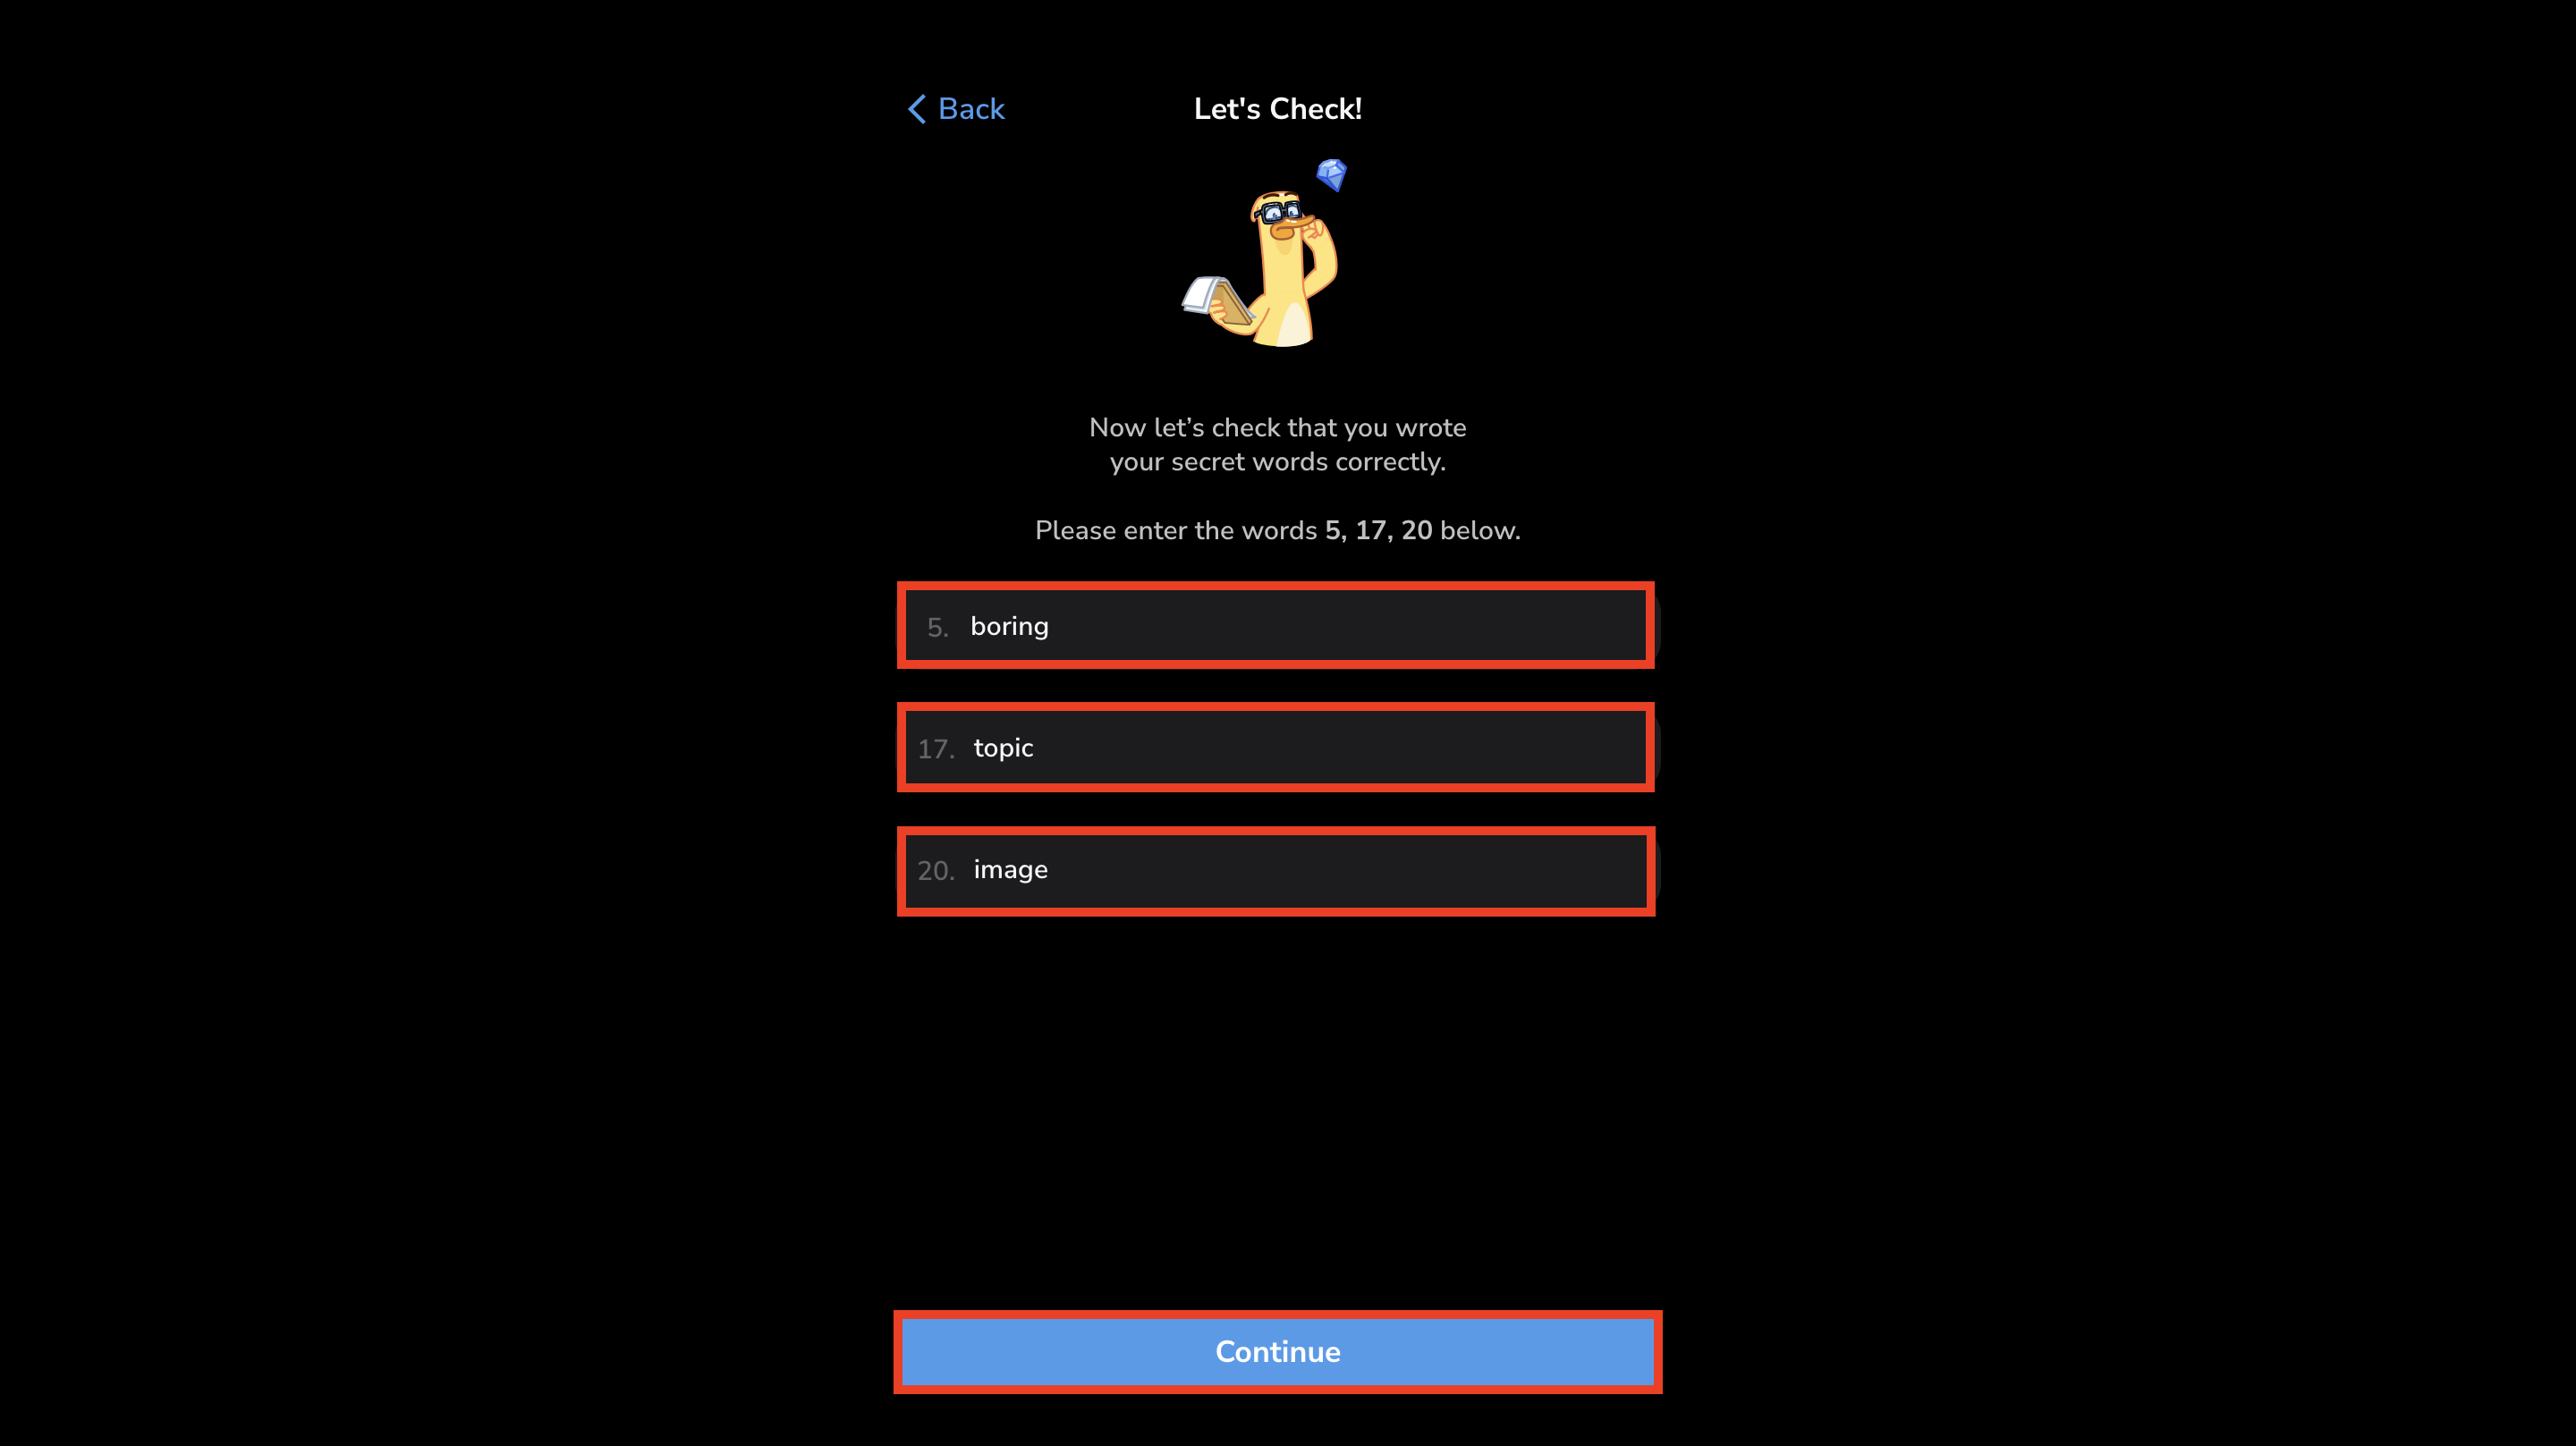 Congratulations! Your wallet is now ready to use.
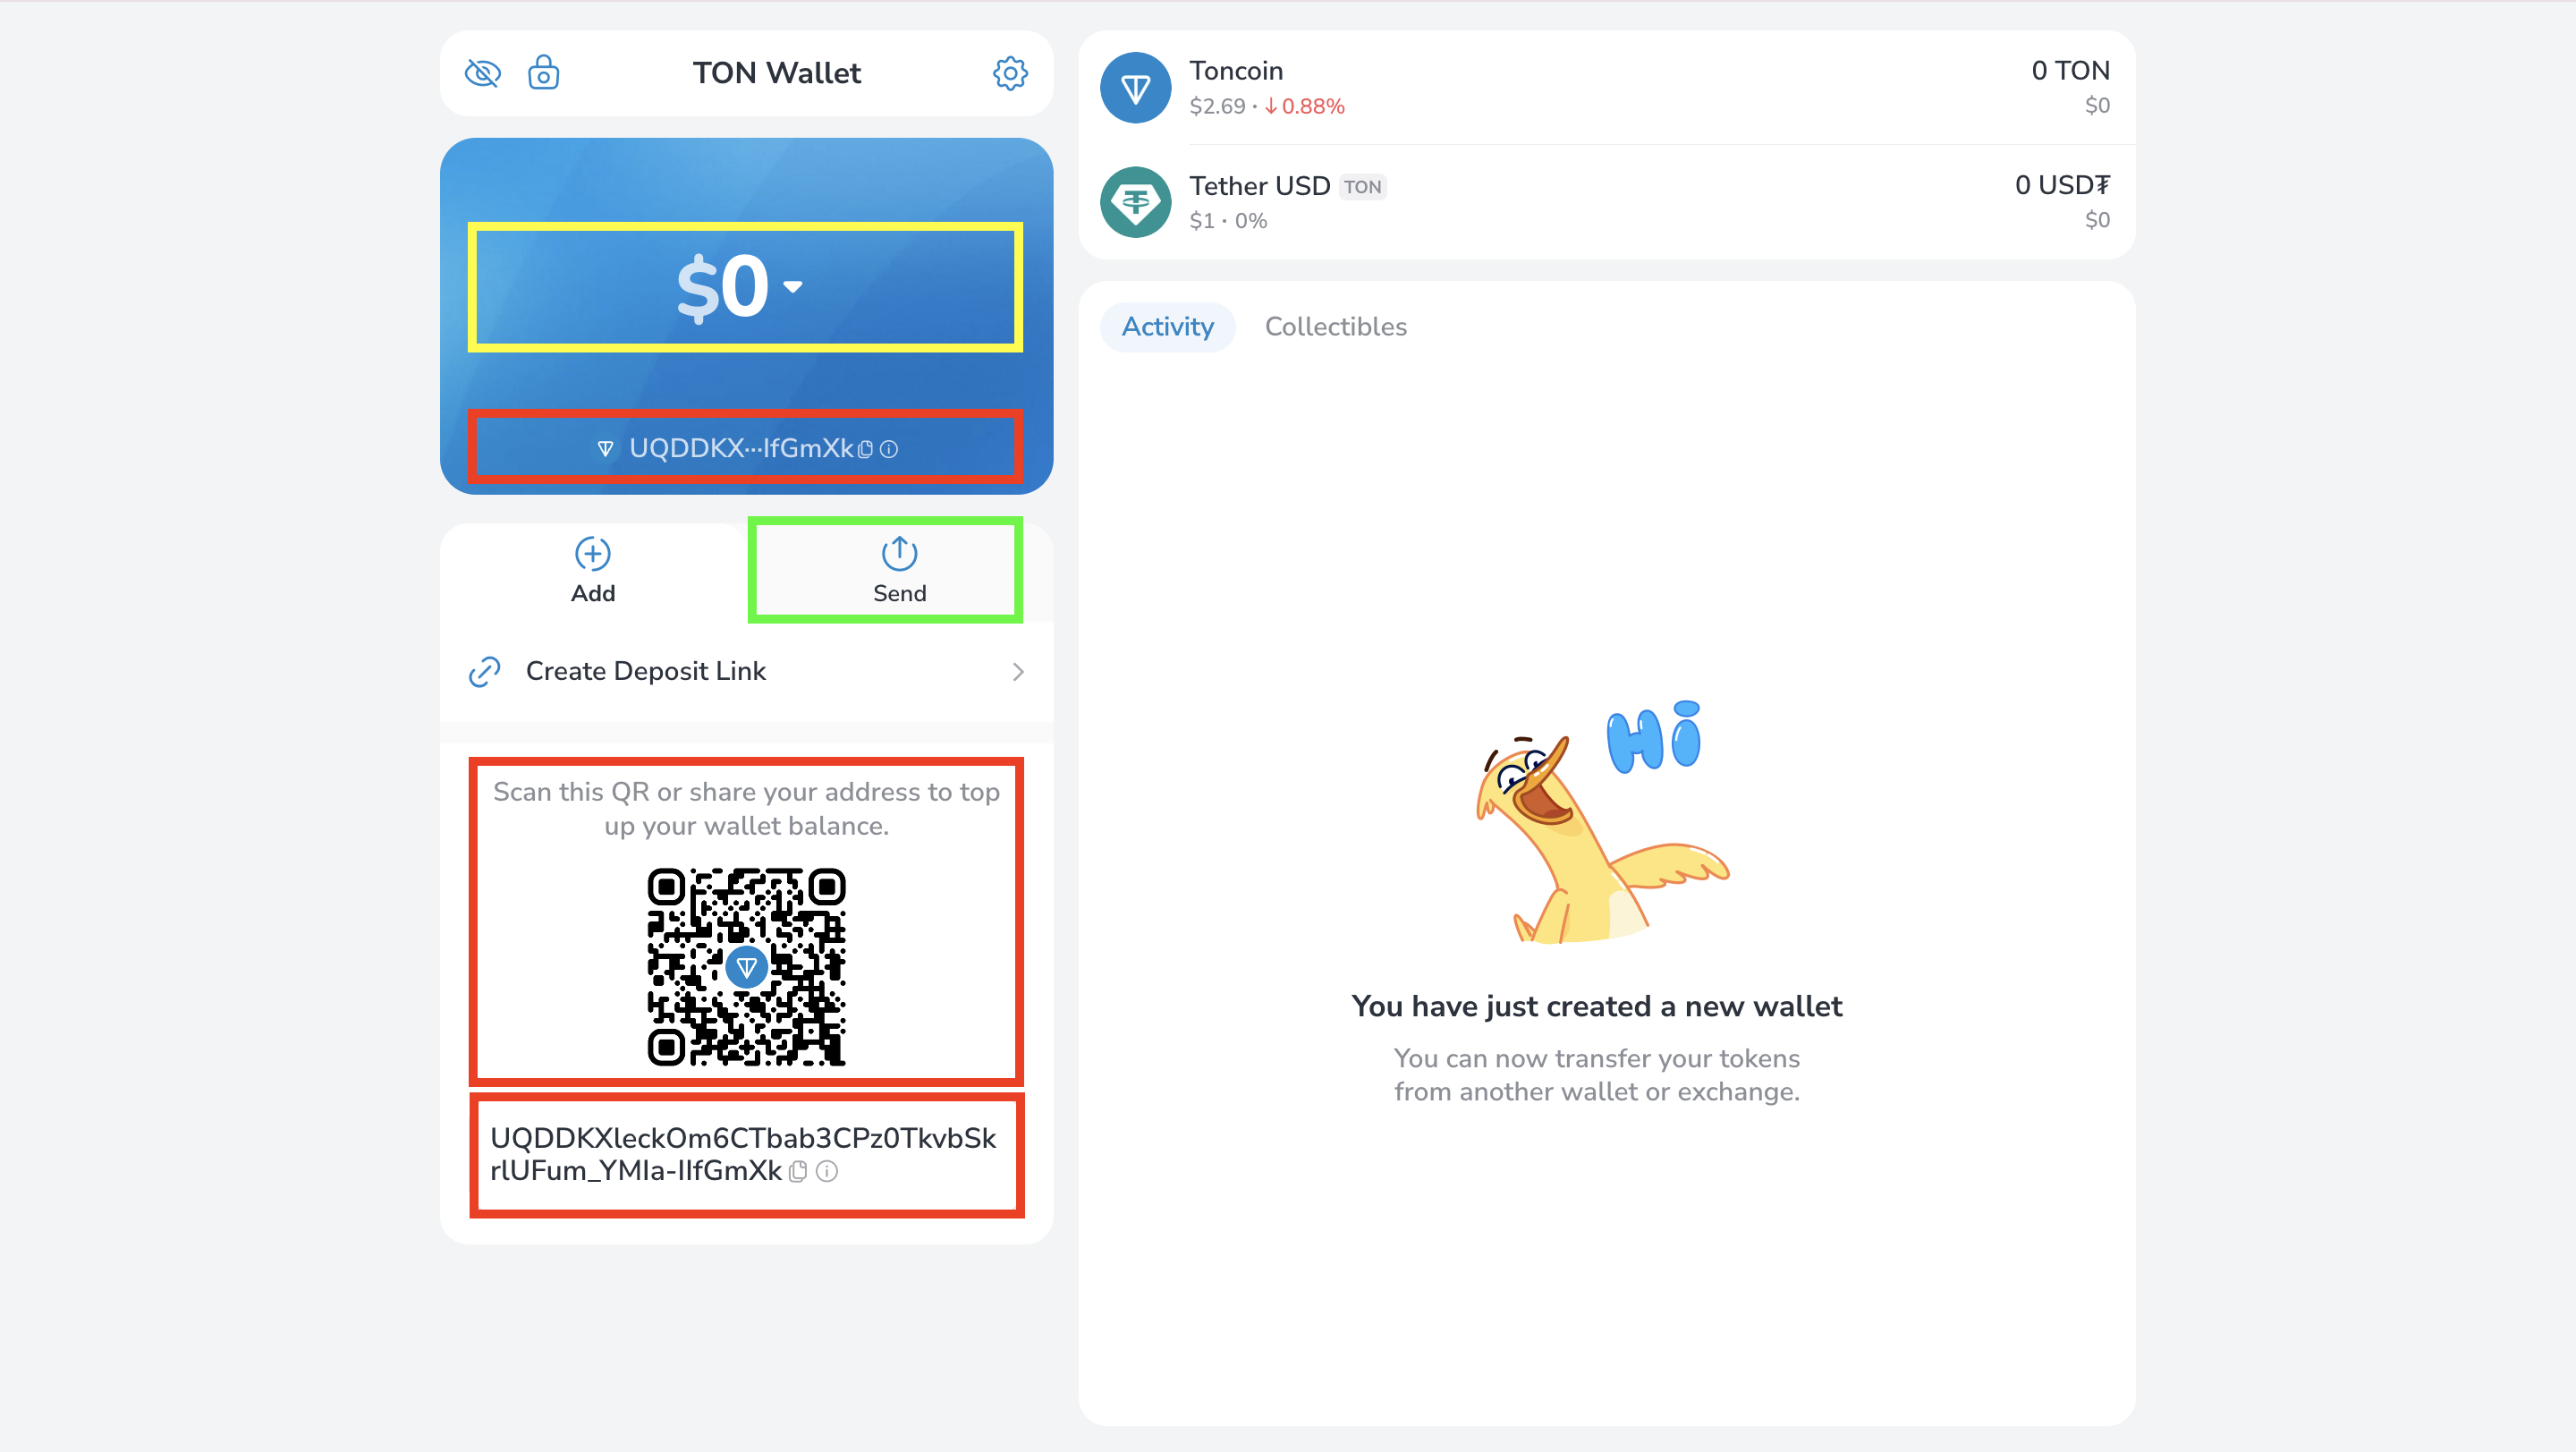
Interface overview
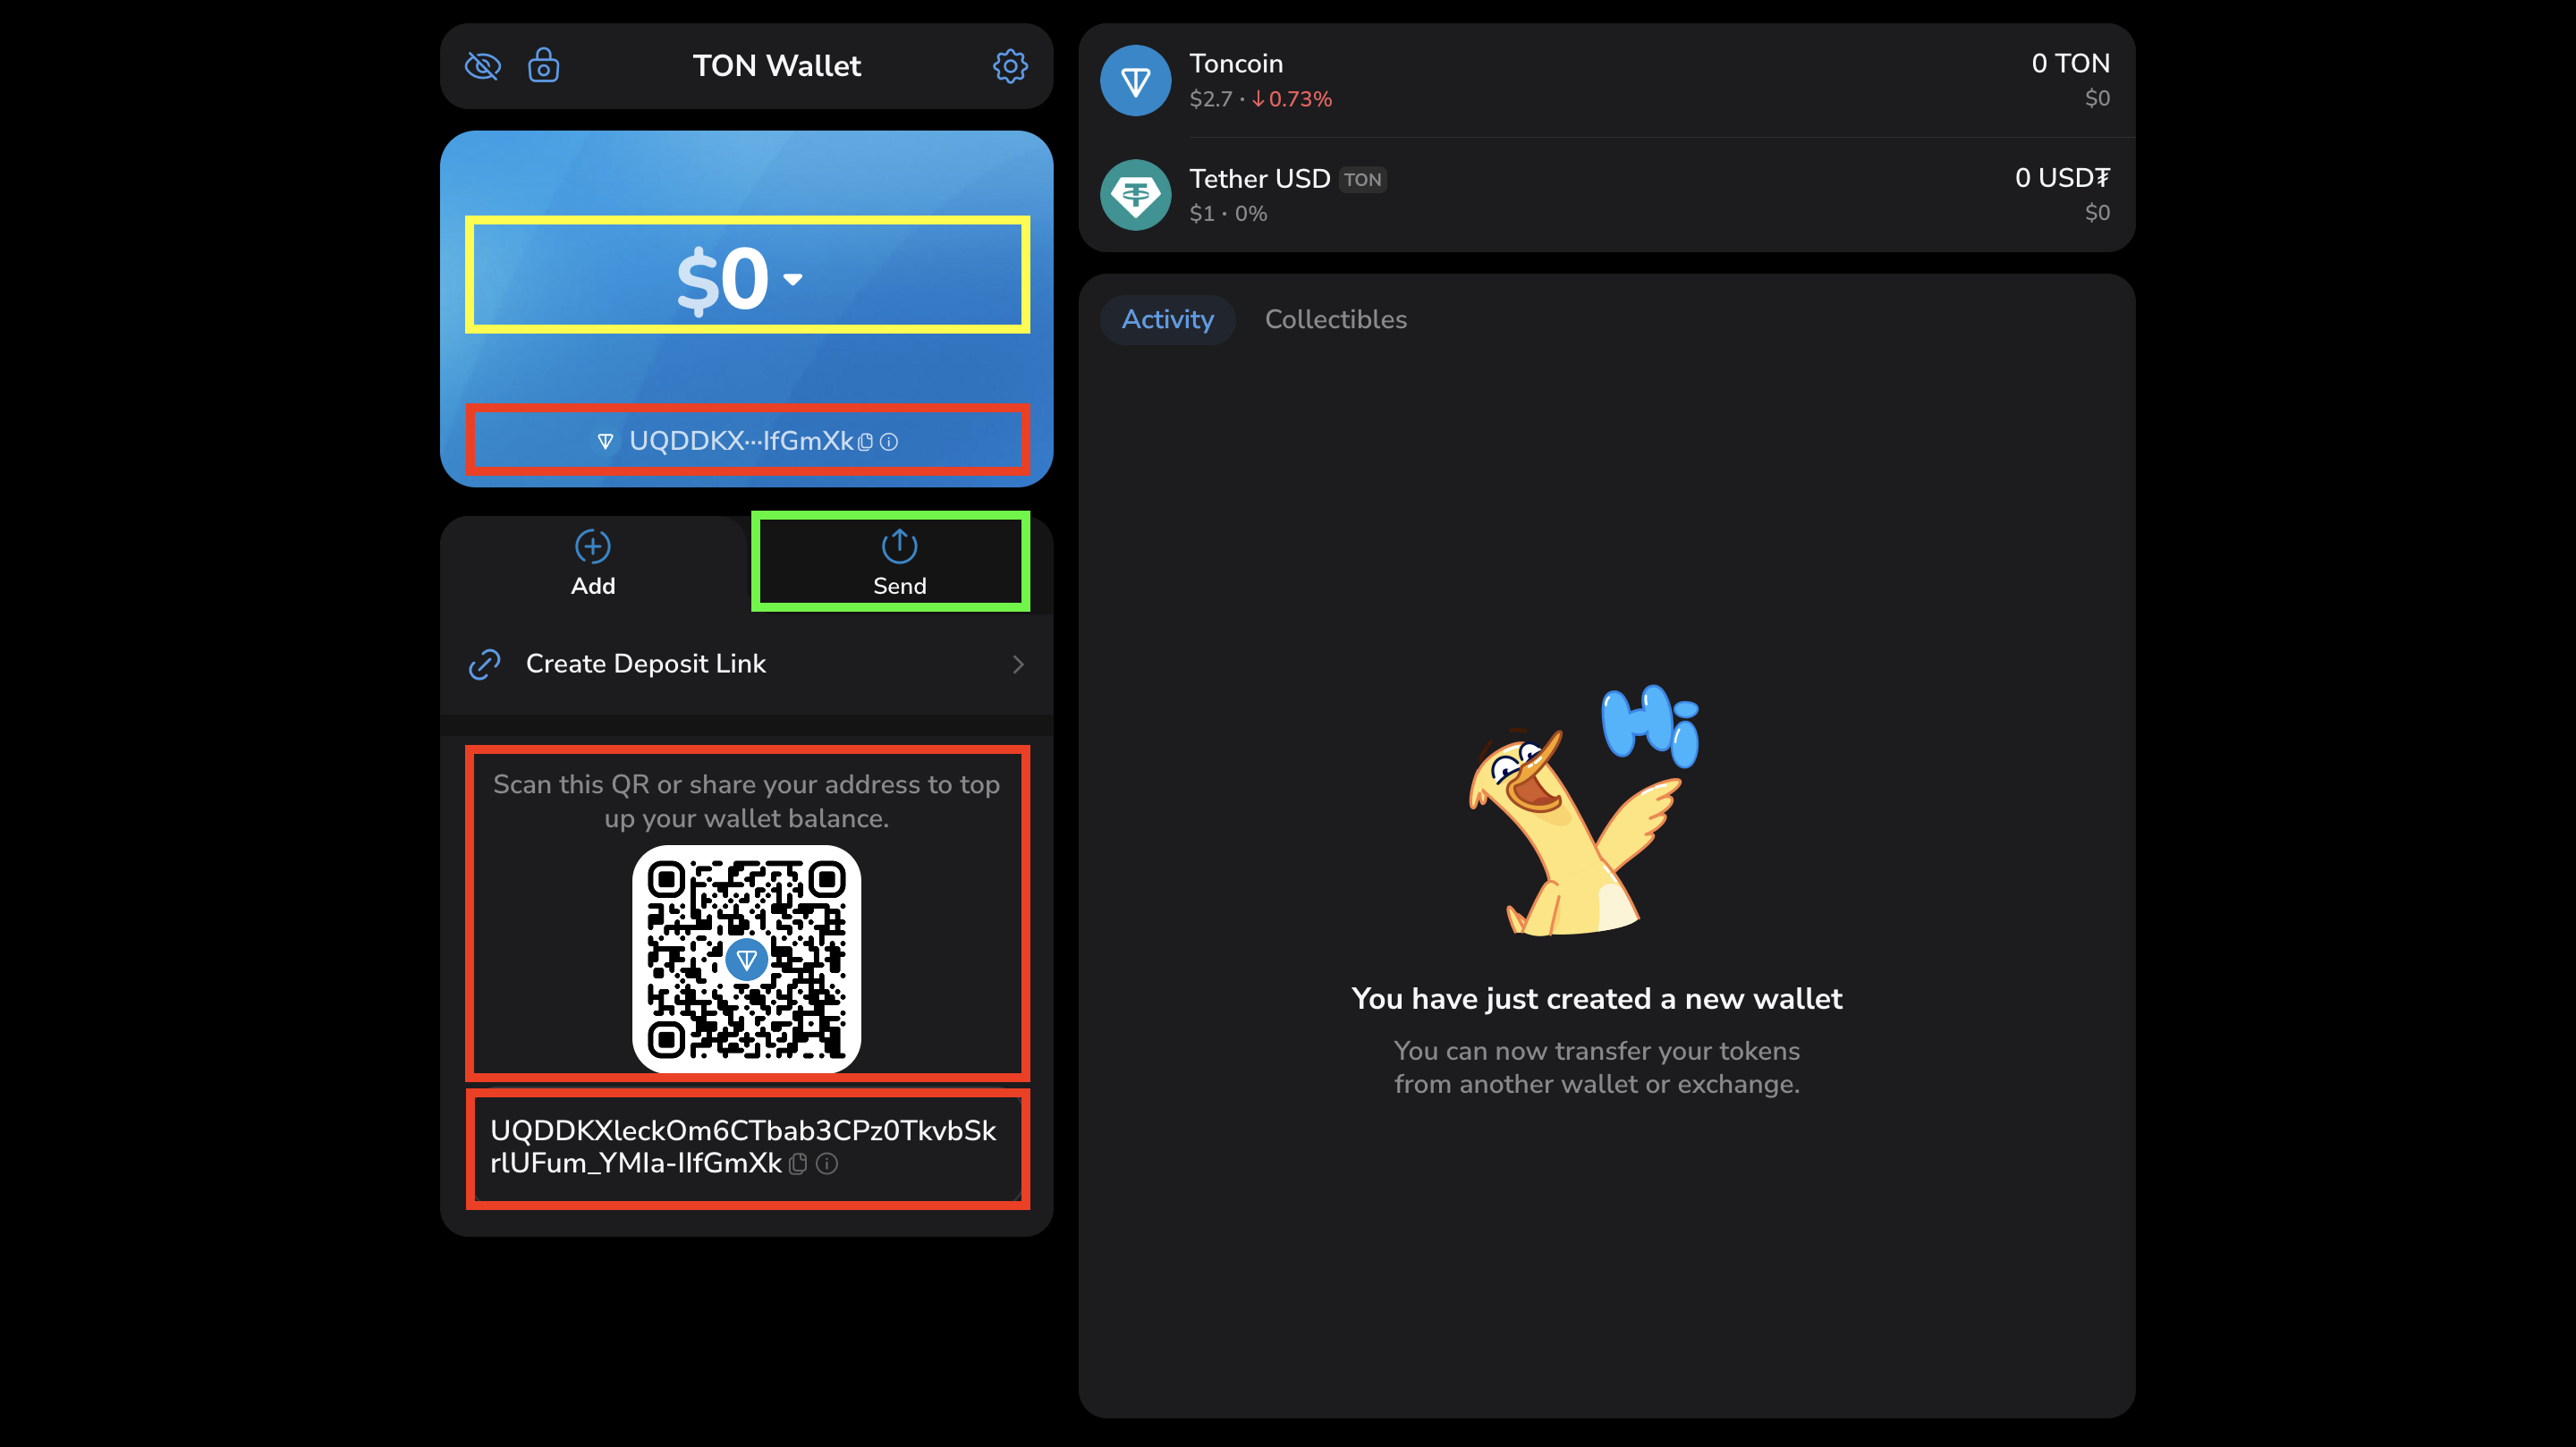
The main screen of the wallet displays essential account information and actions.- Account balance (yellow box) displays the total amount of Toncoin and other tokens held on your account.
- Account address (red box) is your unique account identifier, shown both as a QR code and as a base64-encoded string.
UQDDKXleckOm6CTbab3CPz0TkvbSkrlUFum_YMIa-IIfGmXk.
You can share this address to receive TON, jettons, or NFTs.
- The send button (green box) opens the transfer form, allowing you to send TON or jettons to another account address.
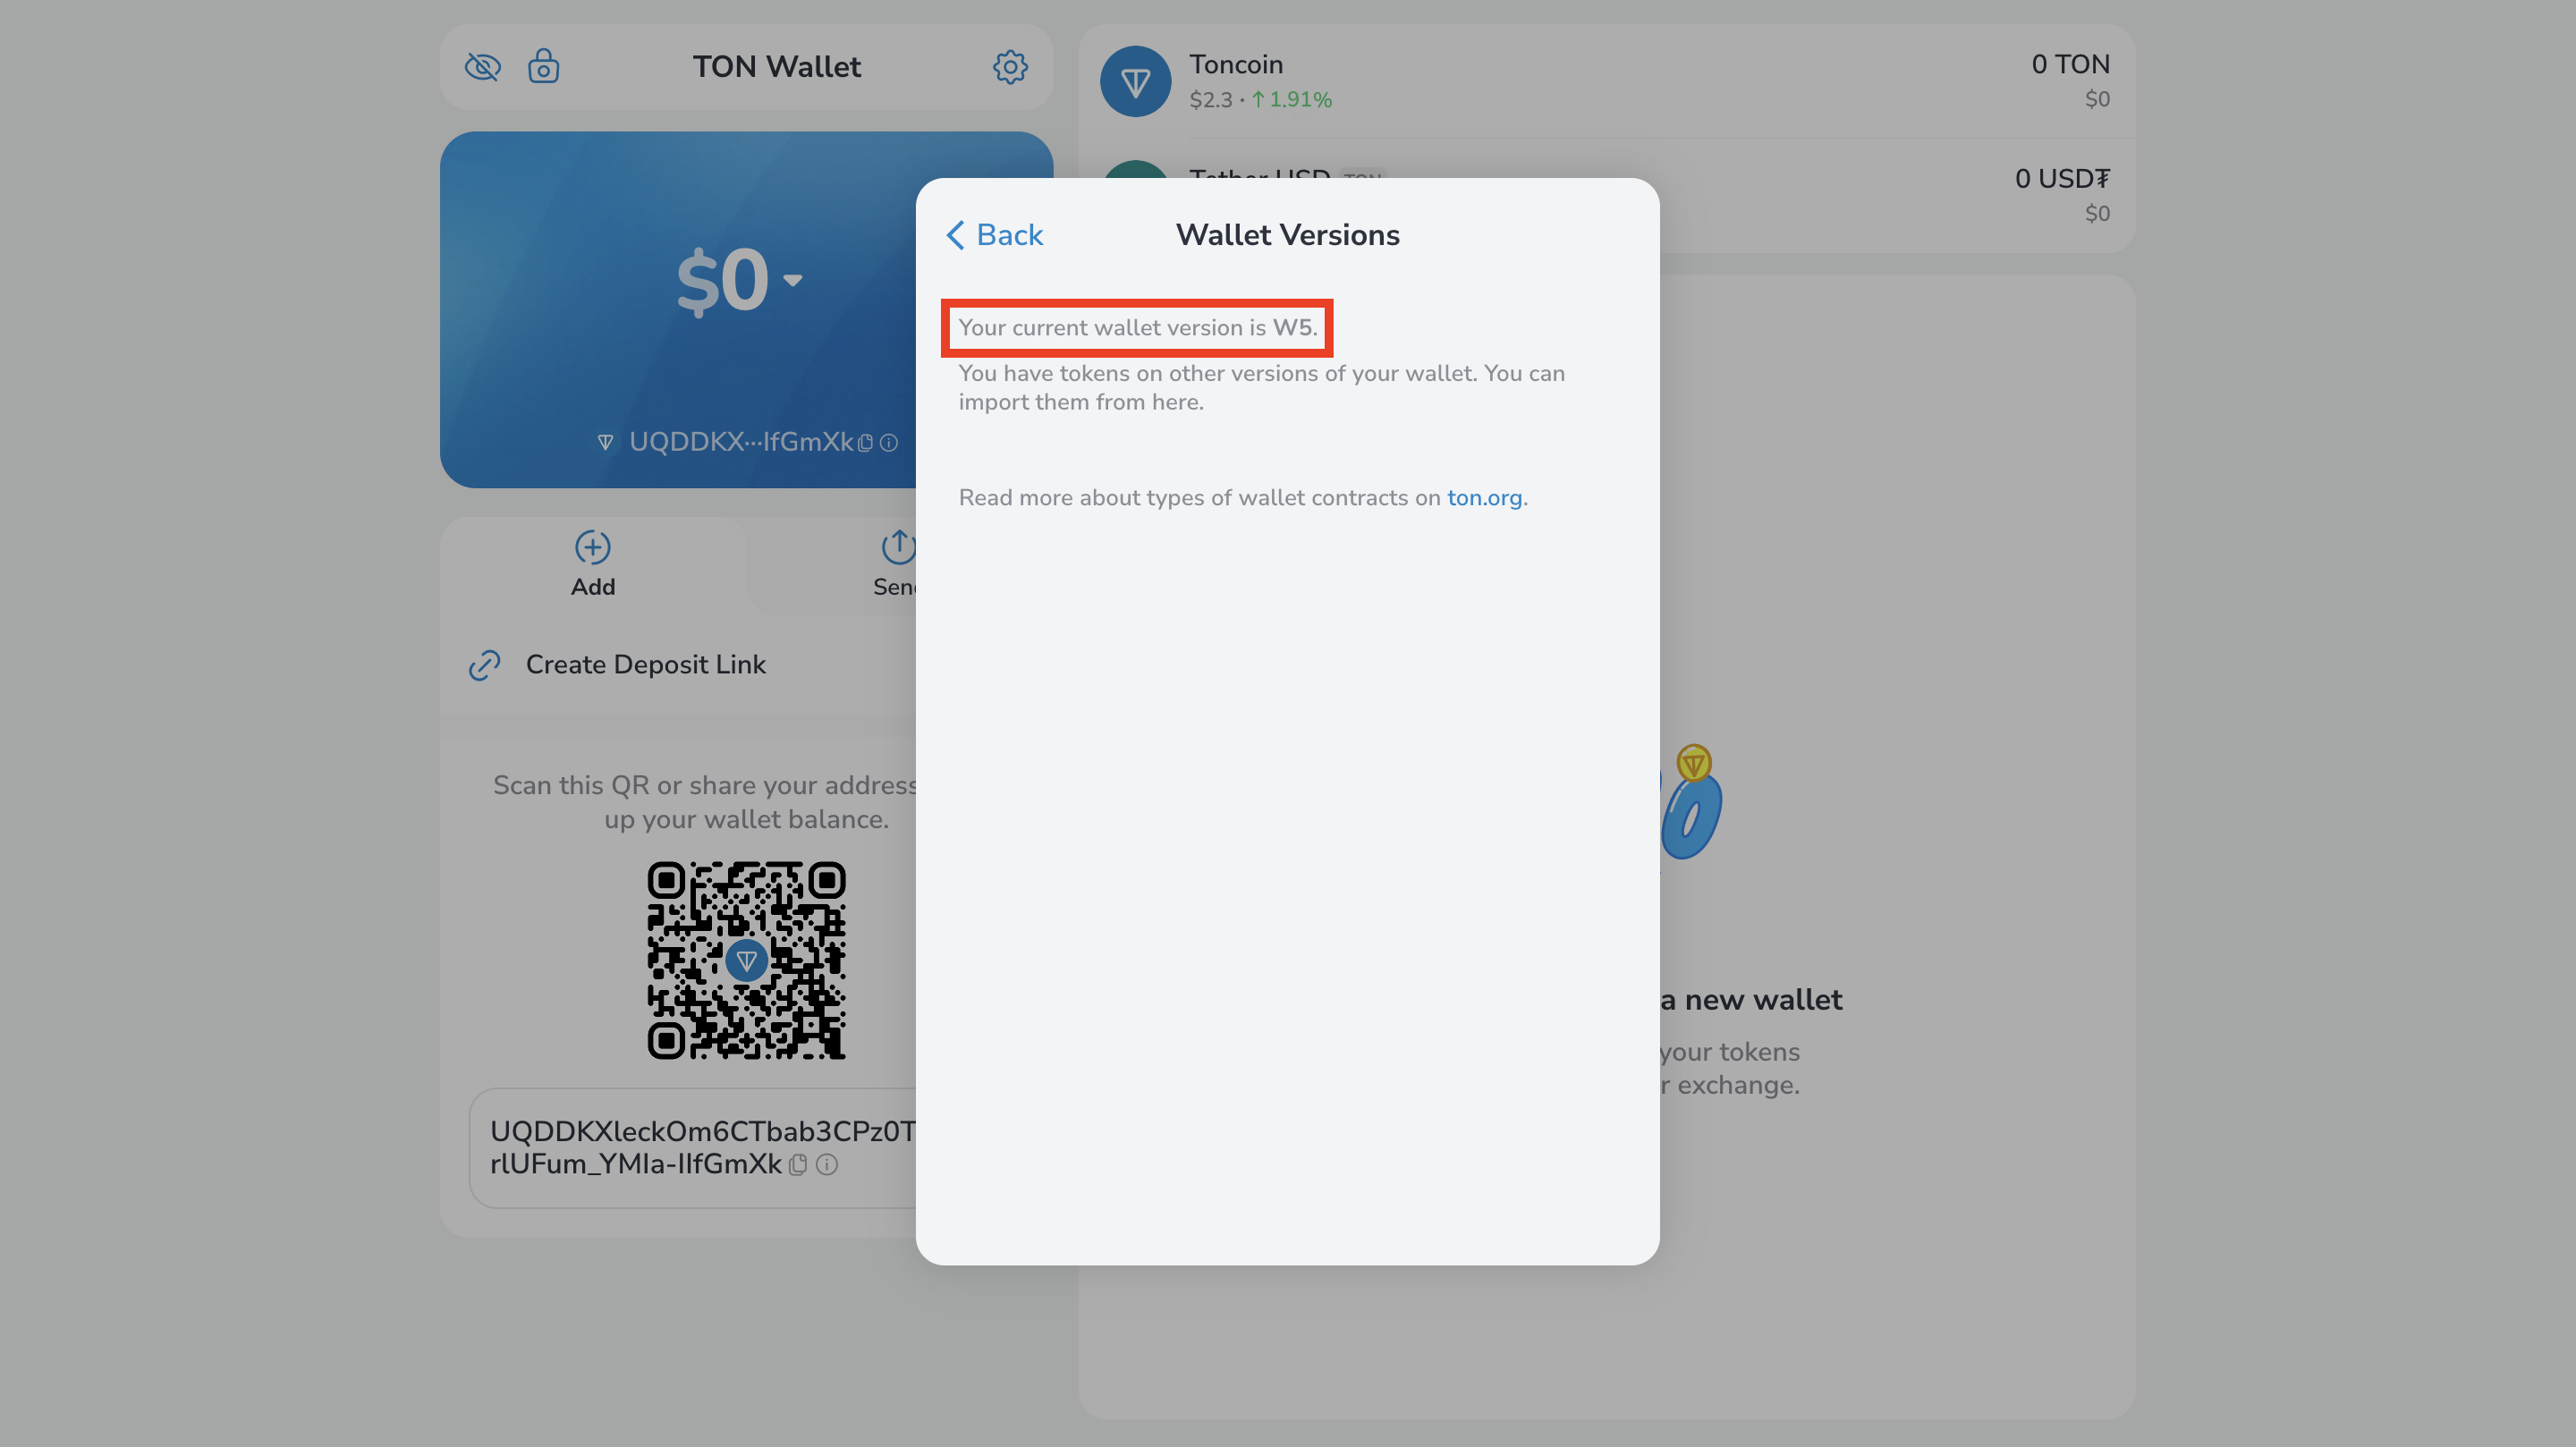
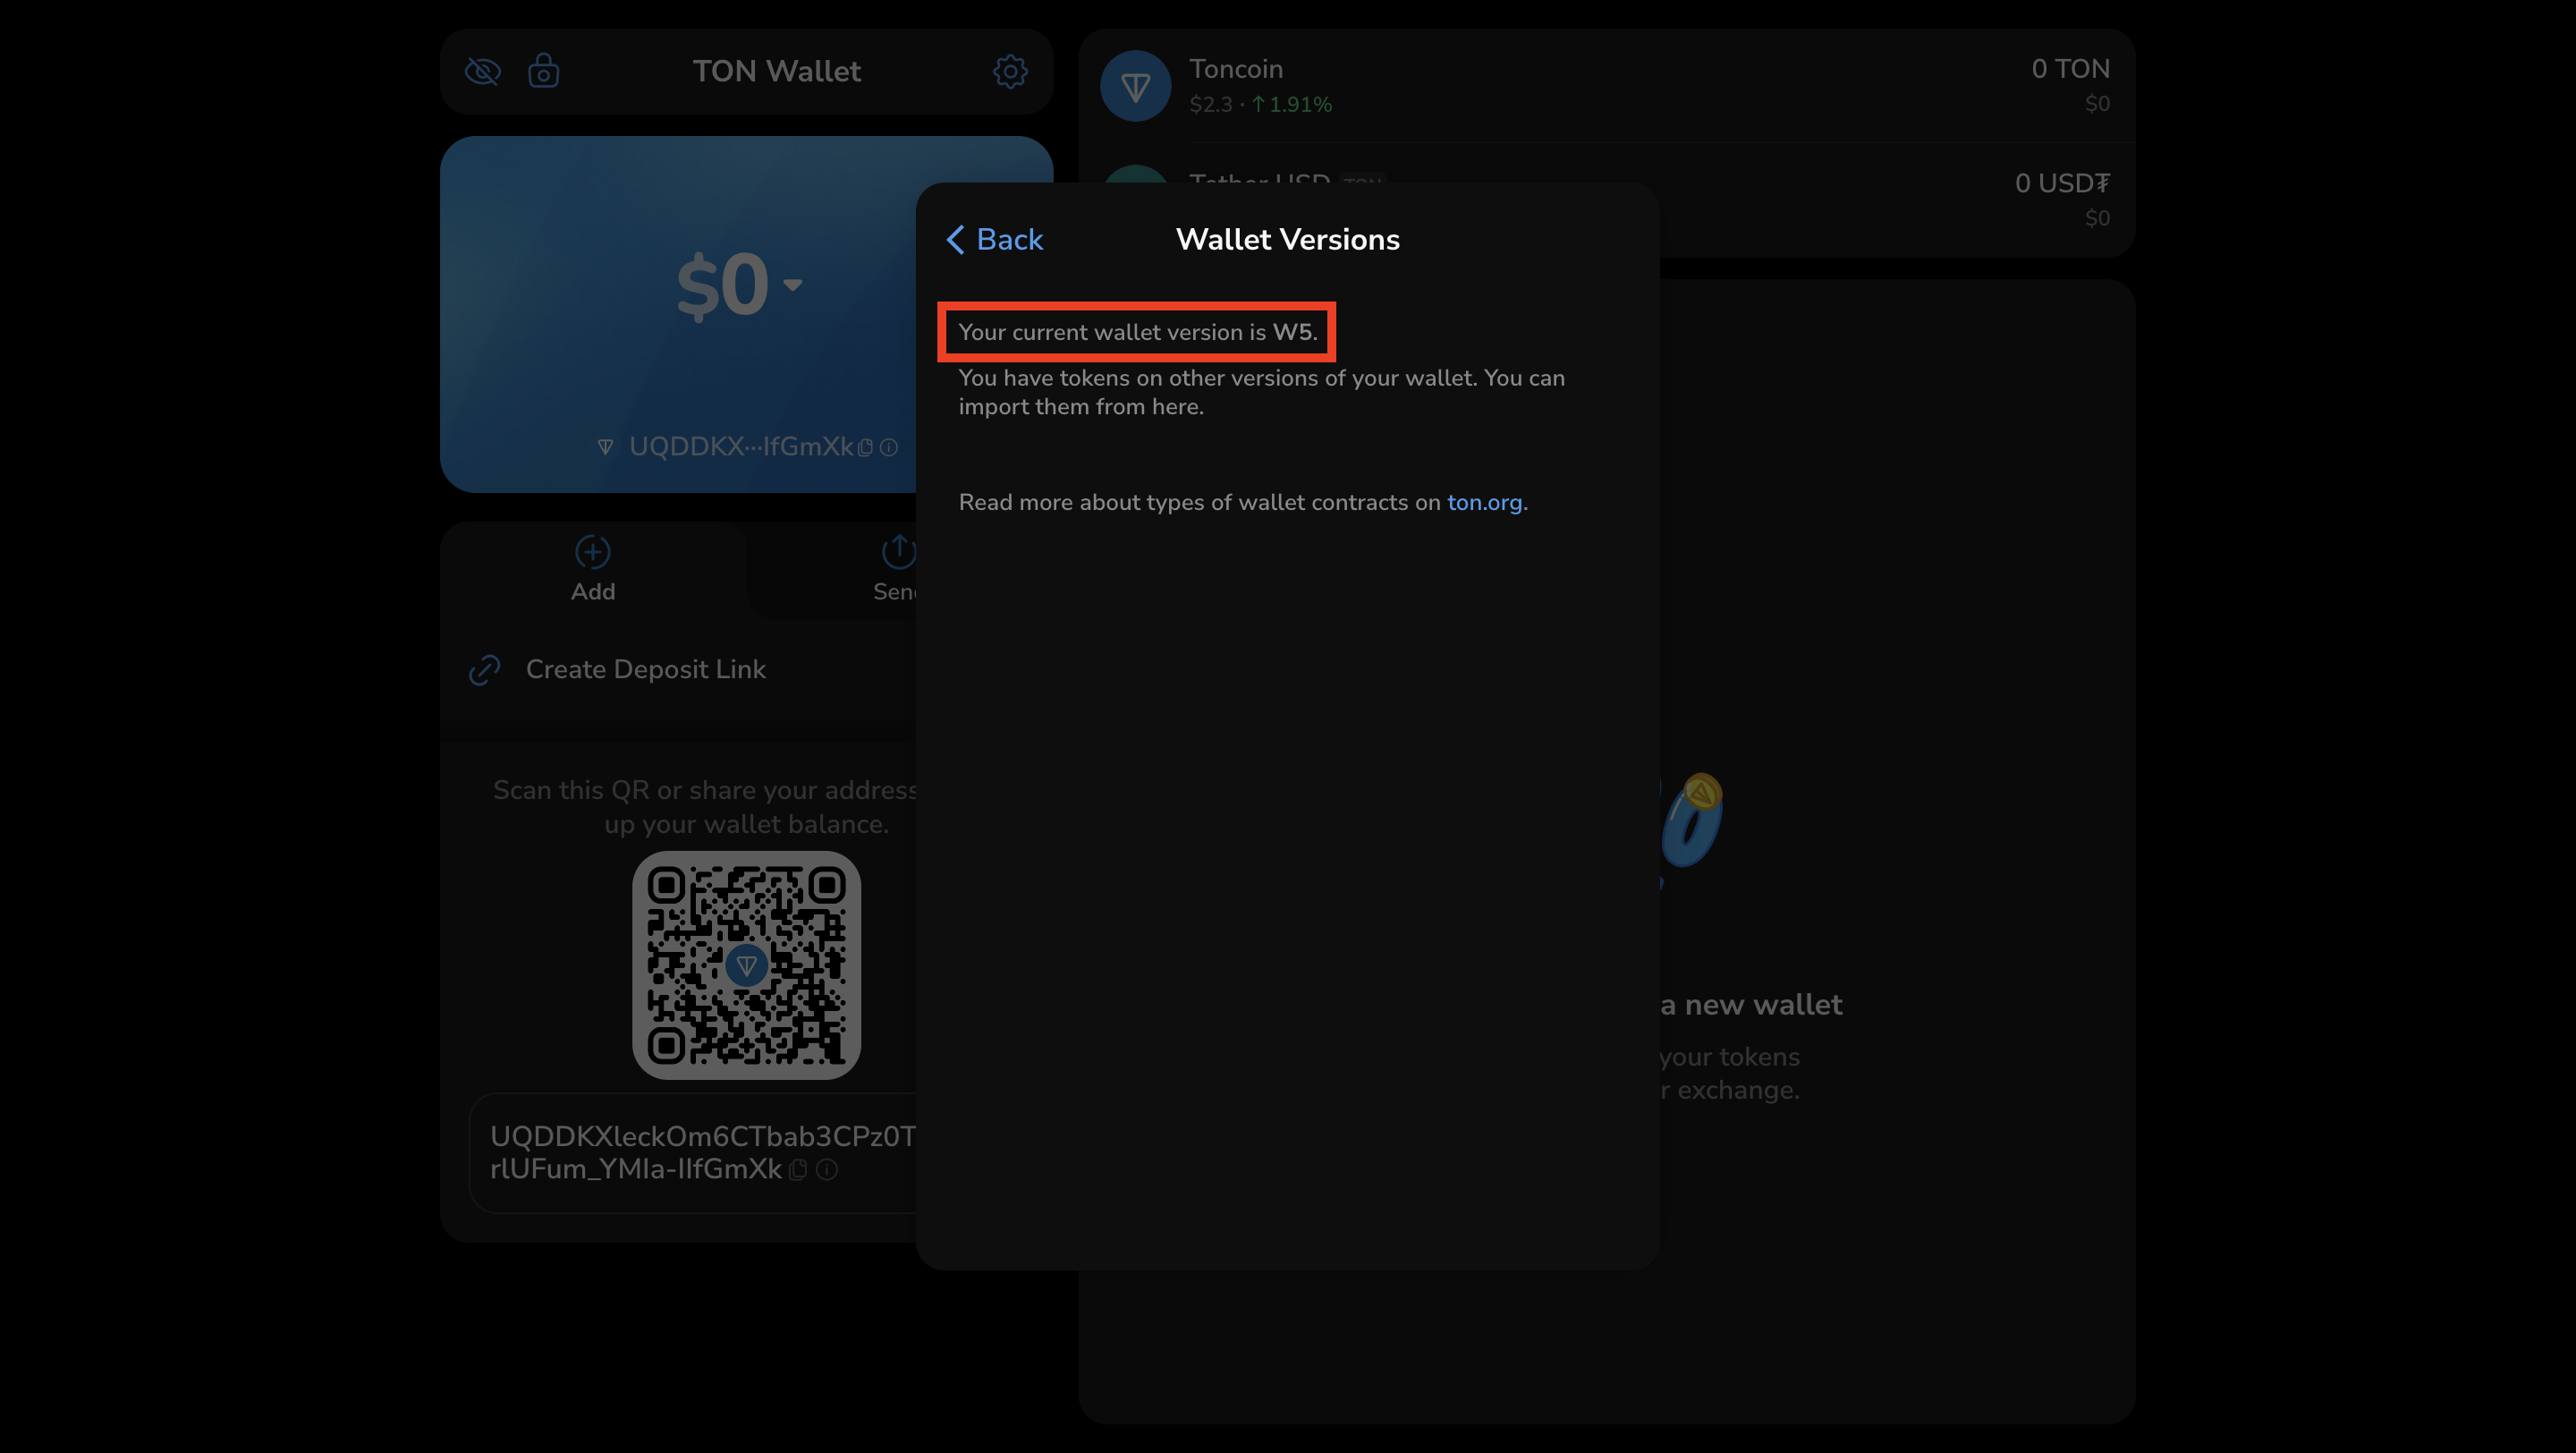
Wallet contract version
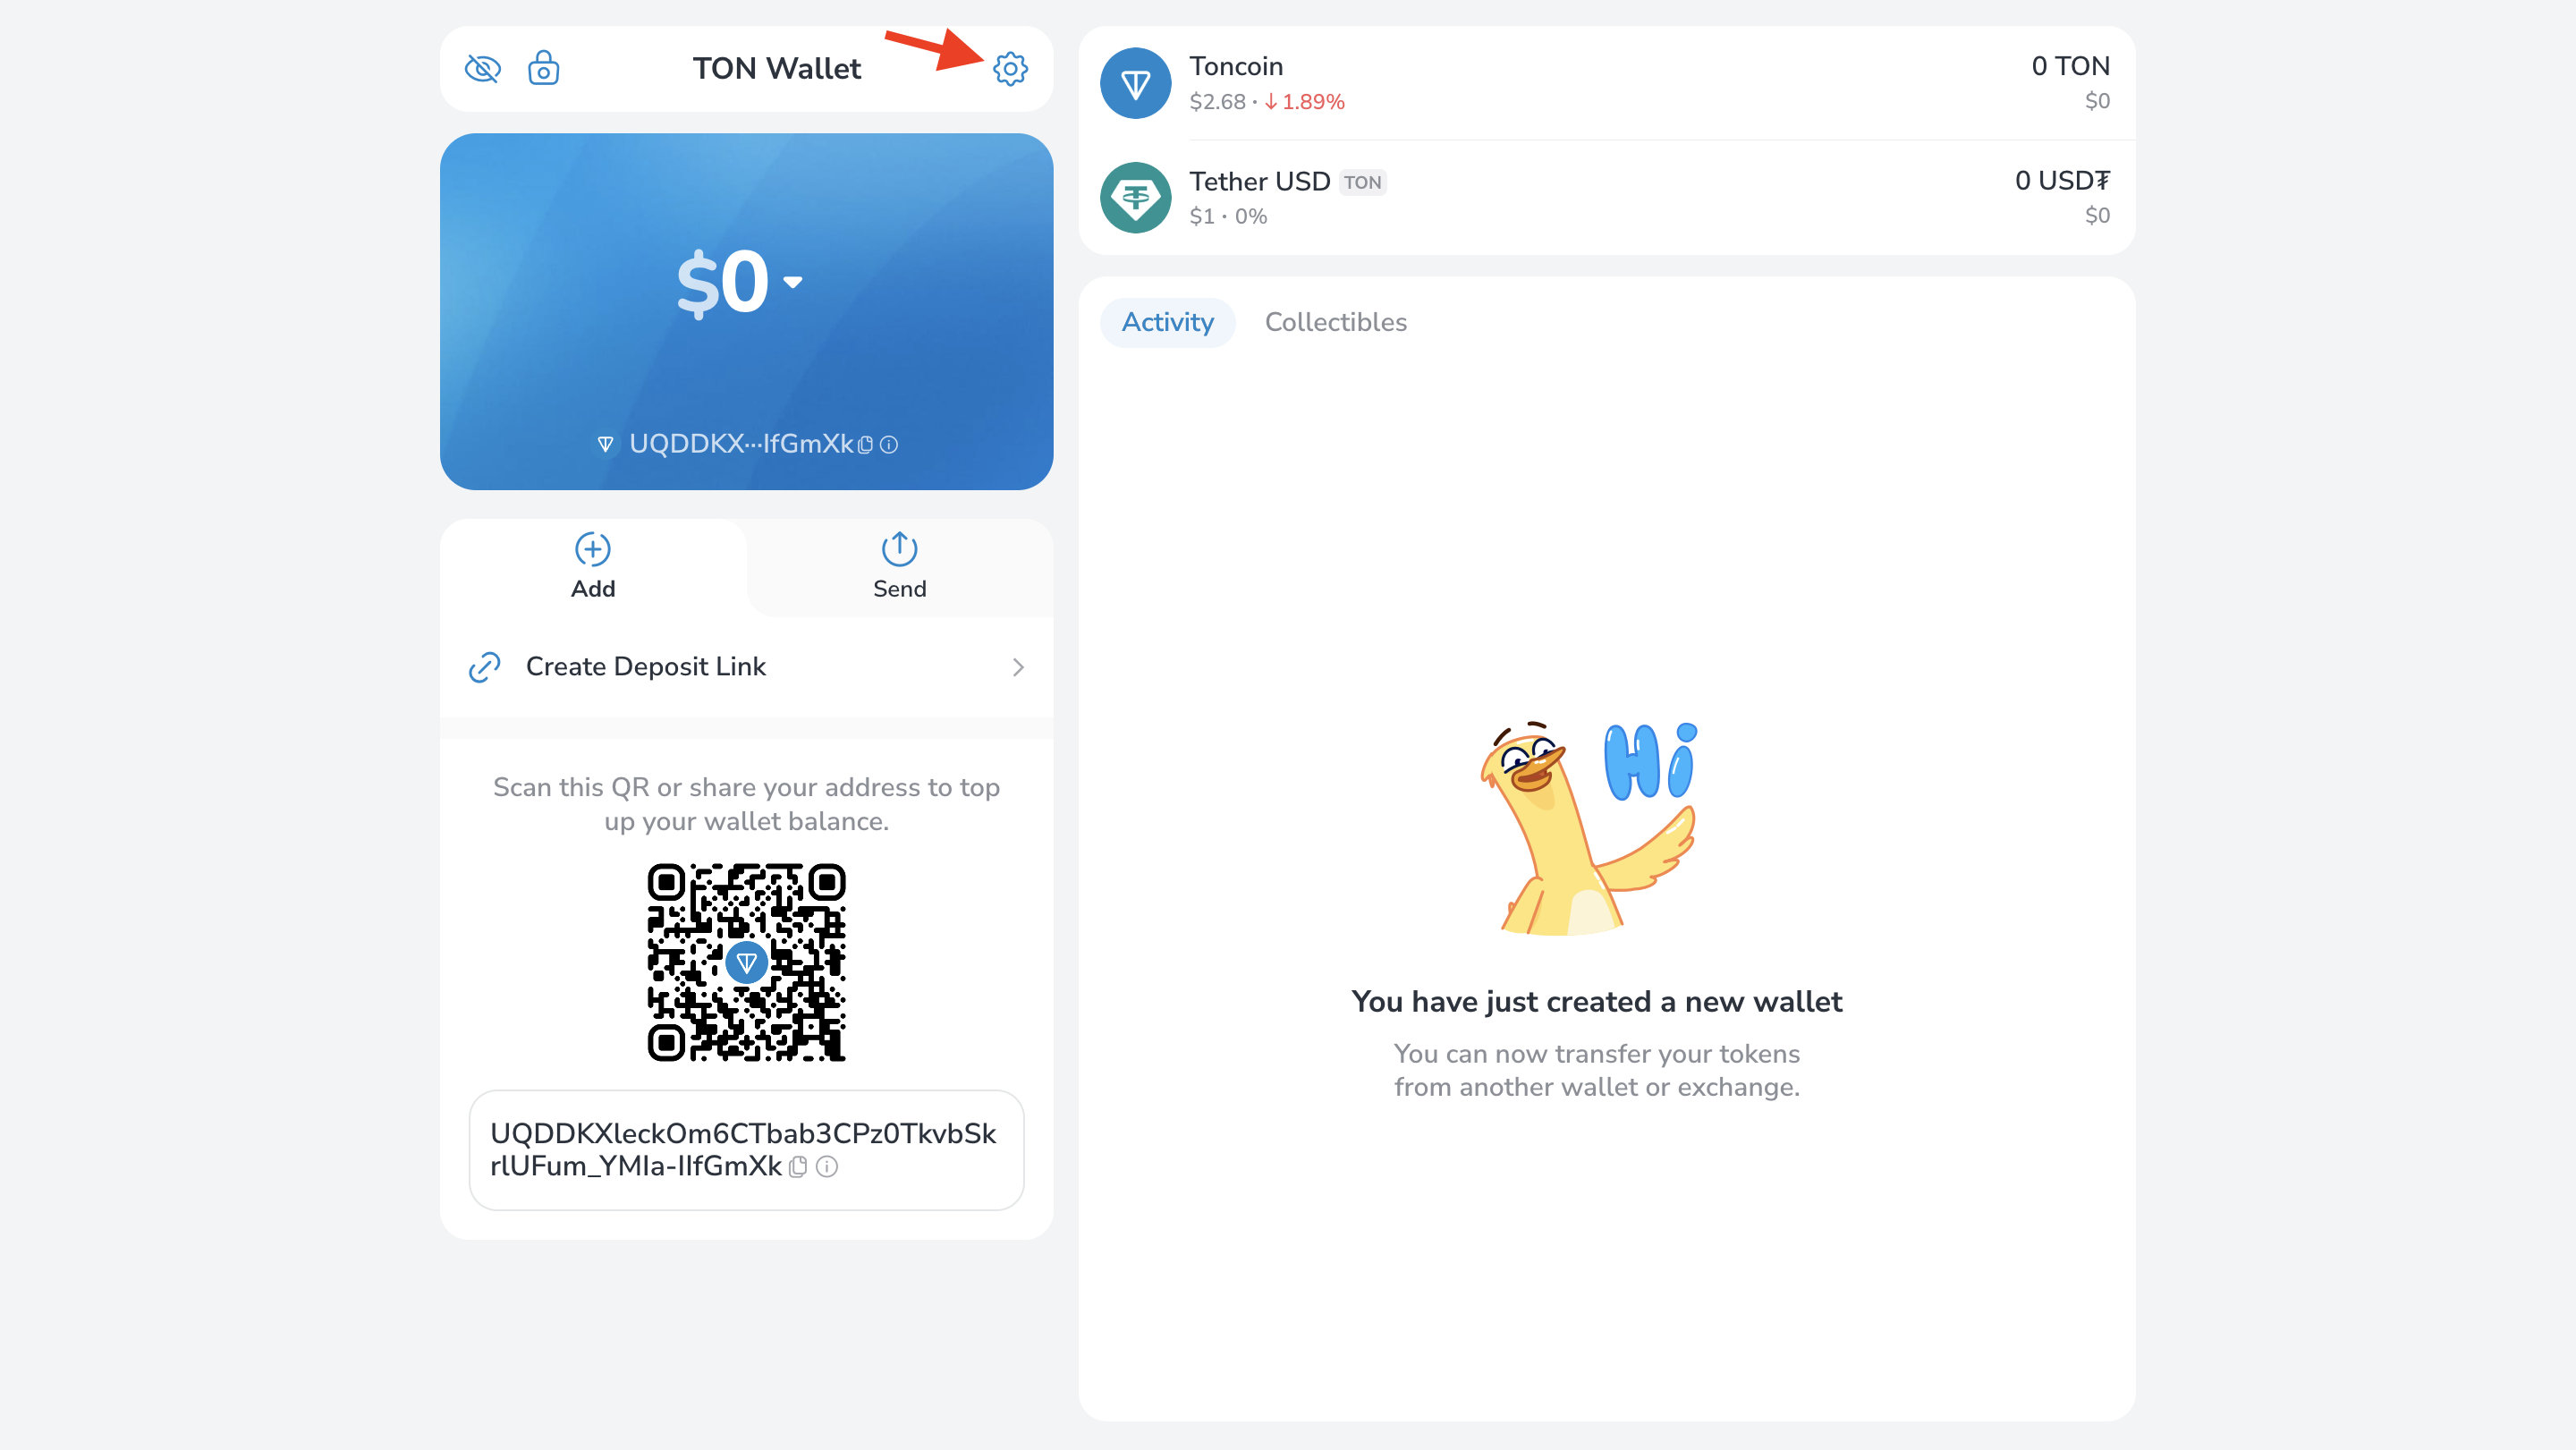
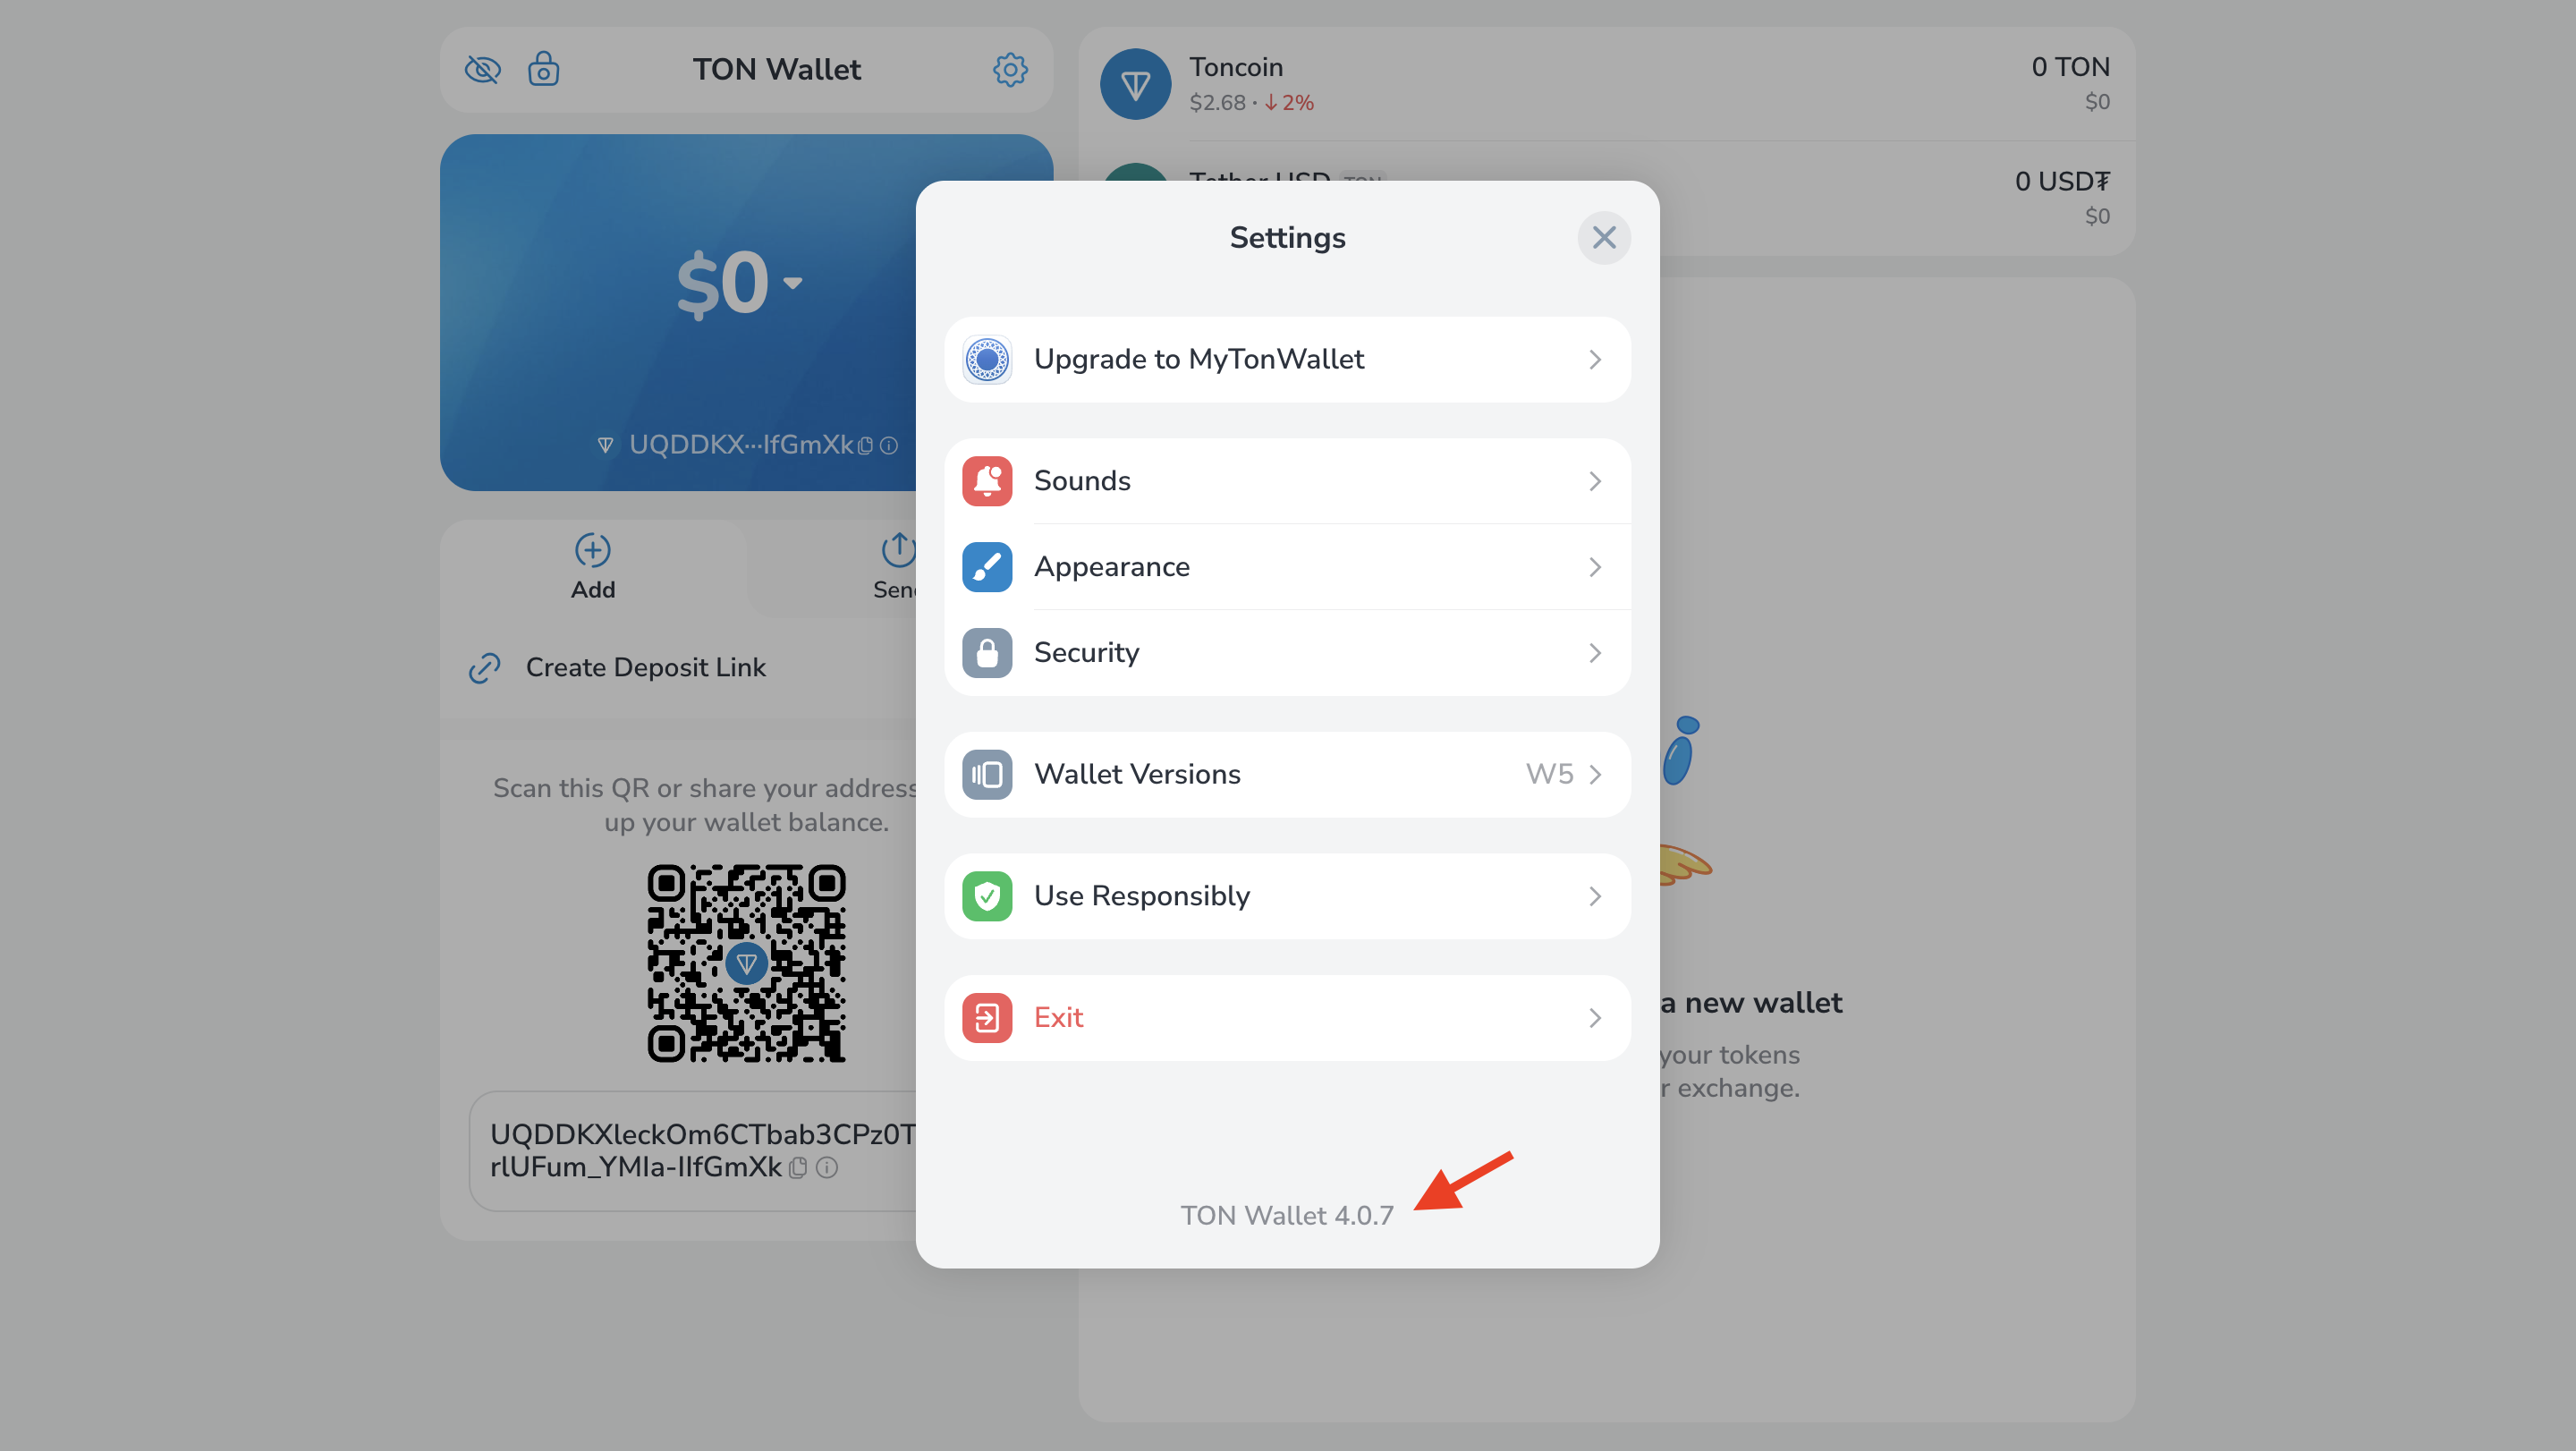
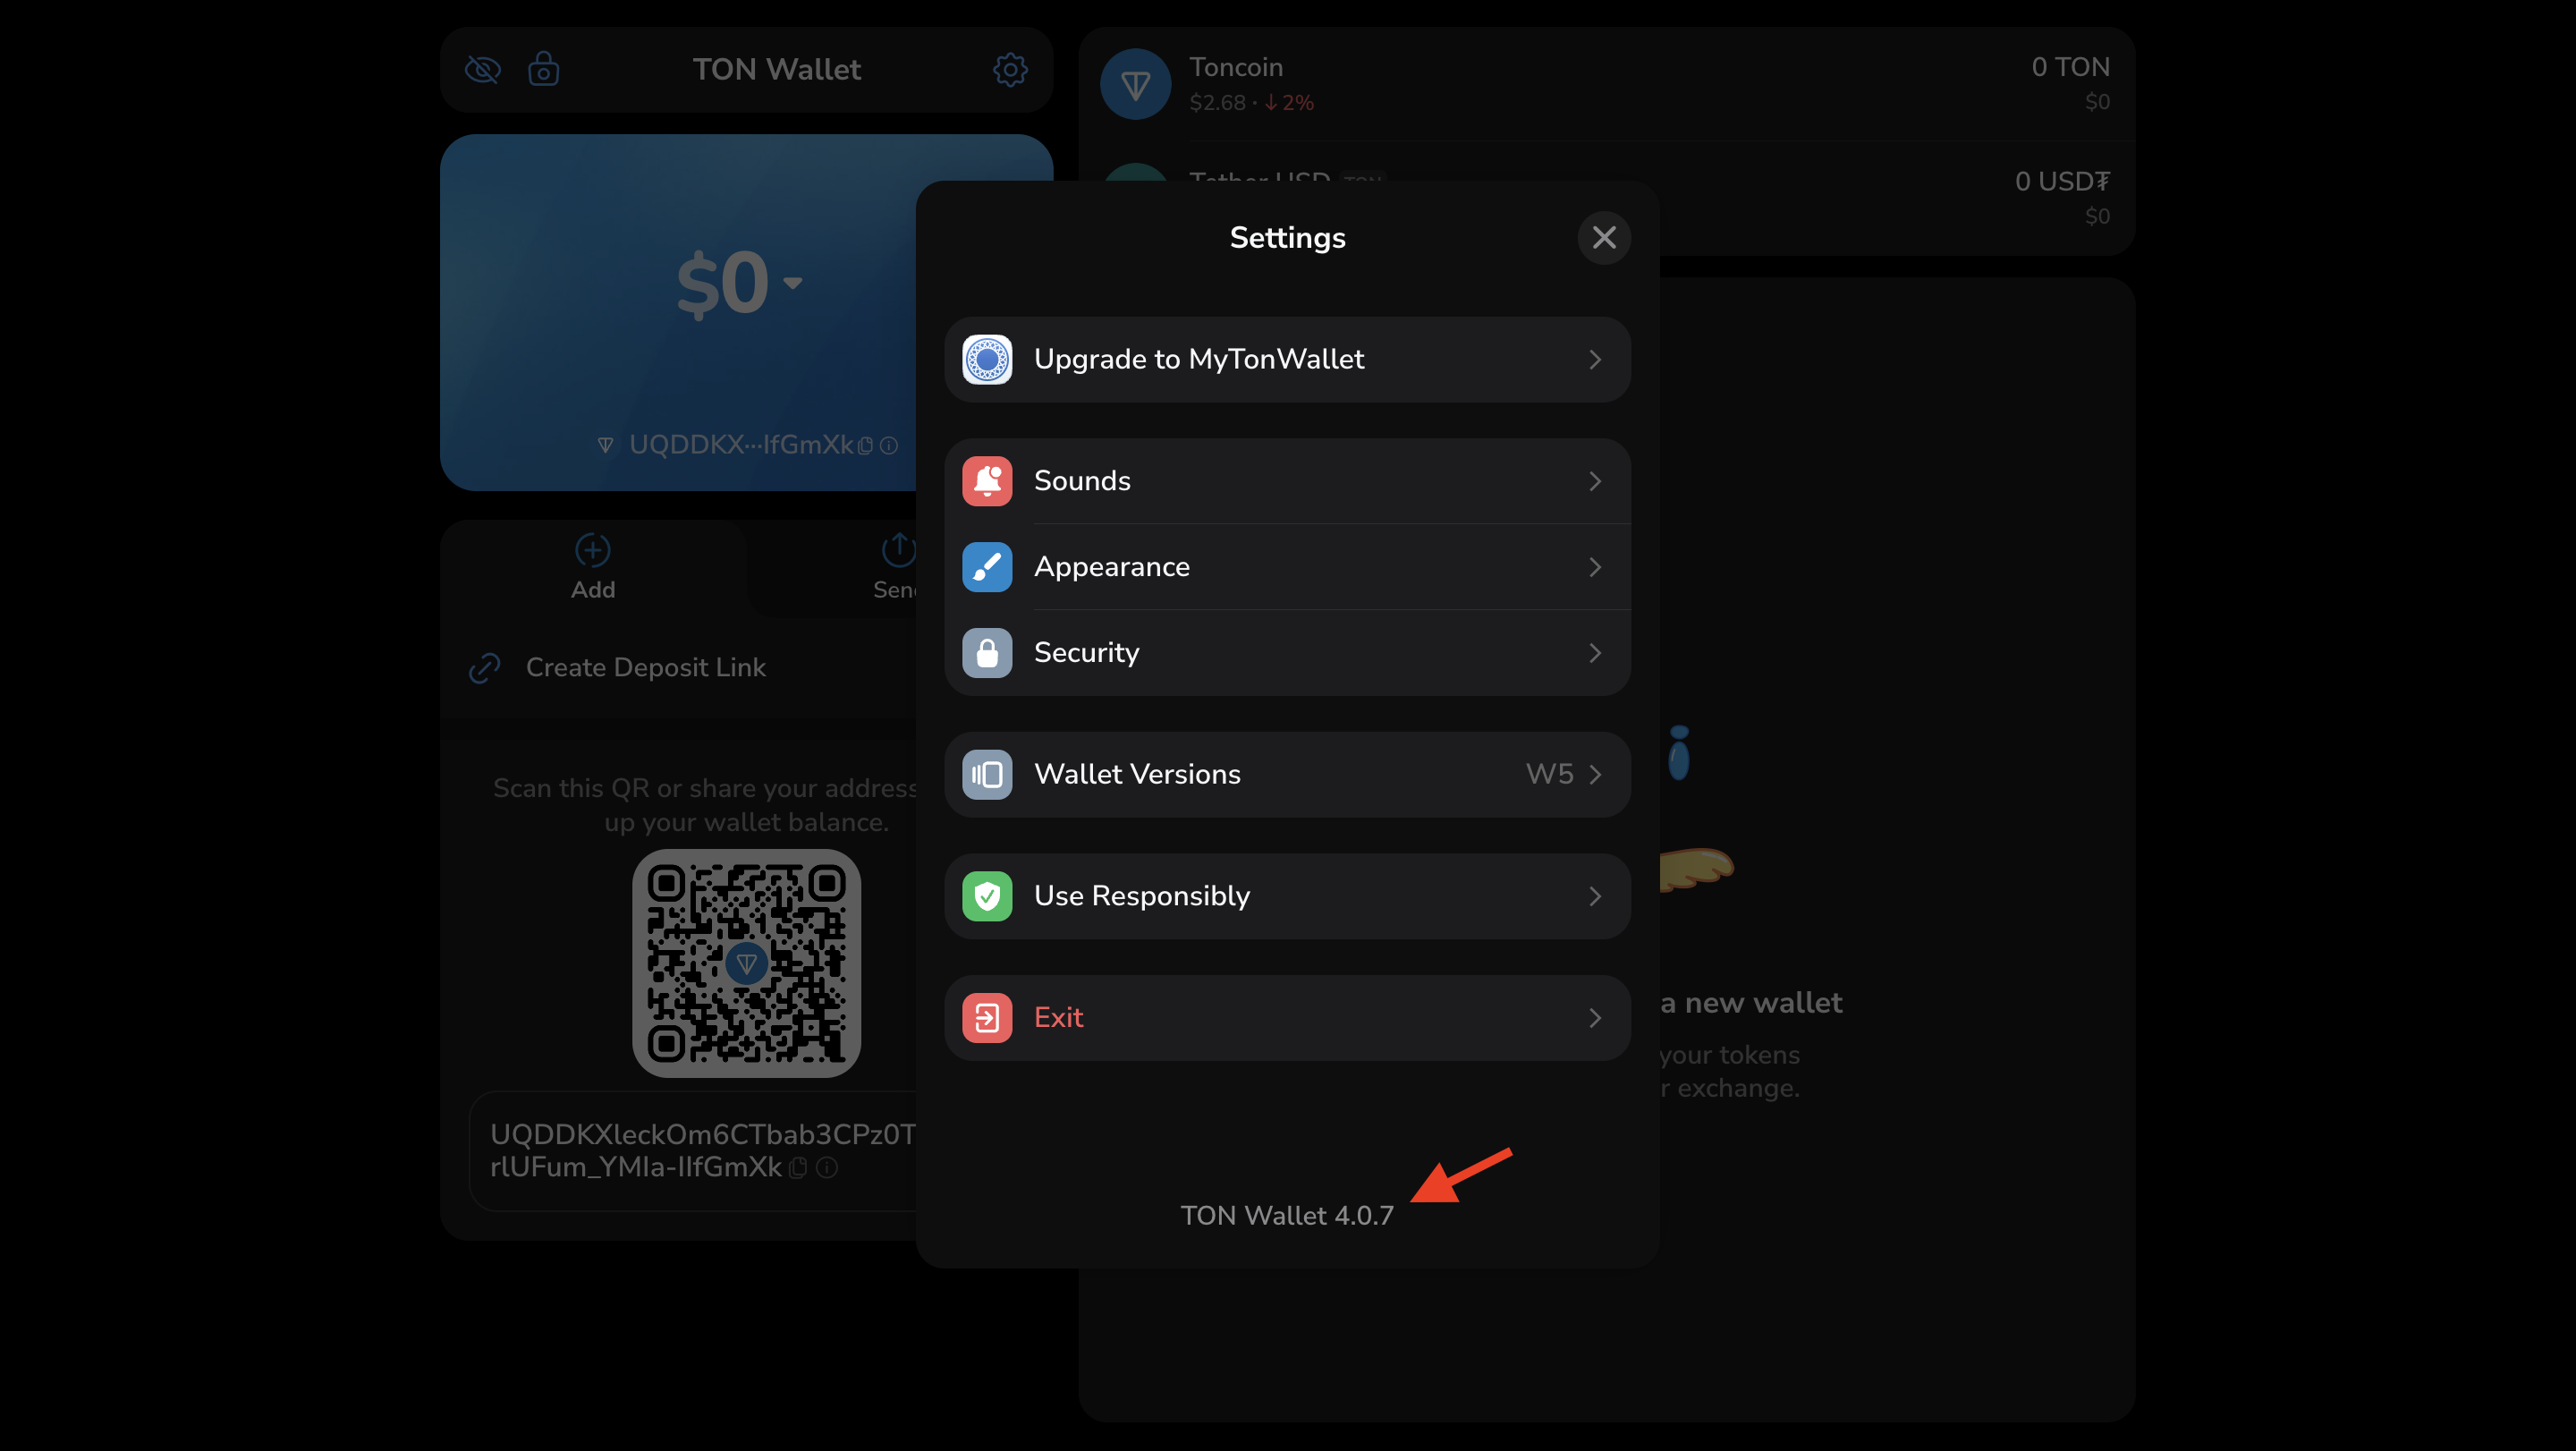
To check which wallet contract version is used:- Click the “Settings” icon.

- In the “Wallet Versions”, you can see which contract your wallet uses.
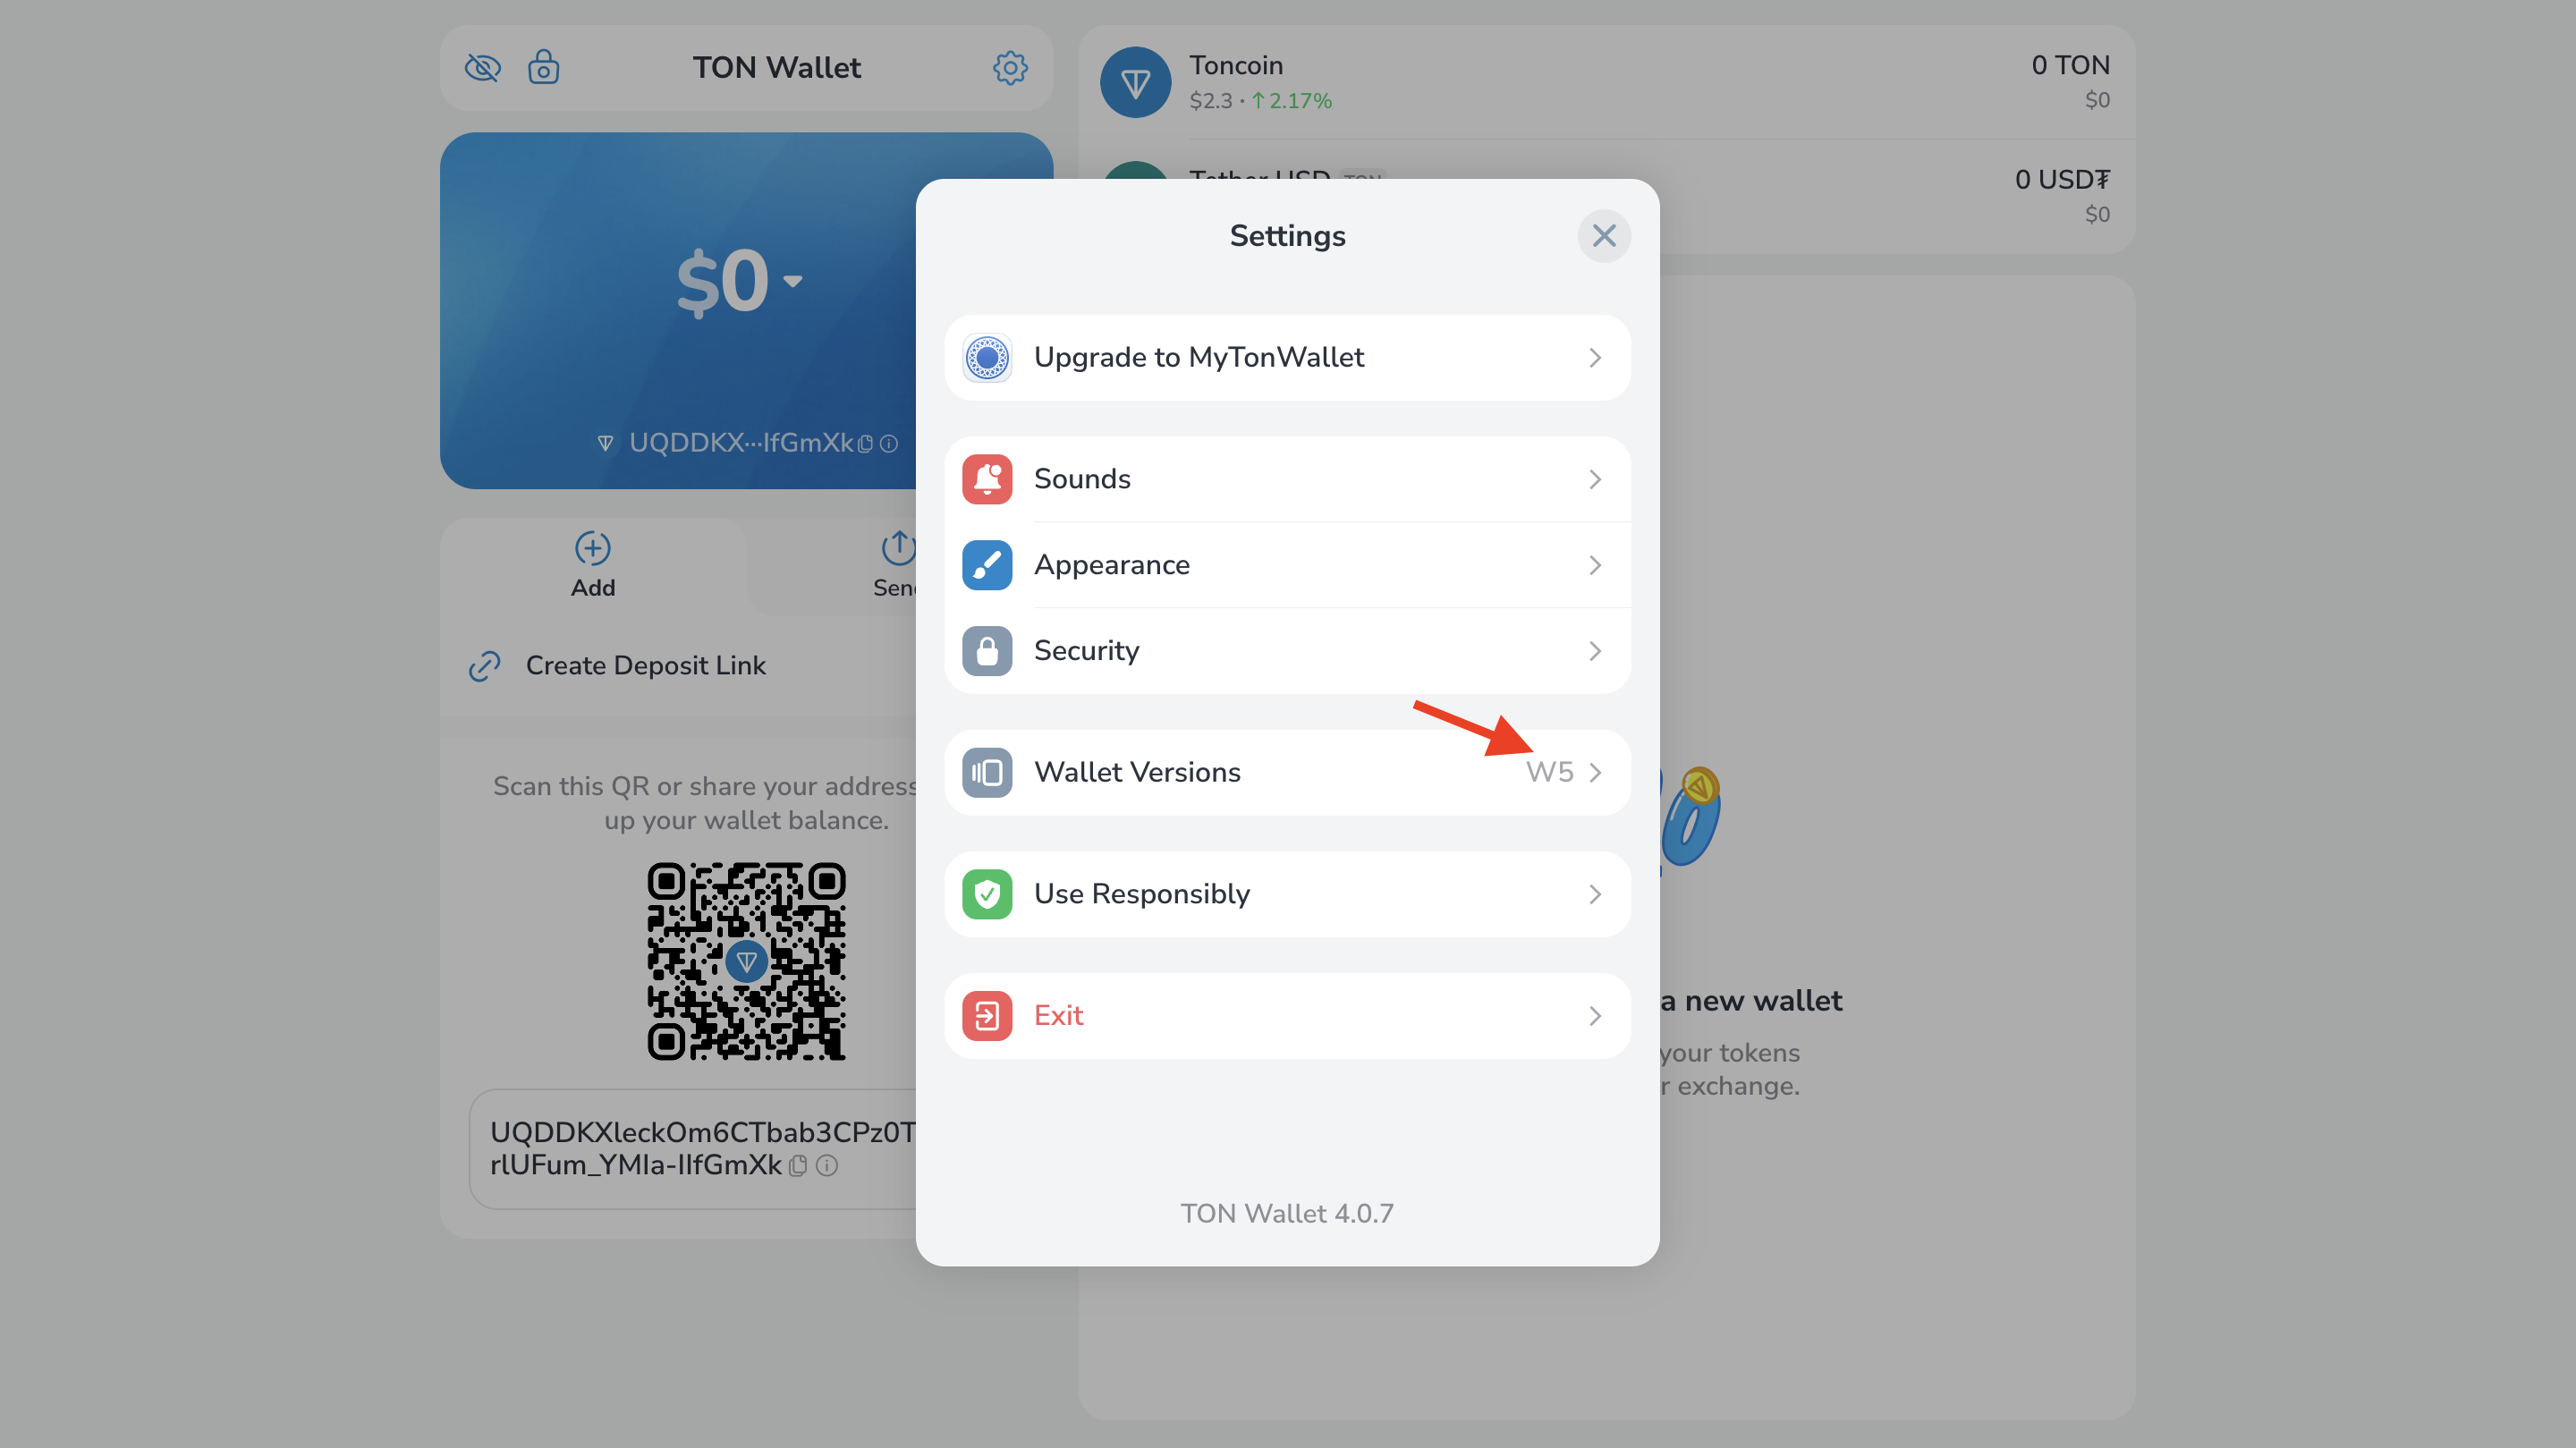
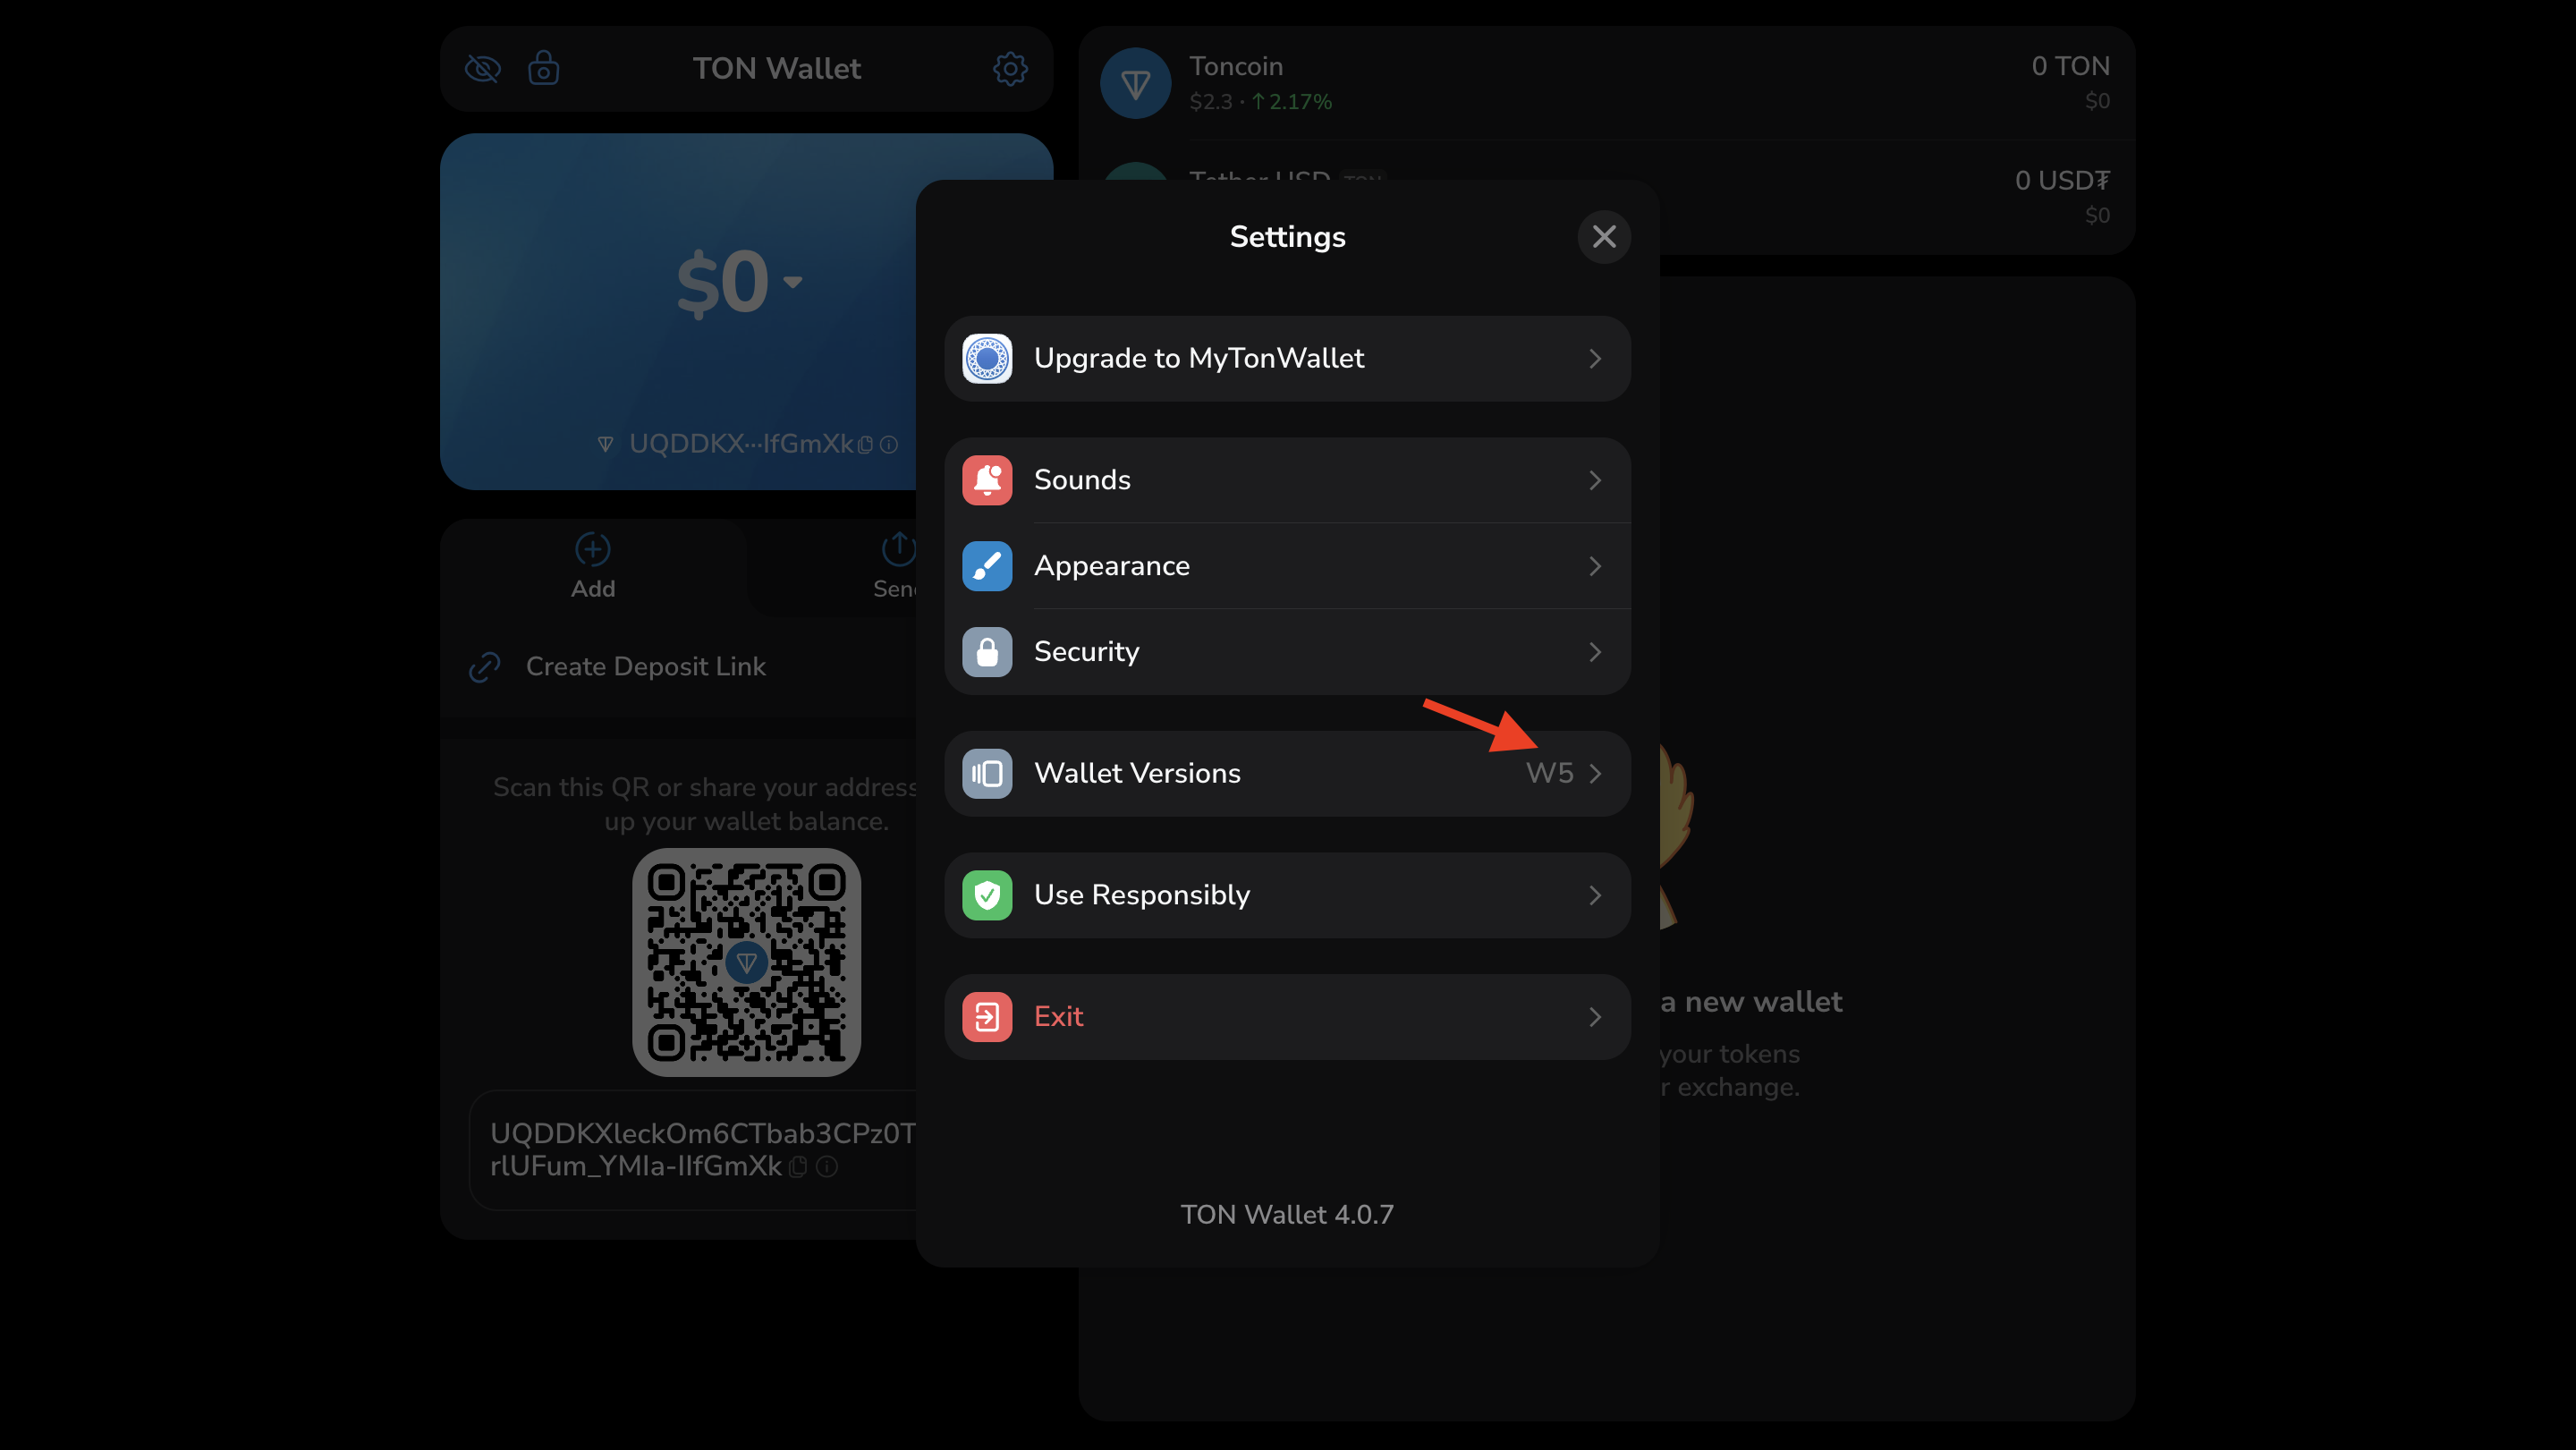
- Click the field to view the current version, for example, W5.
Testnet
In wallet.ton.org, the Testnet account is derived from the Mainnet wallet’s mnemonic. The Testnet account is generated with the same subwallet ID as Mainnet.Make sure the selected network matches your intent — Testnet for testing, Mainnet for real transfers.
Verify the network before sending funds.
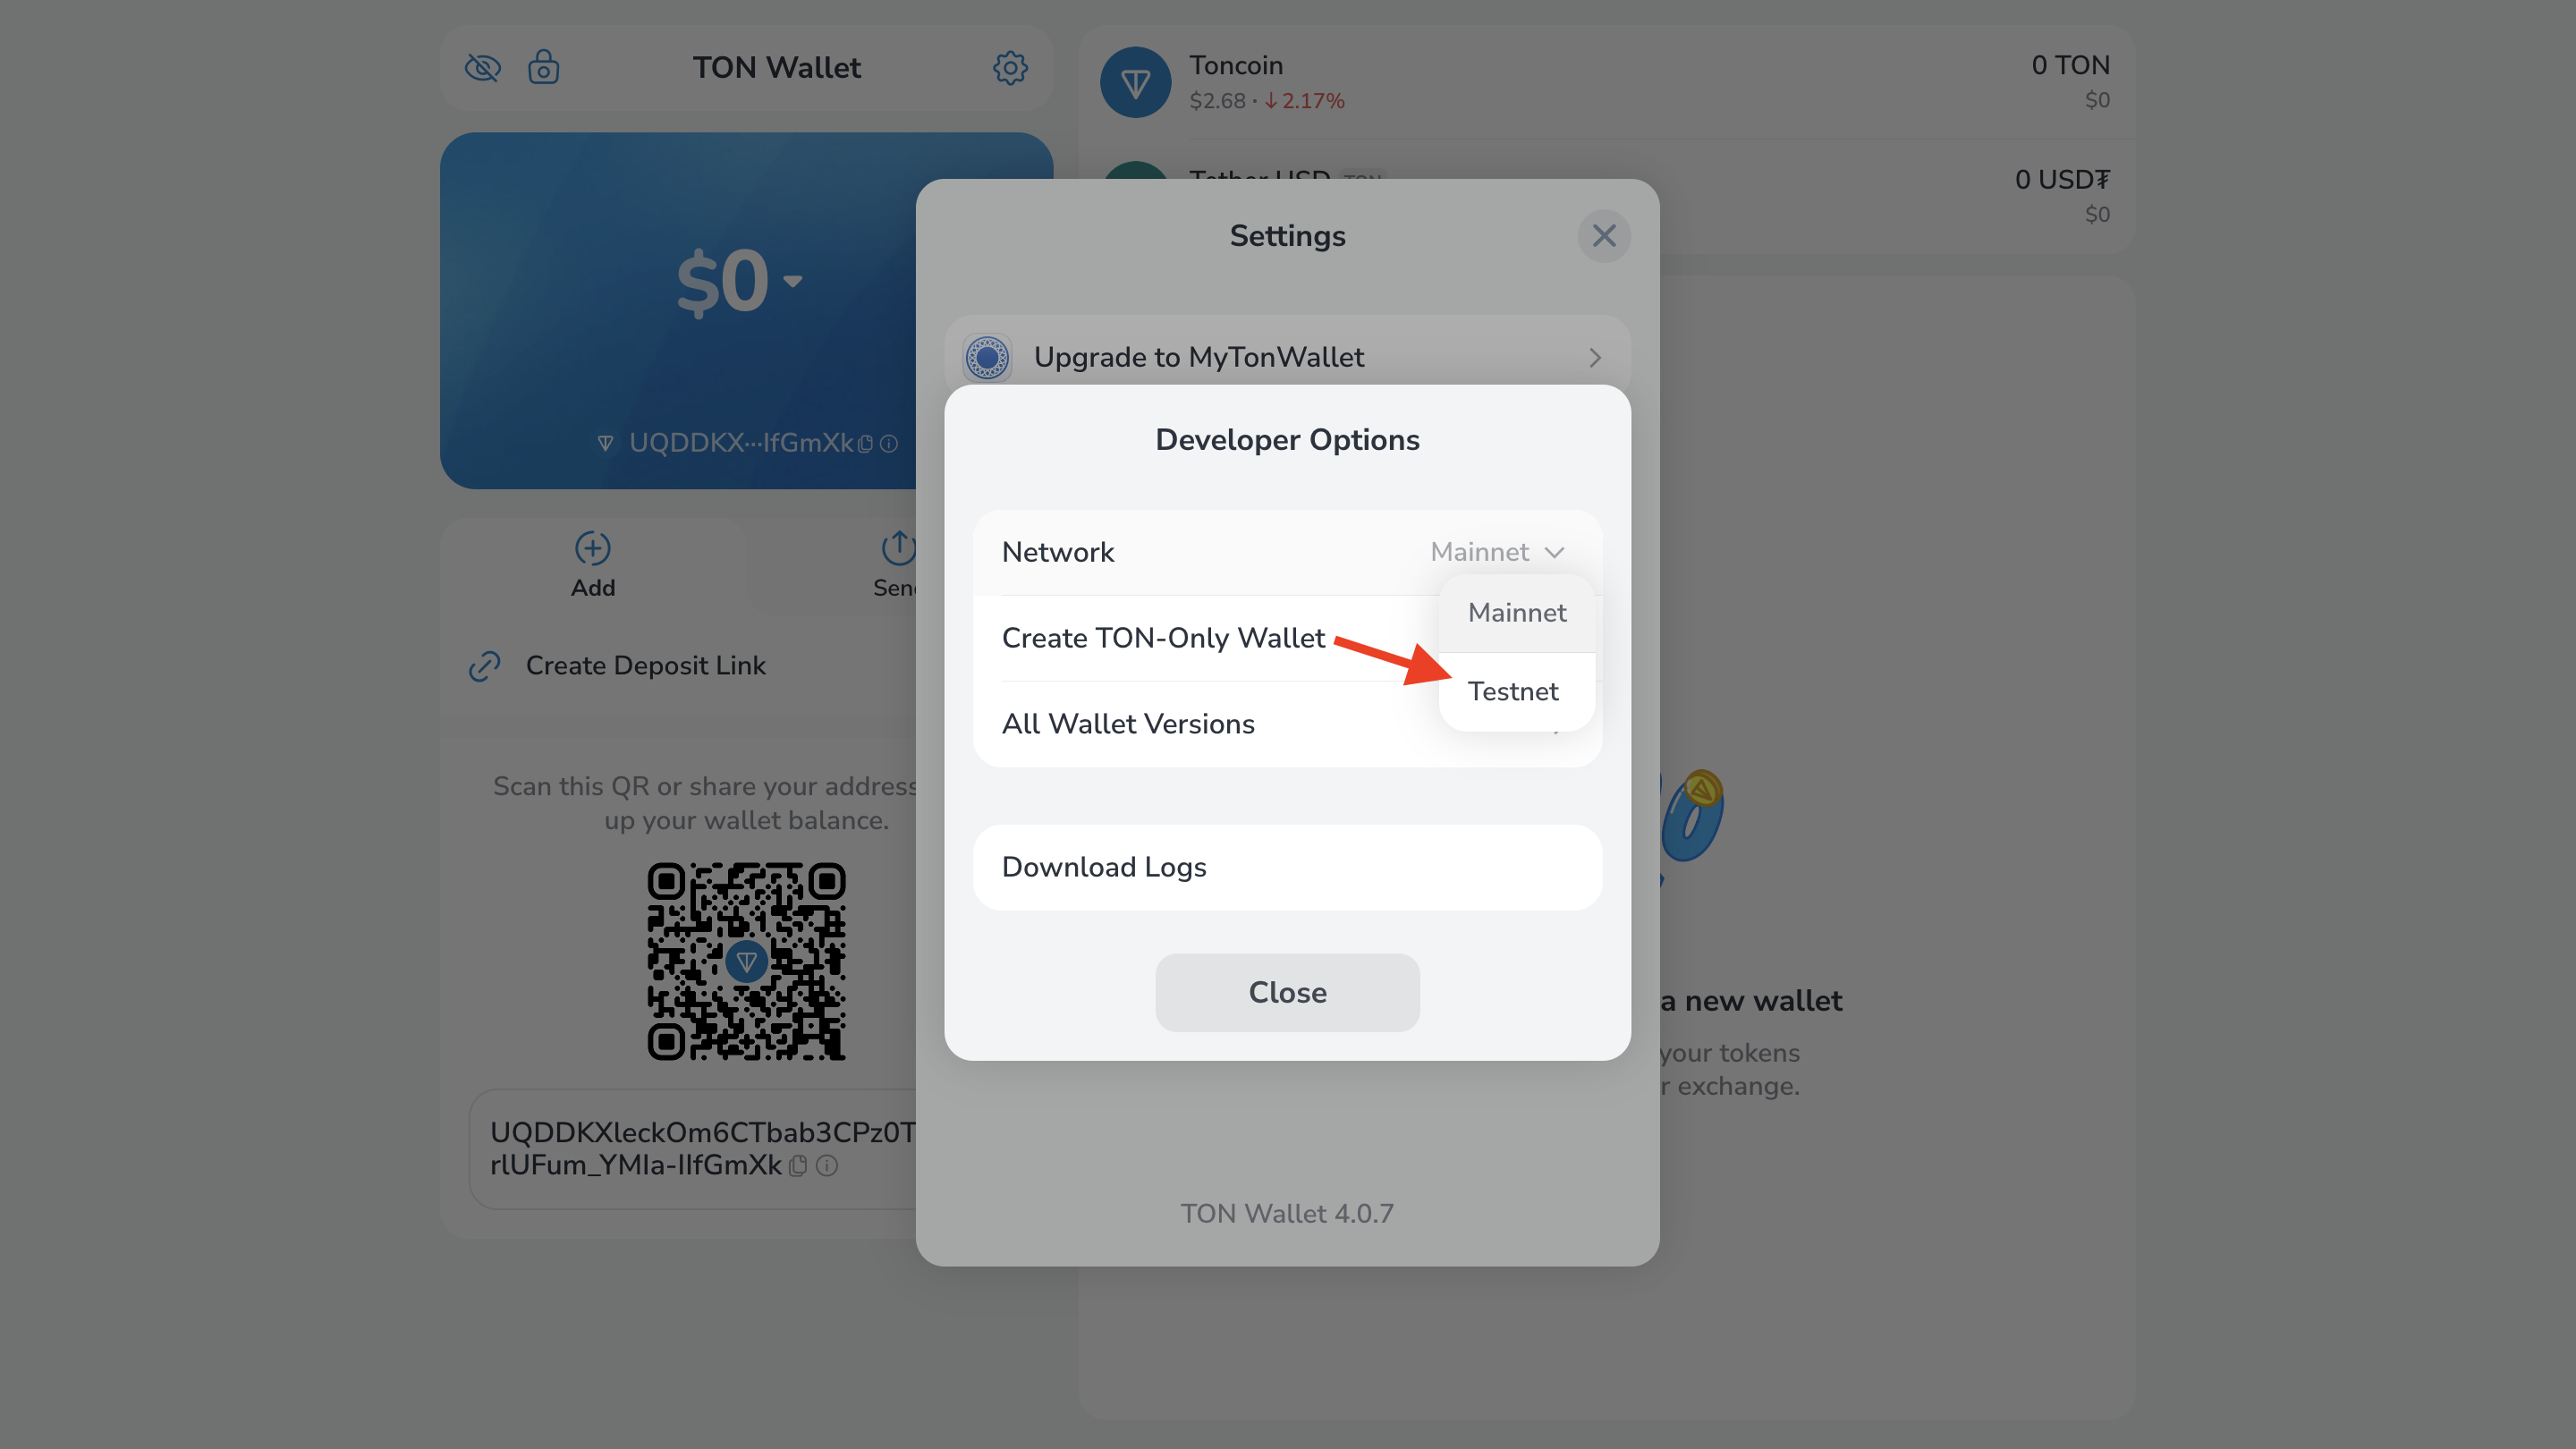
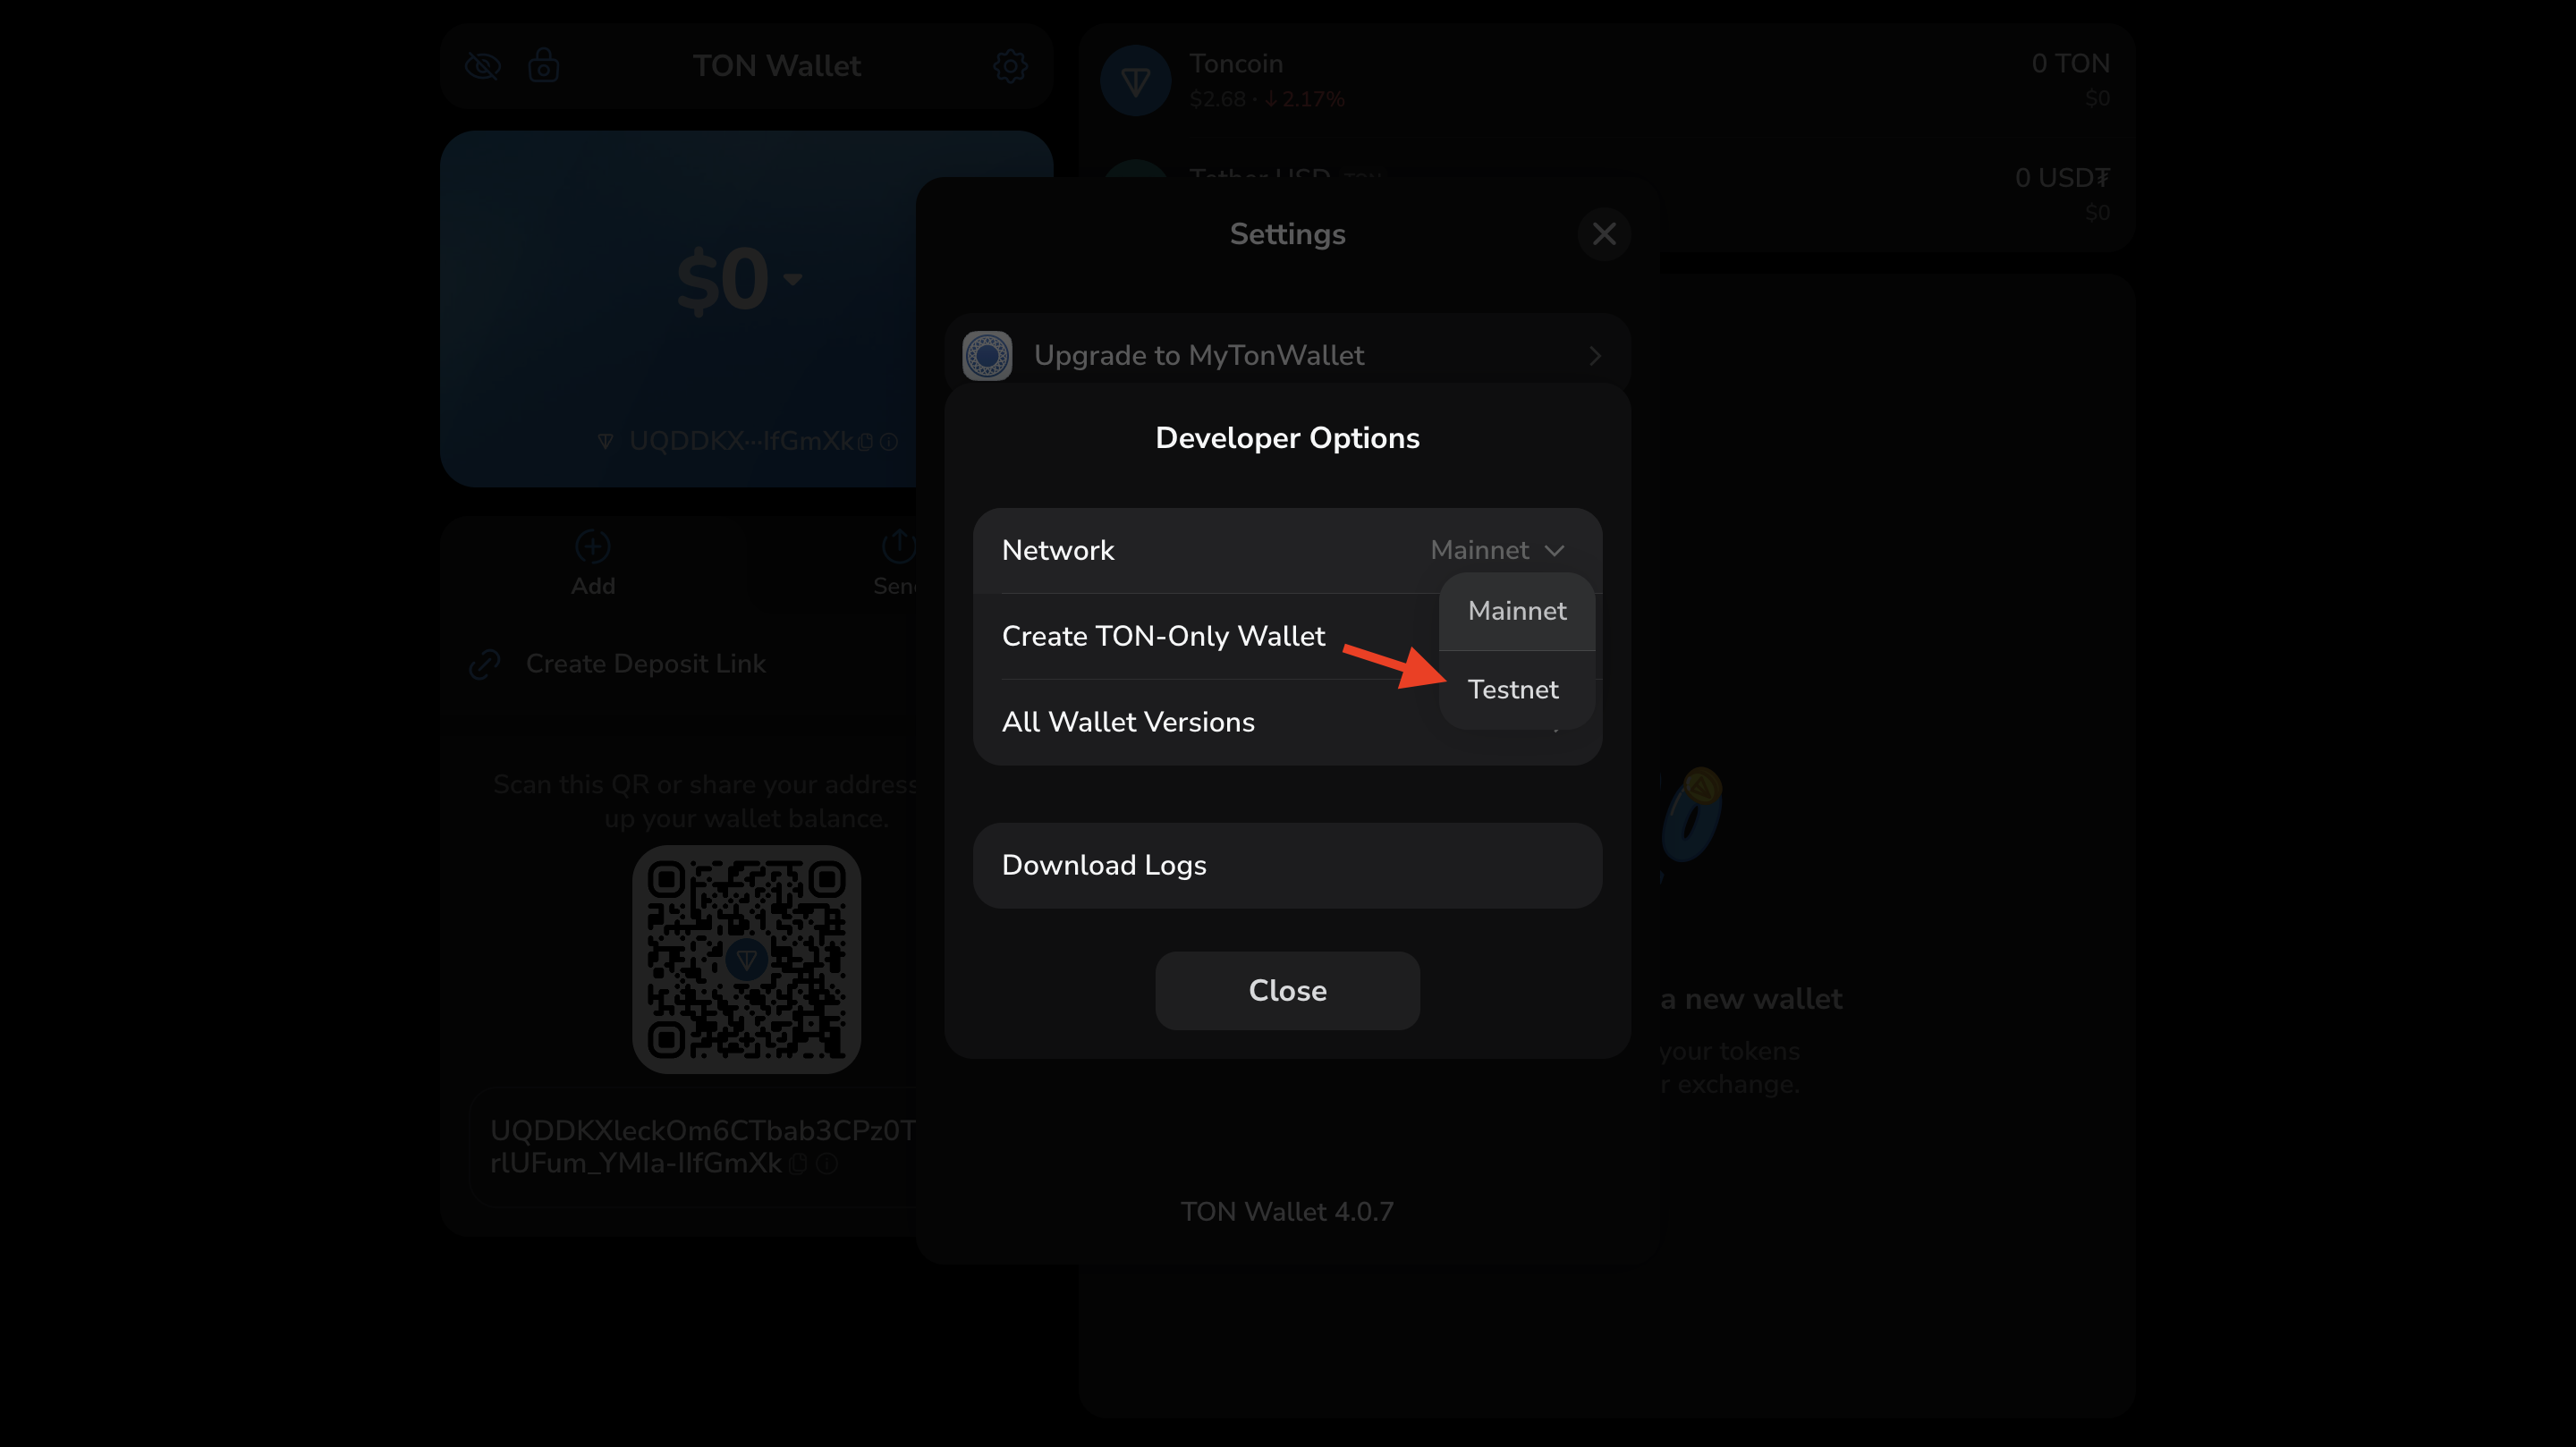
- Click the “Settings” icon.
- In the settings window, double-click the wallet version number to open developer options.
- In the “Developer options” panel, locate the “Networks” section and select “Testnet”.
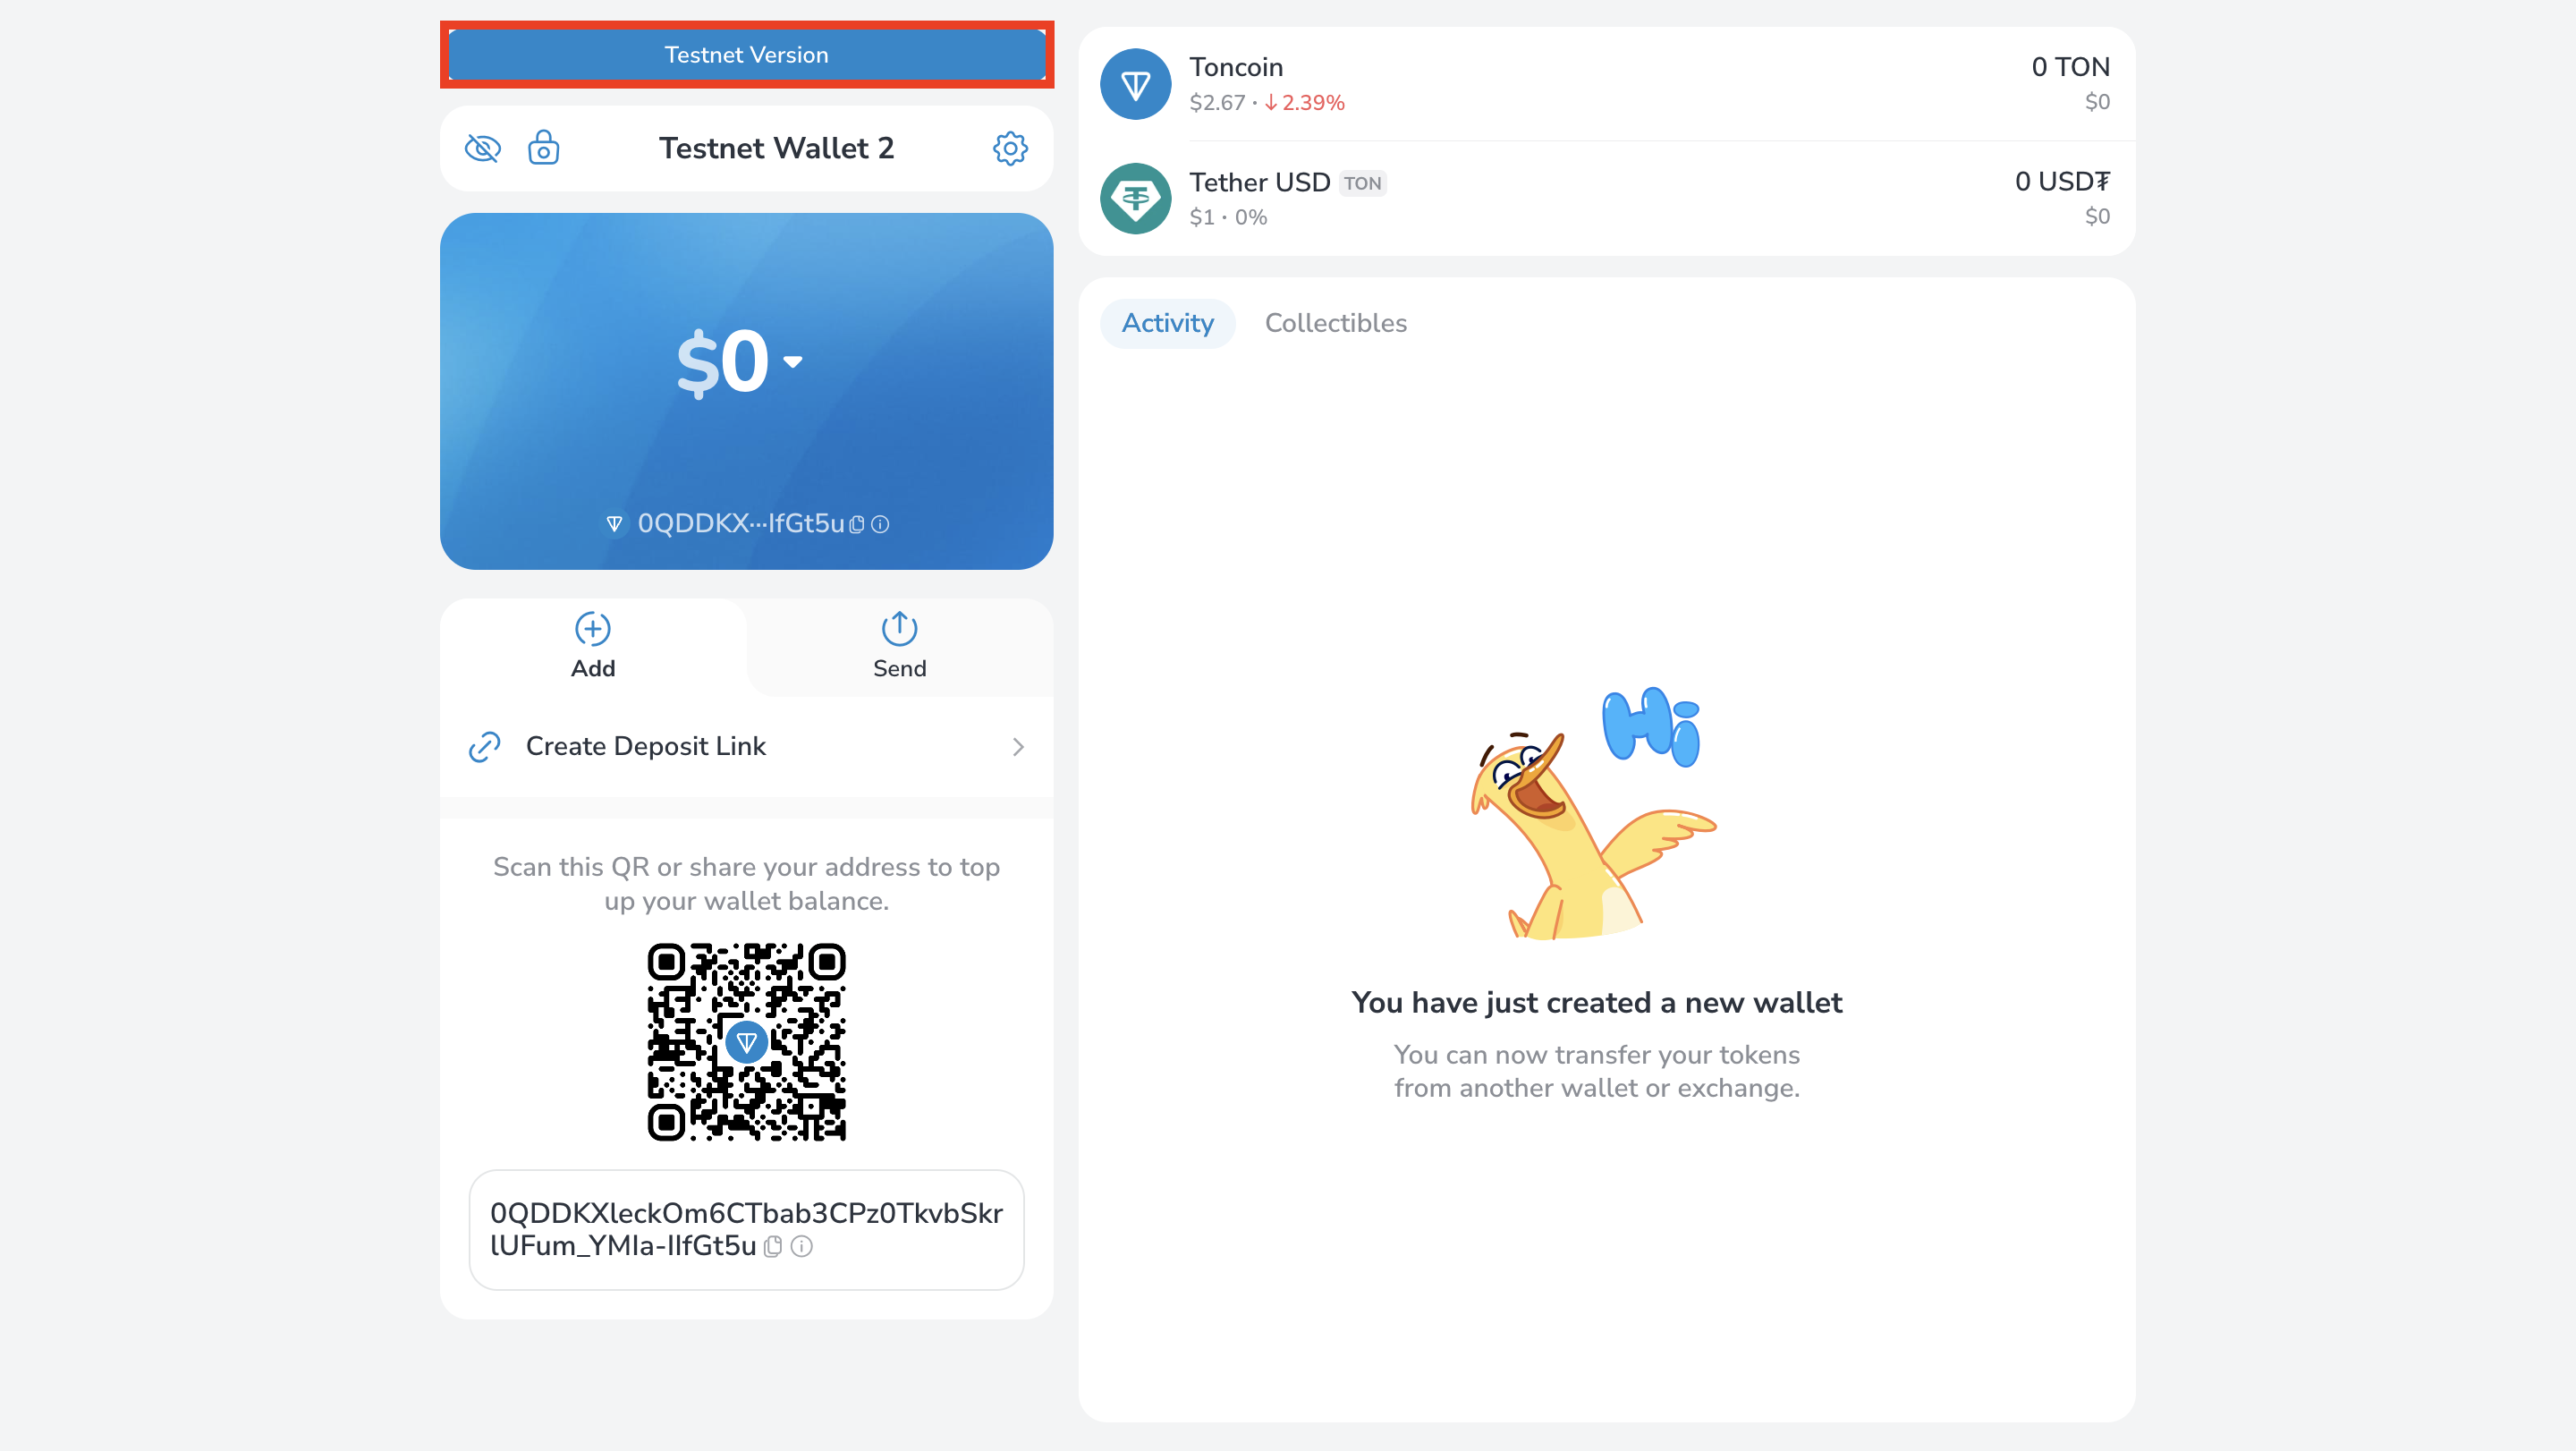
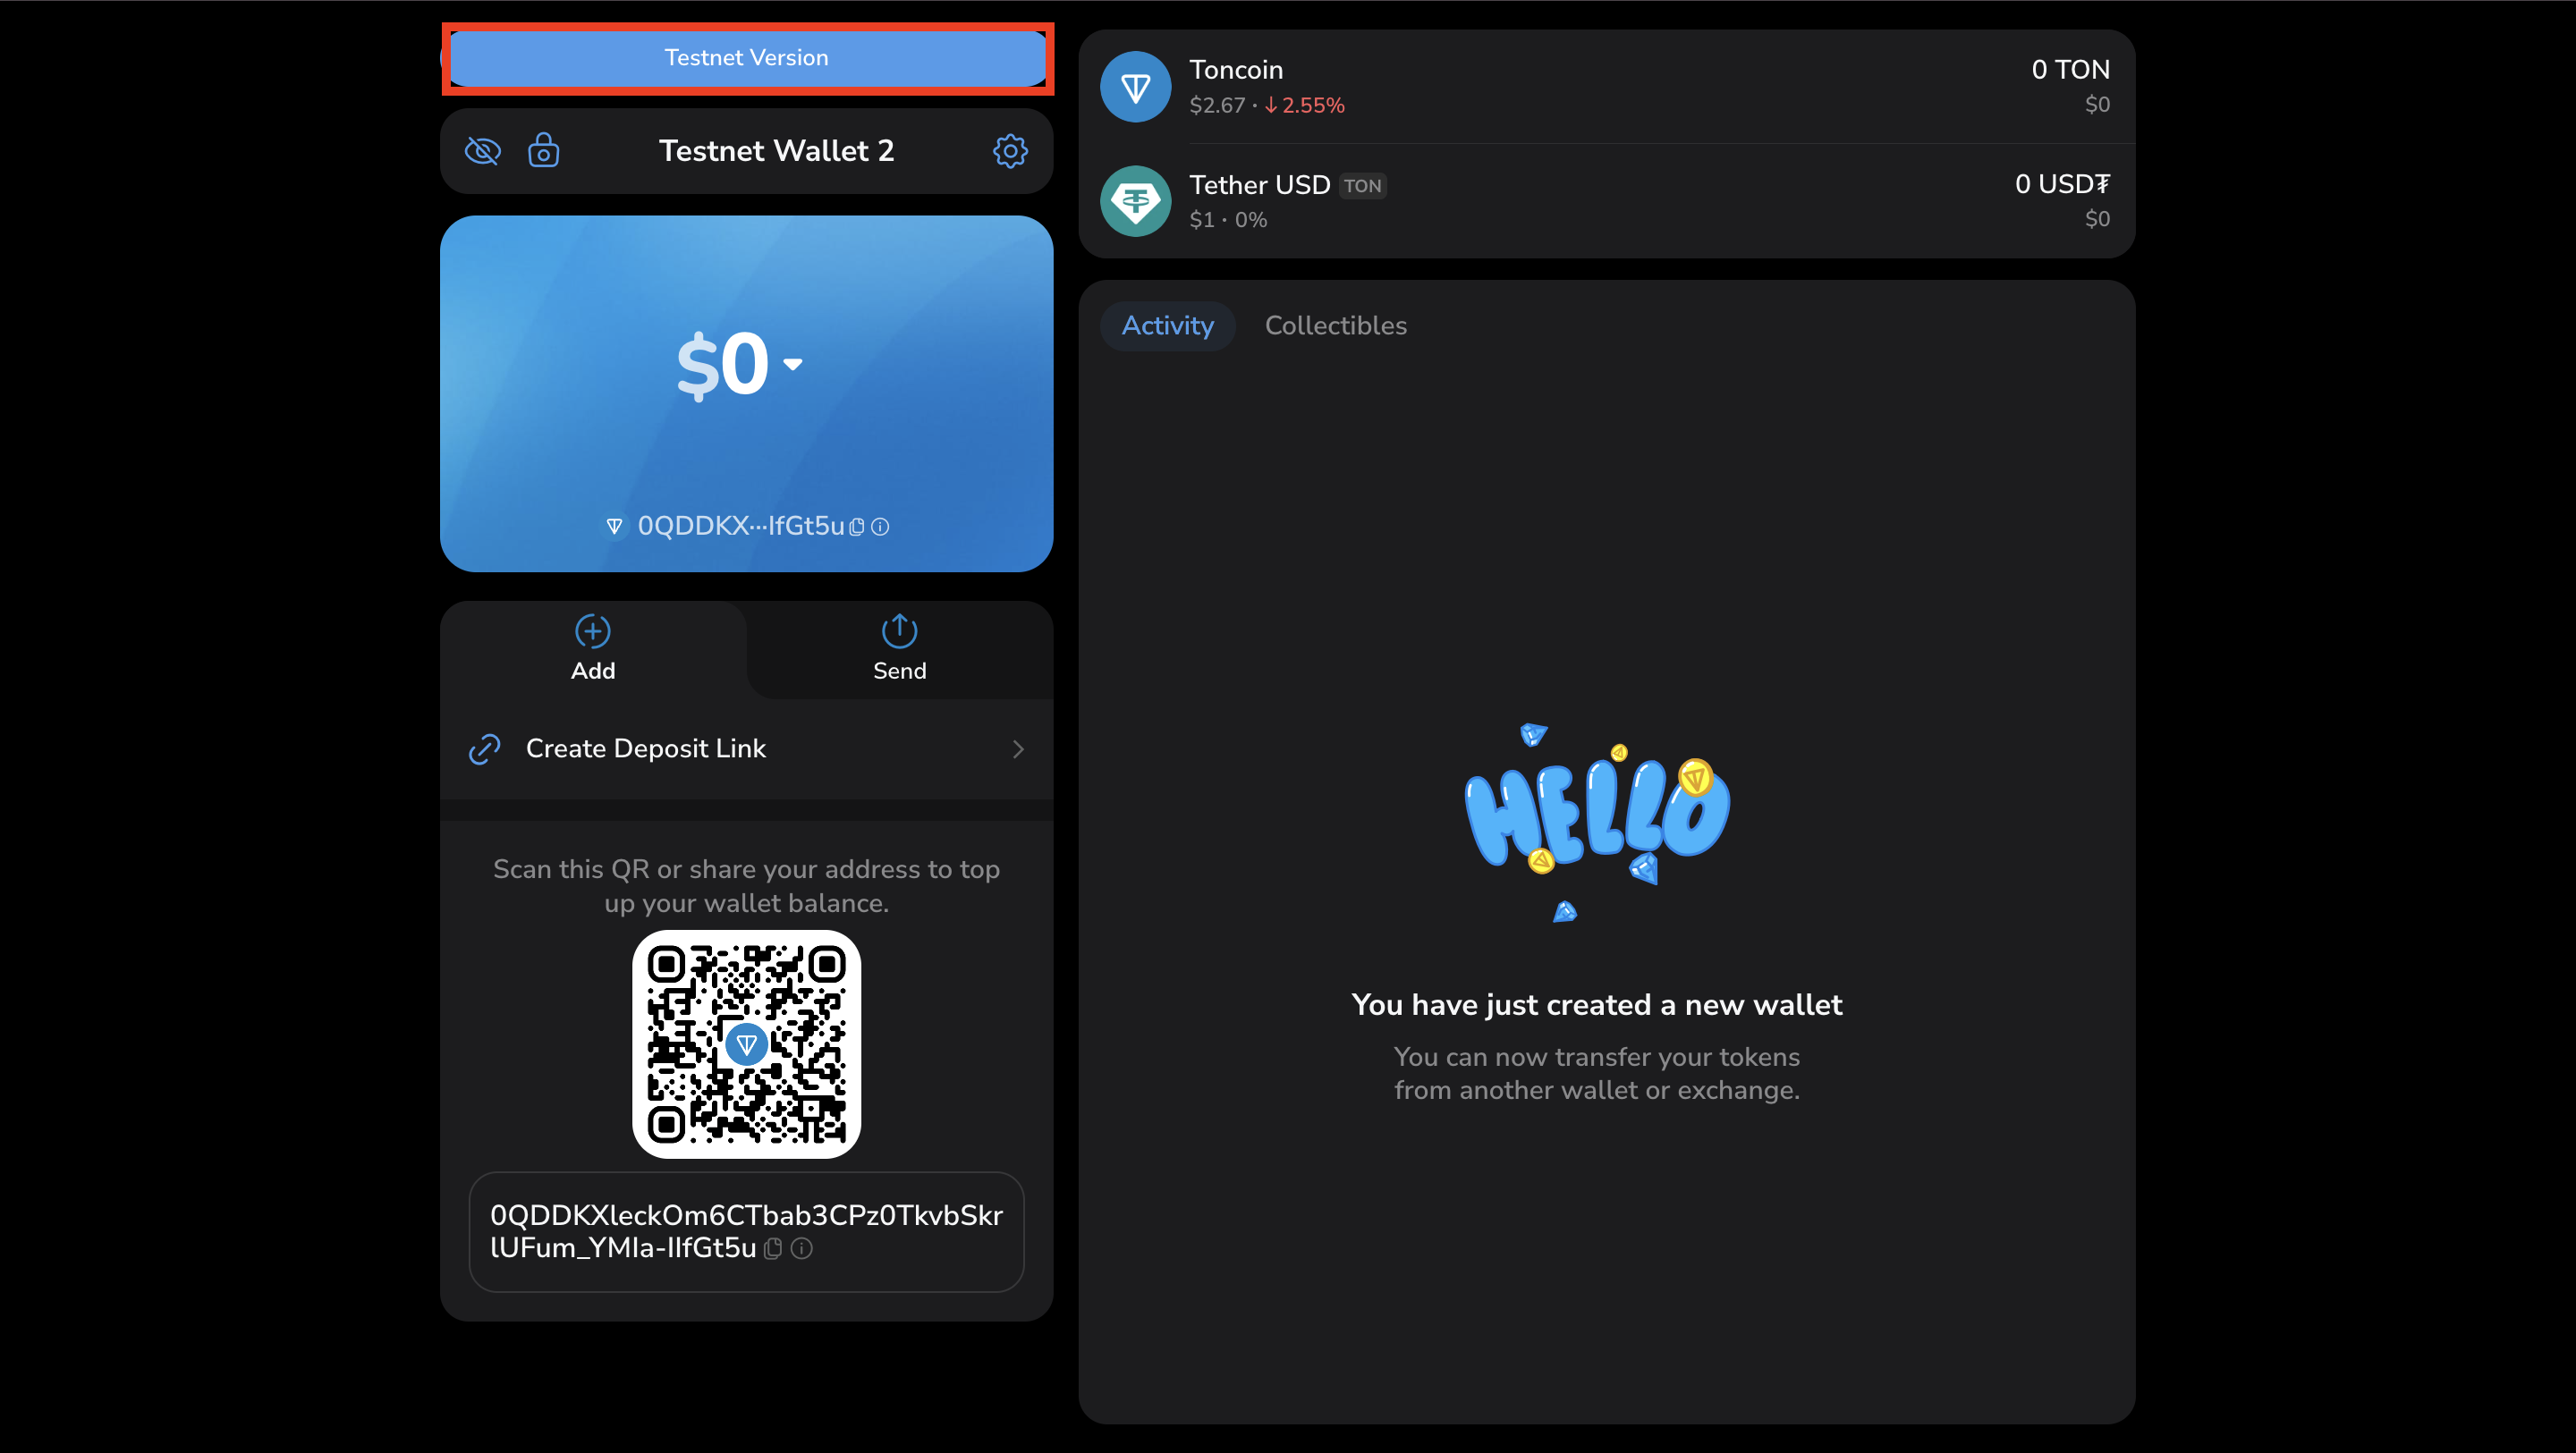
- The app automatically returns to the main screen, where the interface indicates that you’re now using the Testnet version.
Mainnet and Testnet use different user-friendly address formats —the raw address is the same, but its text representation differs.See How to read and write TON addresses for details on address formats and conversion.
 You can also check the wallet contract version in Testnet — the settings UI displays the same version information as on Mainnet.
Deploy a wallet
A wallet must be deployed before use — its account state must beactive.
Newly created wallets have the default state nonexist, meaning the account has no code, data, or balance.
Check the account state
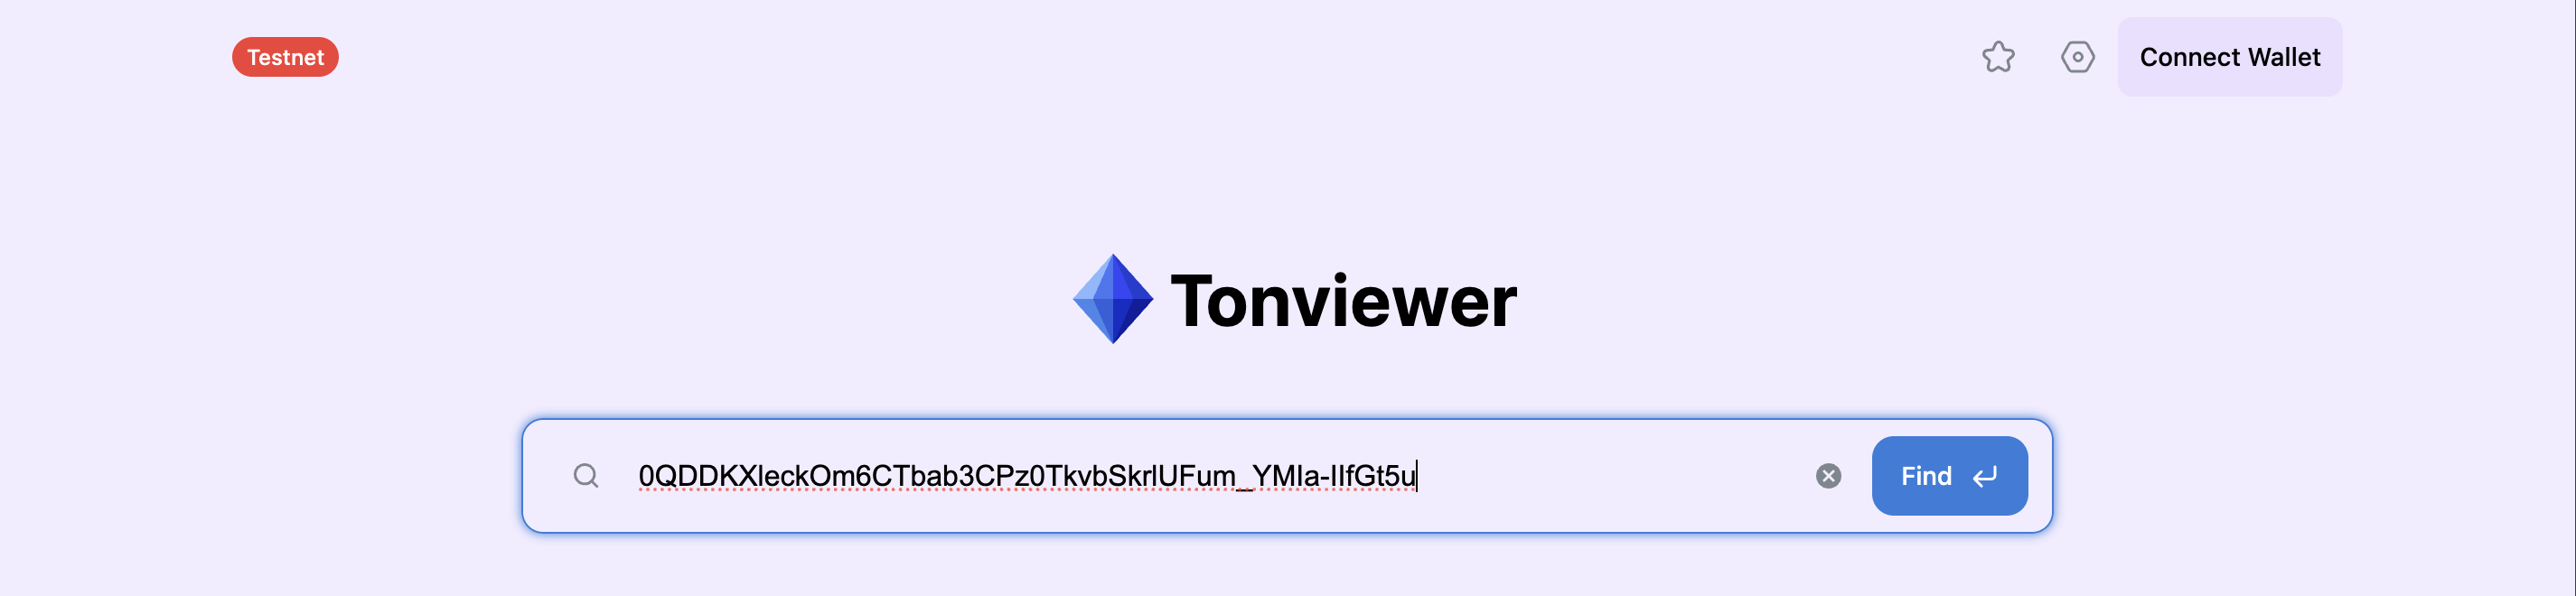
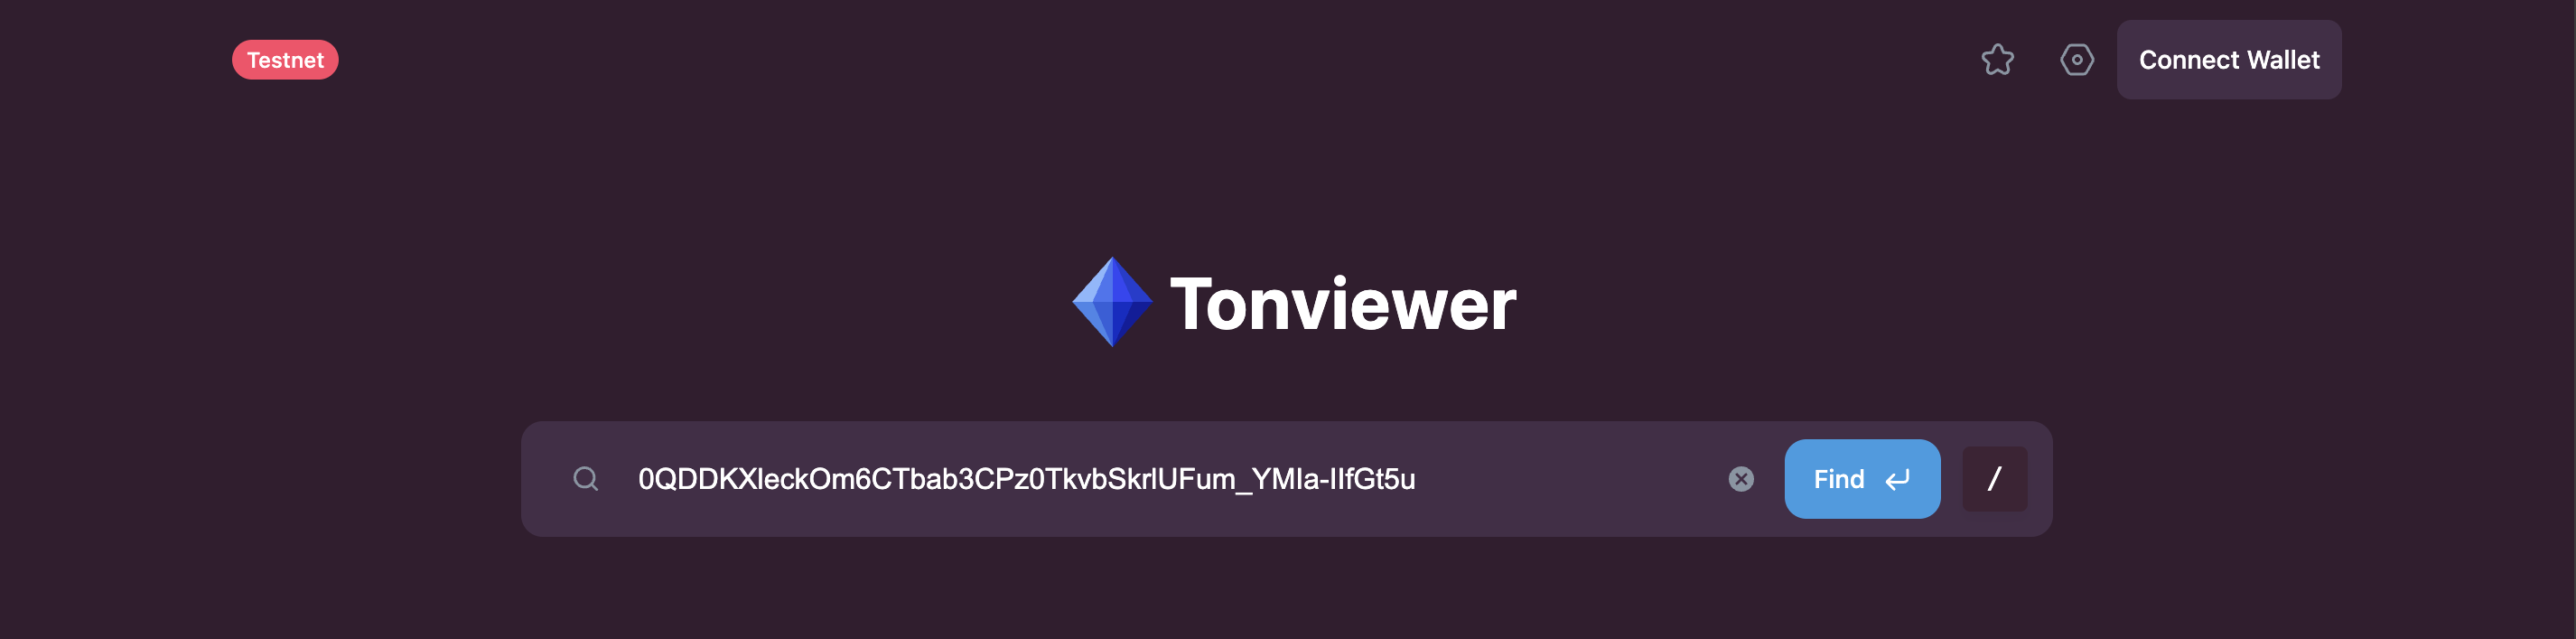
Use a blockchain explorer to inspect the account. For Testnet, use Tonviewer Testnet.- Paste your address into the search bar.
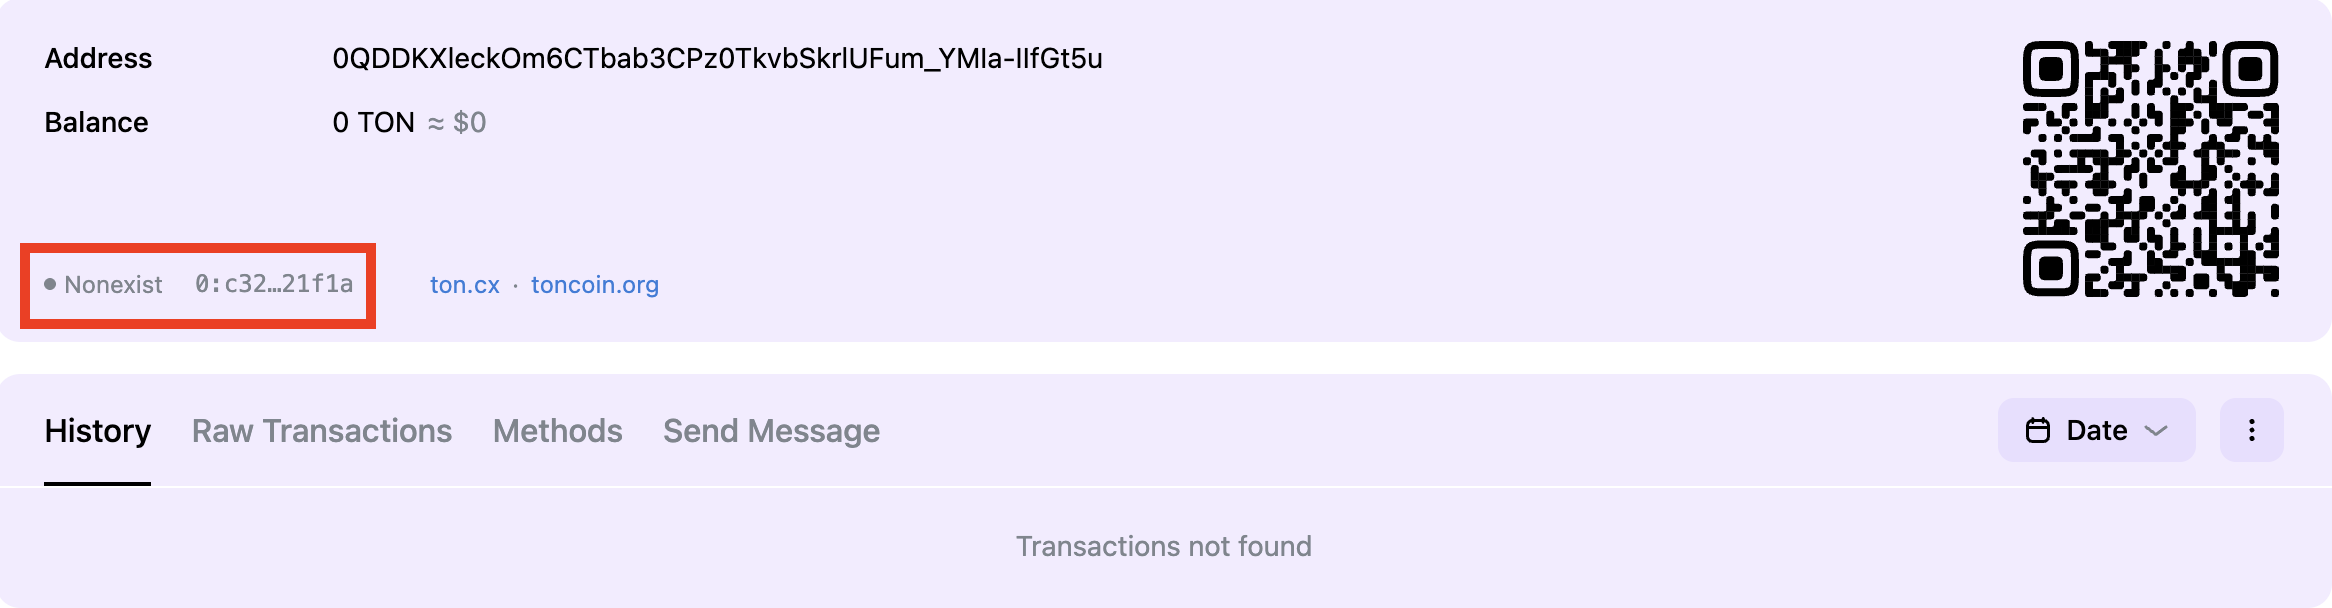
- The account details will appear. In a newly created wallet, the status is
nonexist, indicating the wallet is not deployed.

Fund the wallet
A wallet must receive funds before deployment.- On Testnet, request free Testnet Toncoins from the TON Testnet Faucet.
uninit state. This means the account has a balance, but the smart contract is not yet deployed.


Send the first transaction
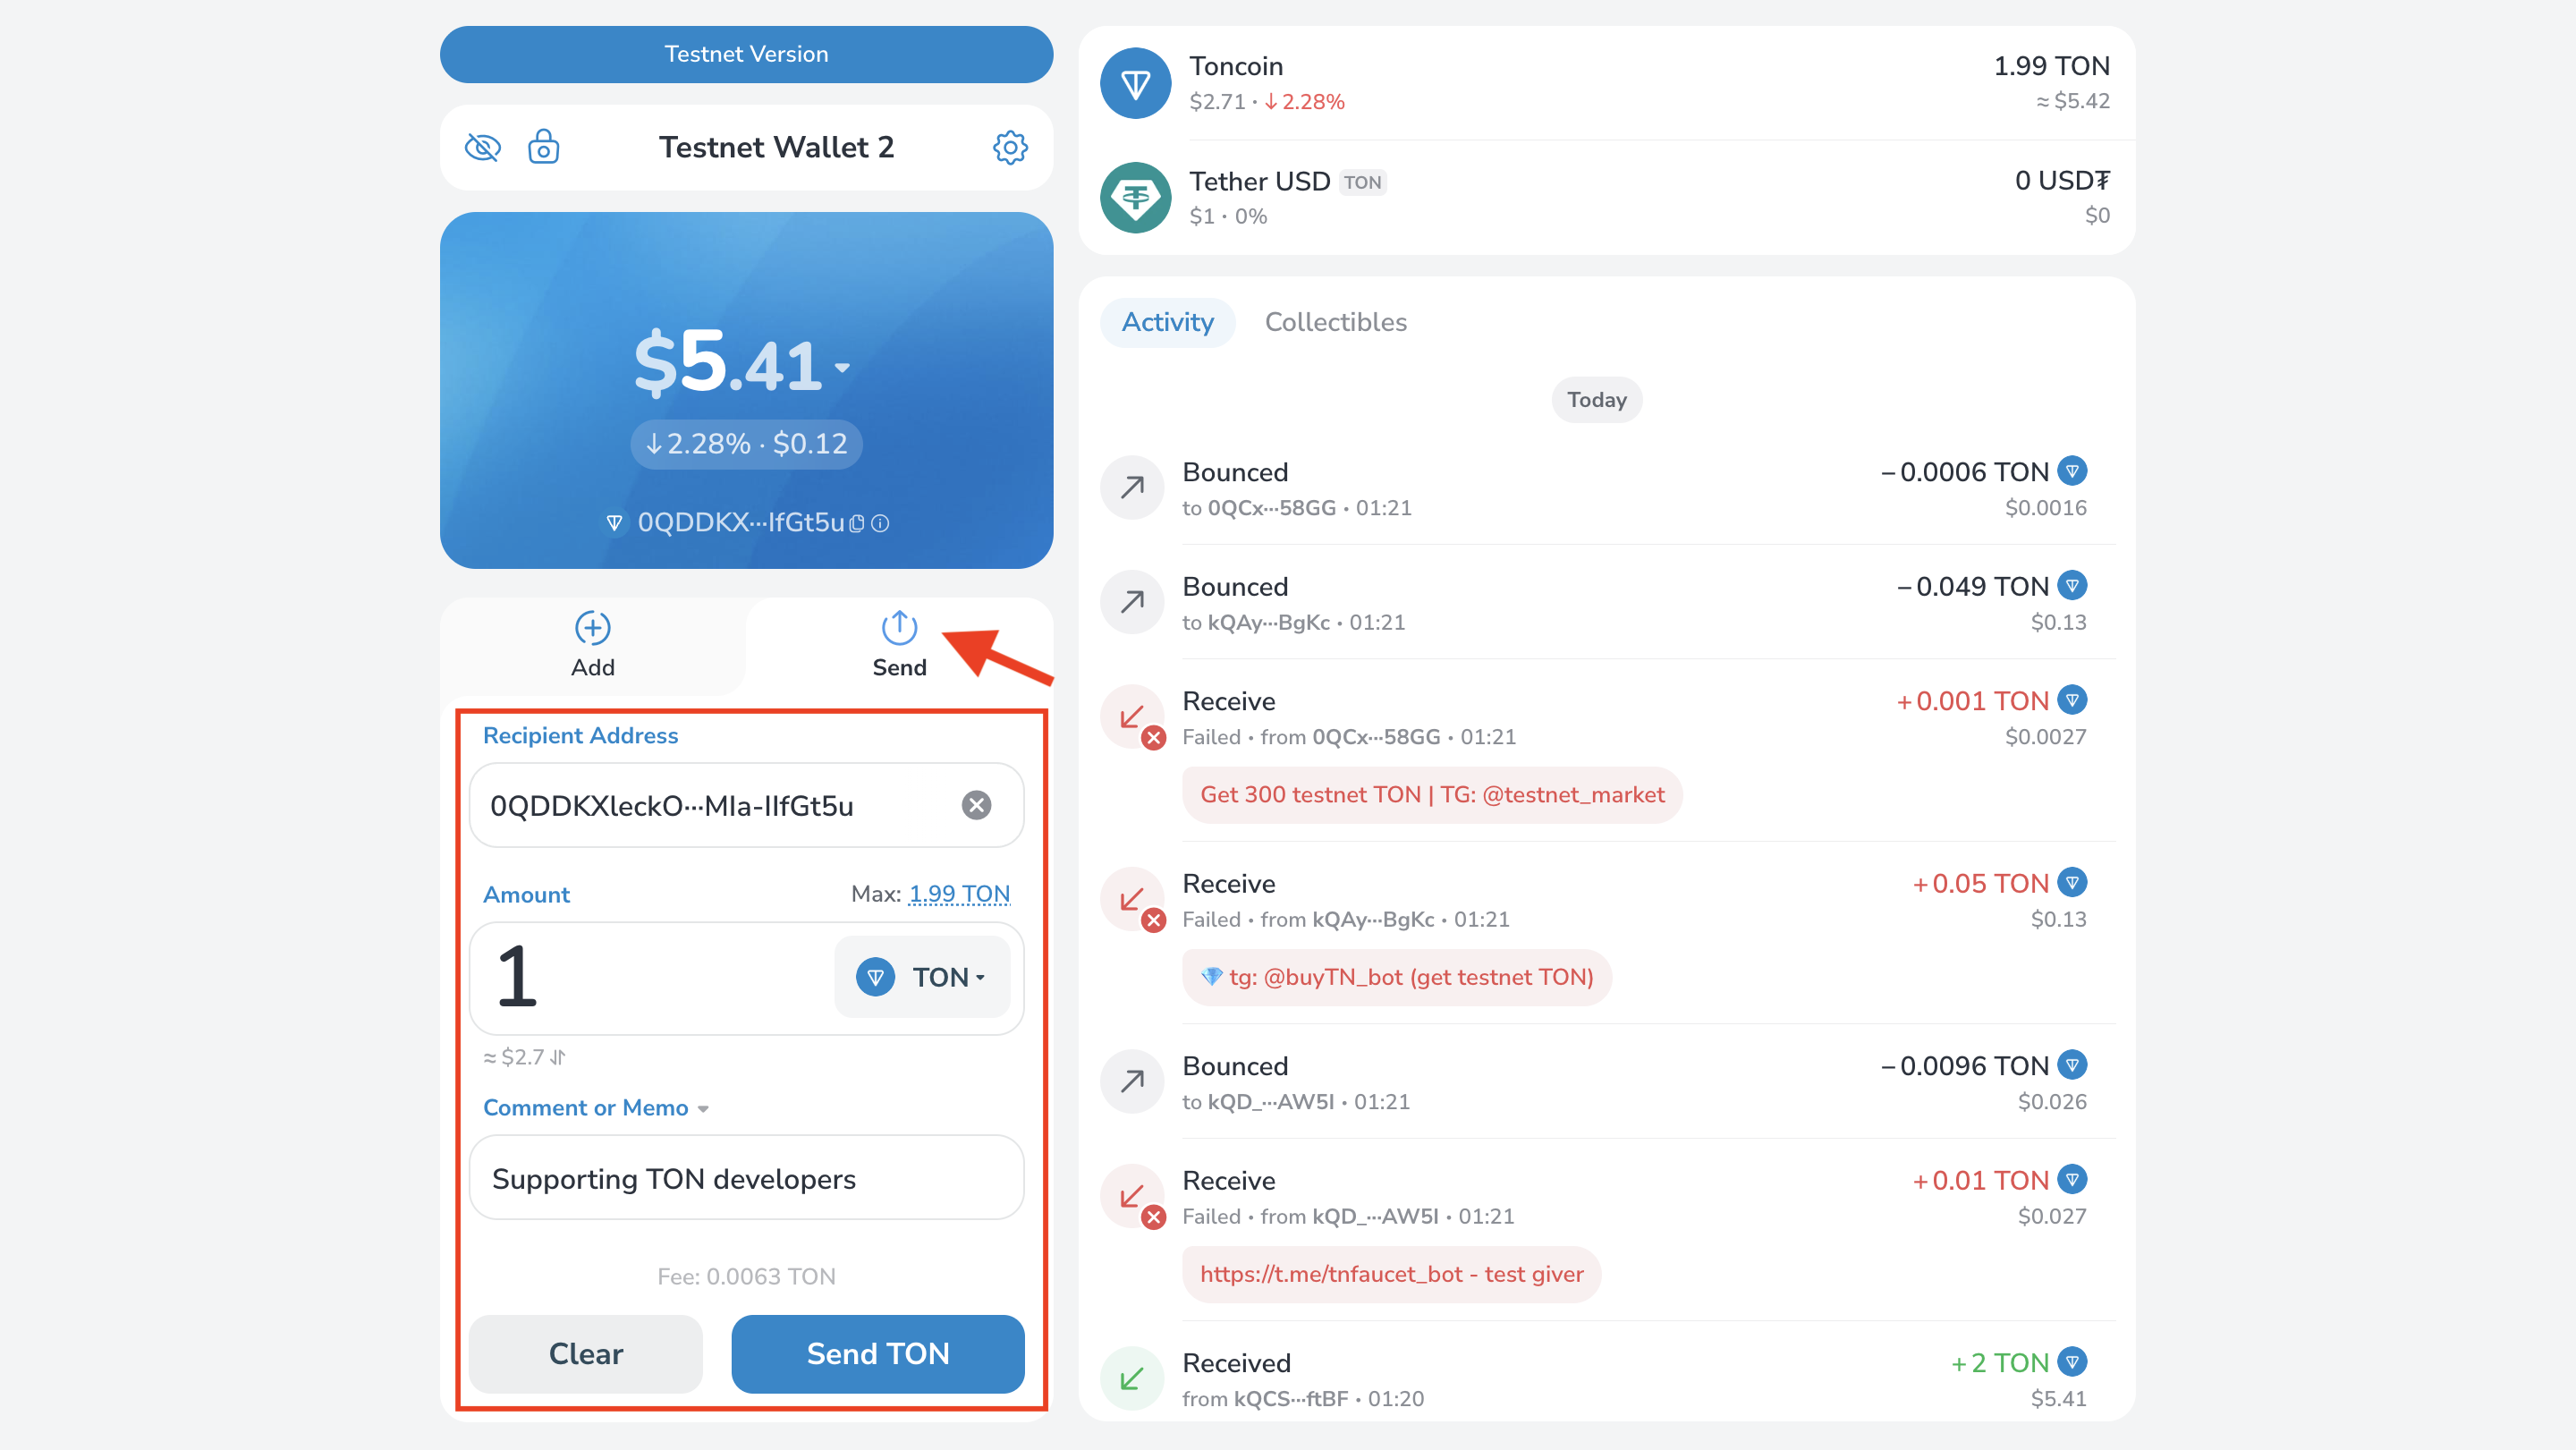
With TON in the account, the wallet can be deployed. Deployment occurs when the wallet processes its first transaction. In this example, we send TON to the account itself on Testnet to observe the transaction and wallet deployment on-chain.Funds at riskOn-chain transfers are irreversible — verify the recipient and amount before confirming. Use the Testnet for practice; only use the Mainnet when you intend to make a real transfer.
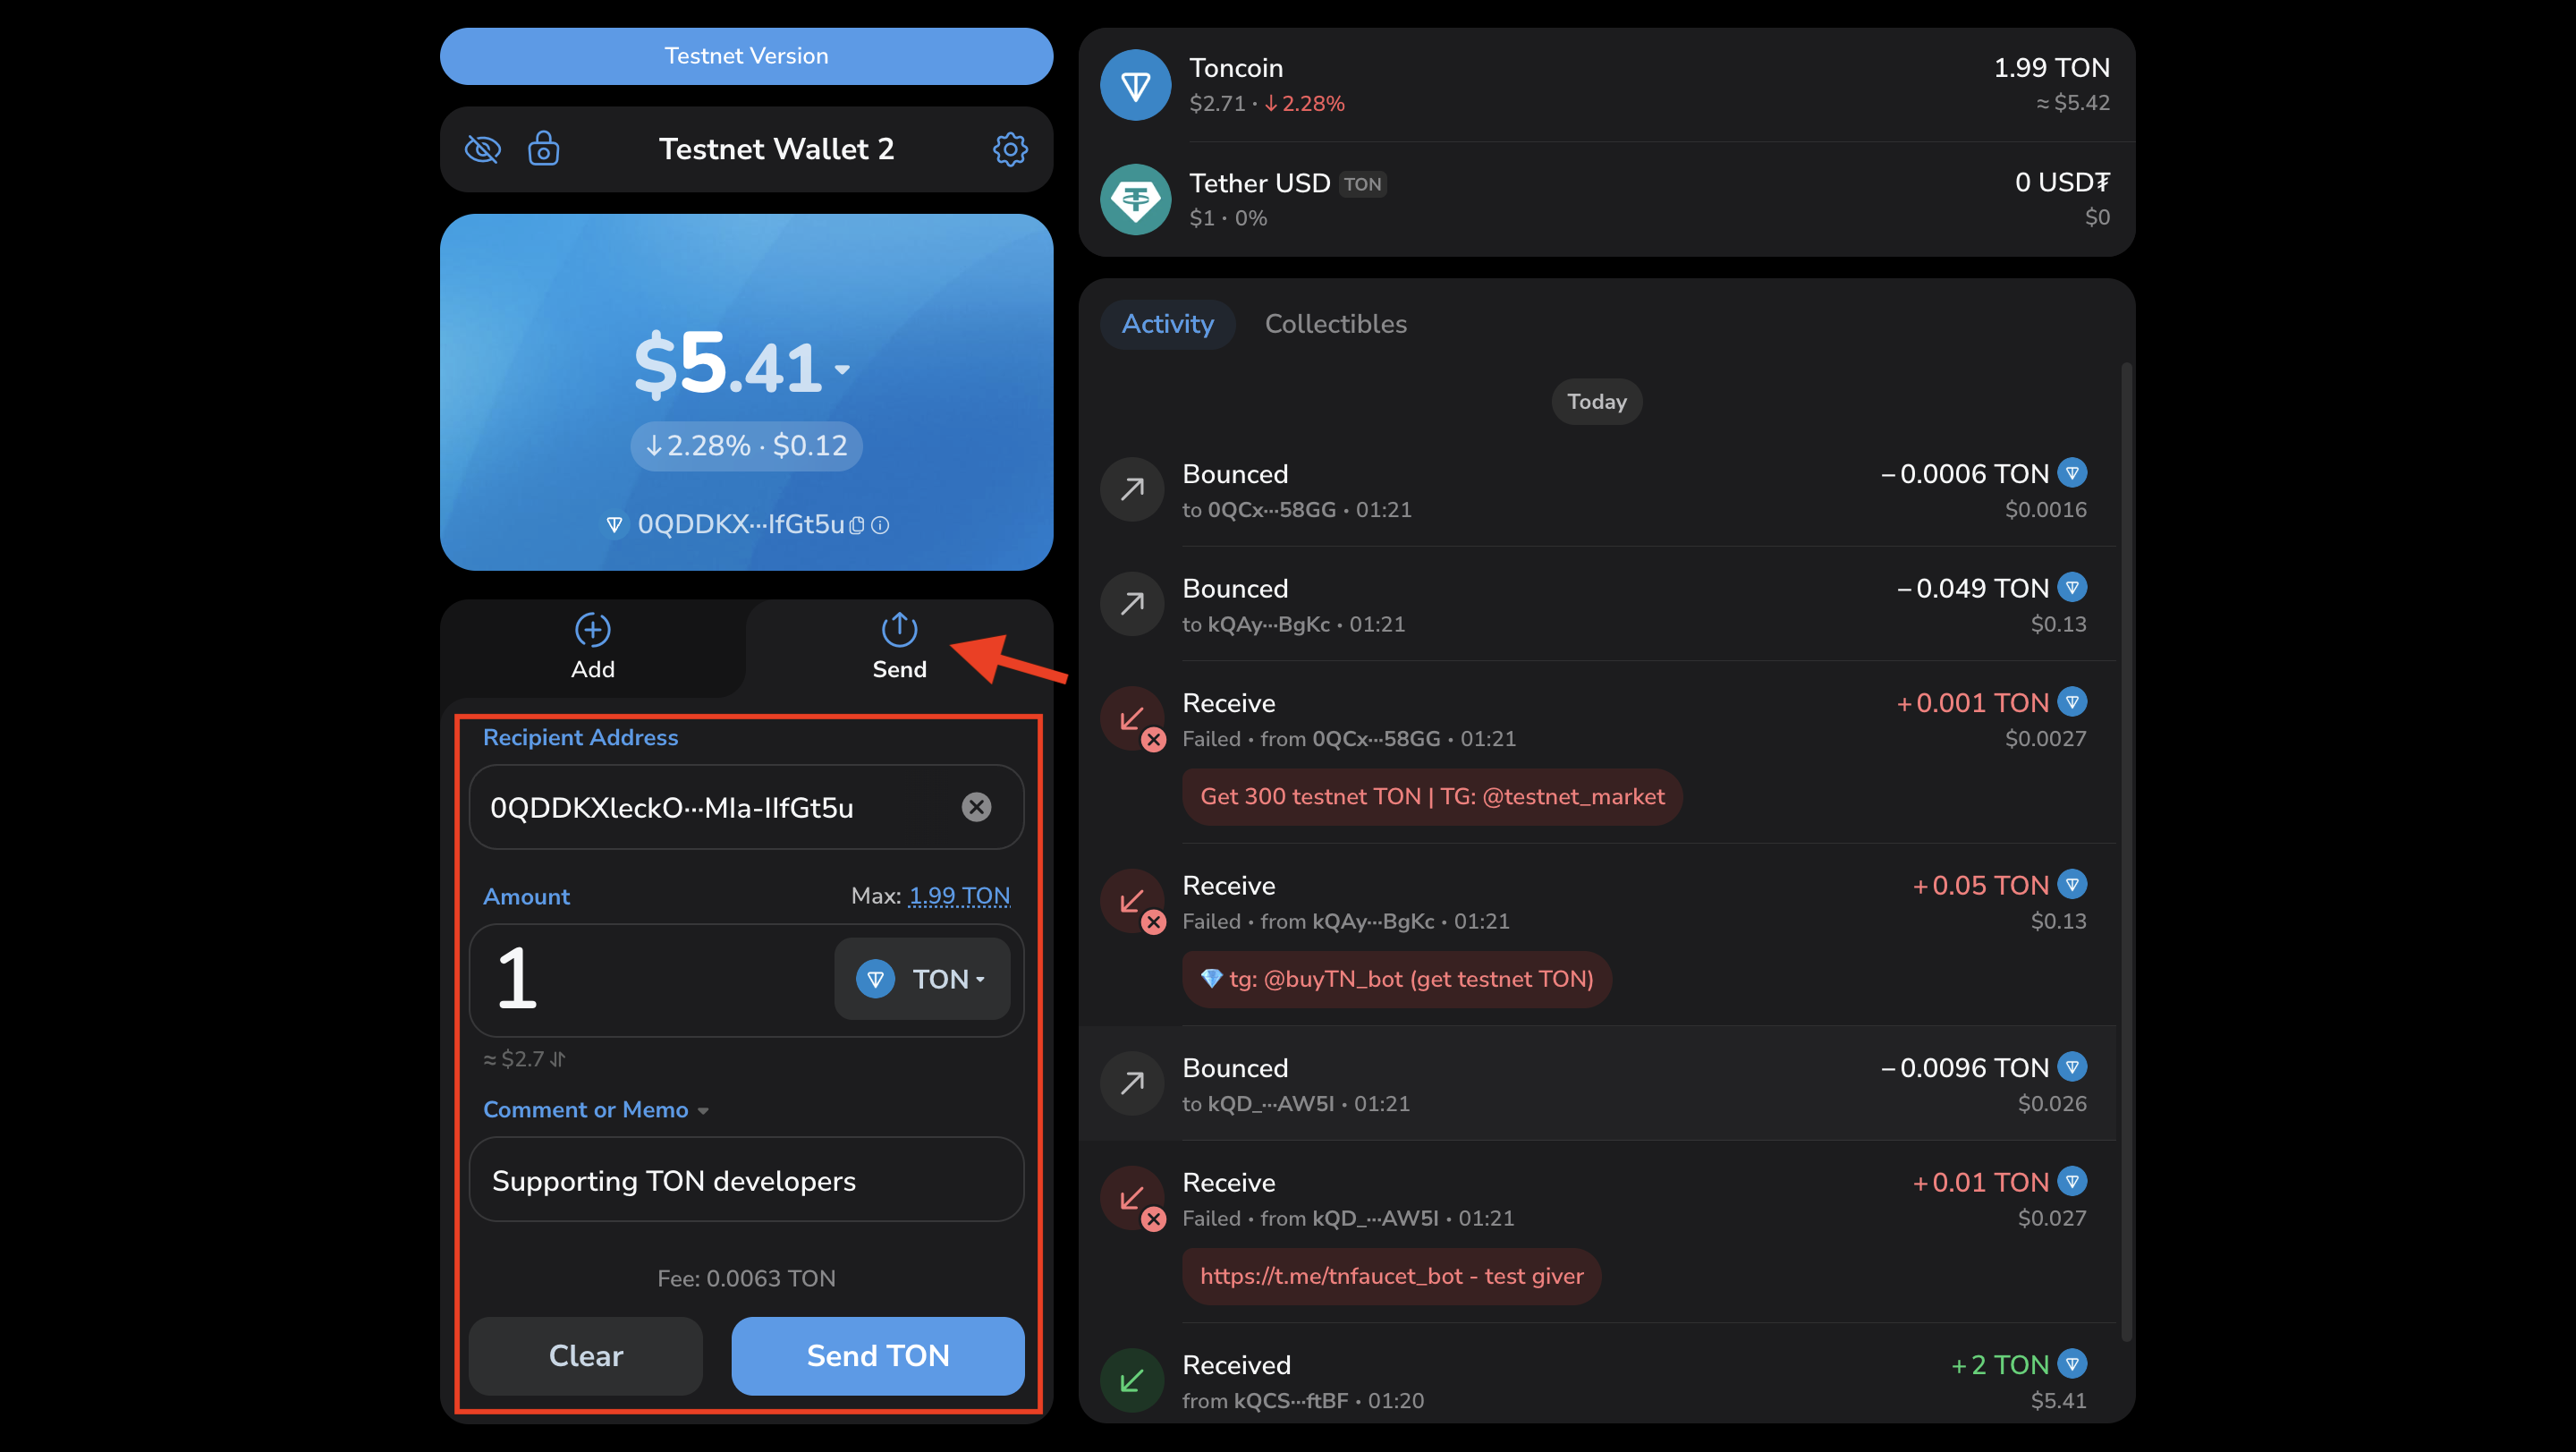
- Click “Send”, enter your wallet address in “Recipient Address”, and the “Amount” of TON. Optionally, add a comment. Click “Send TON”.
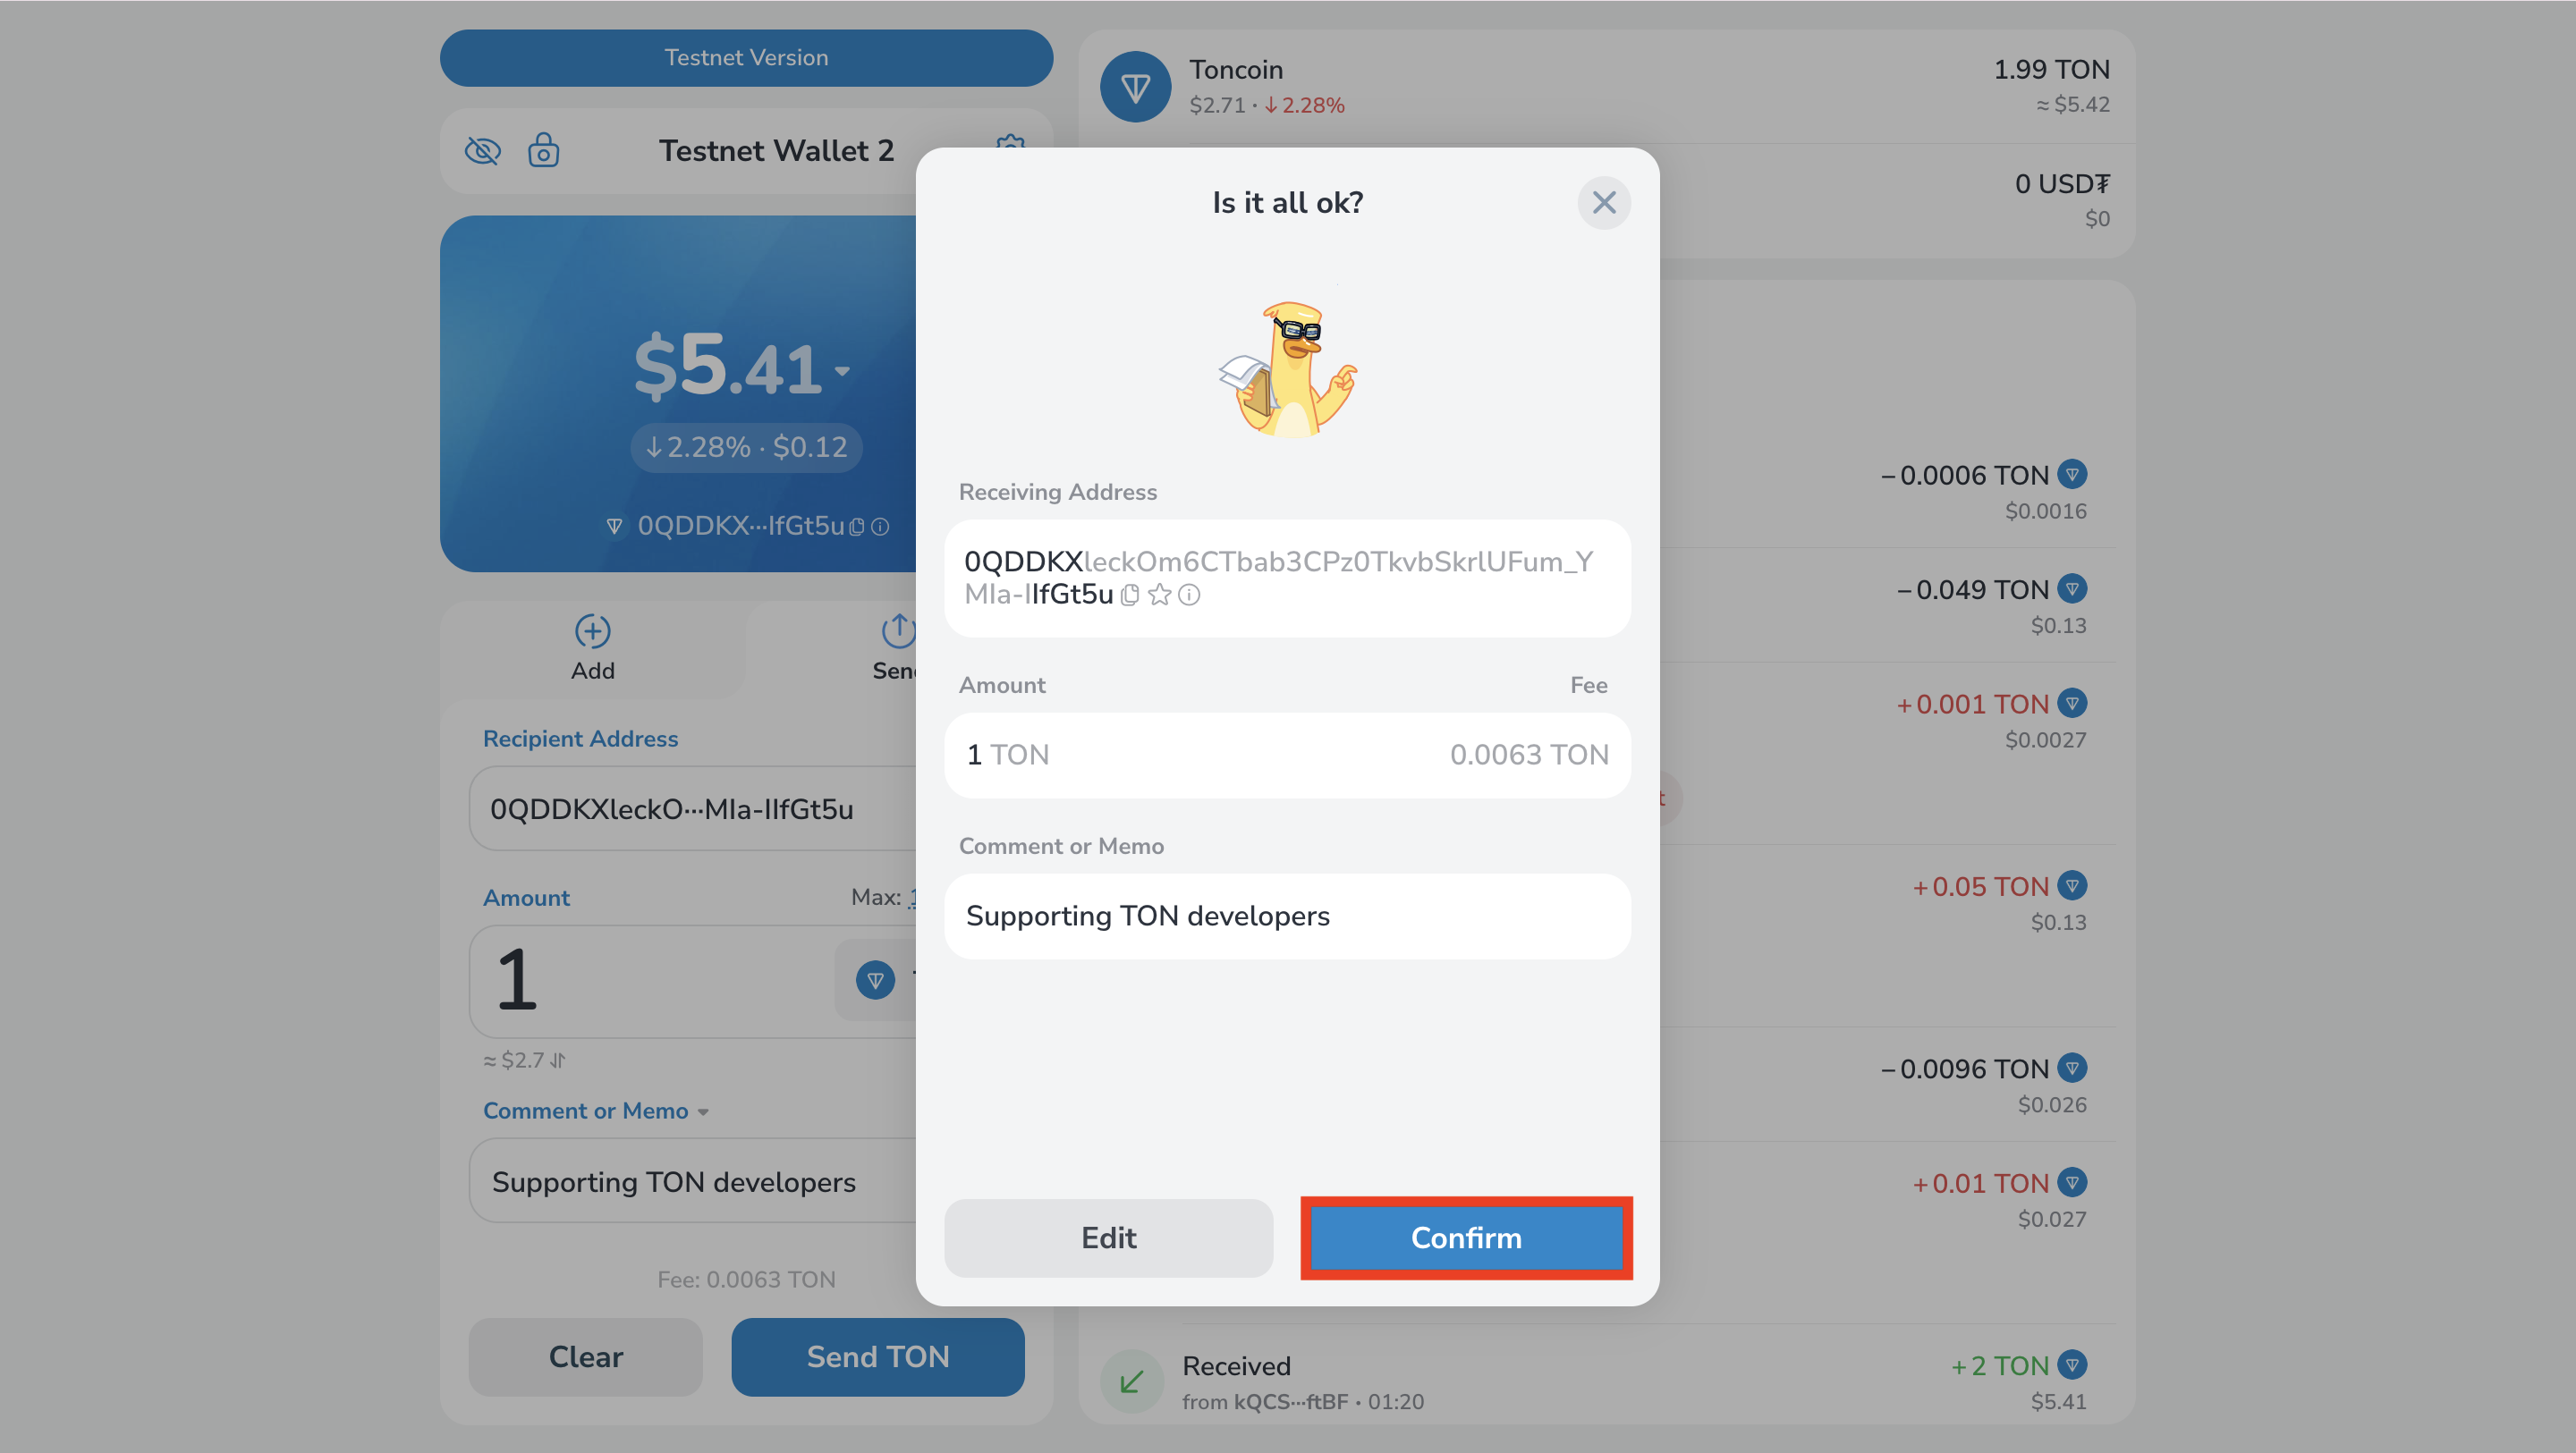
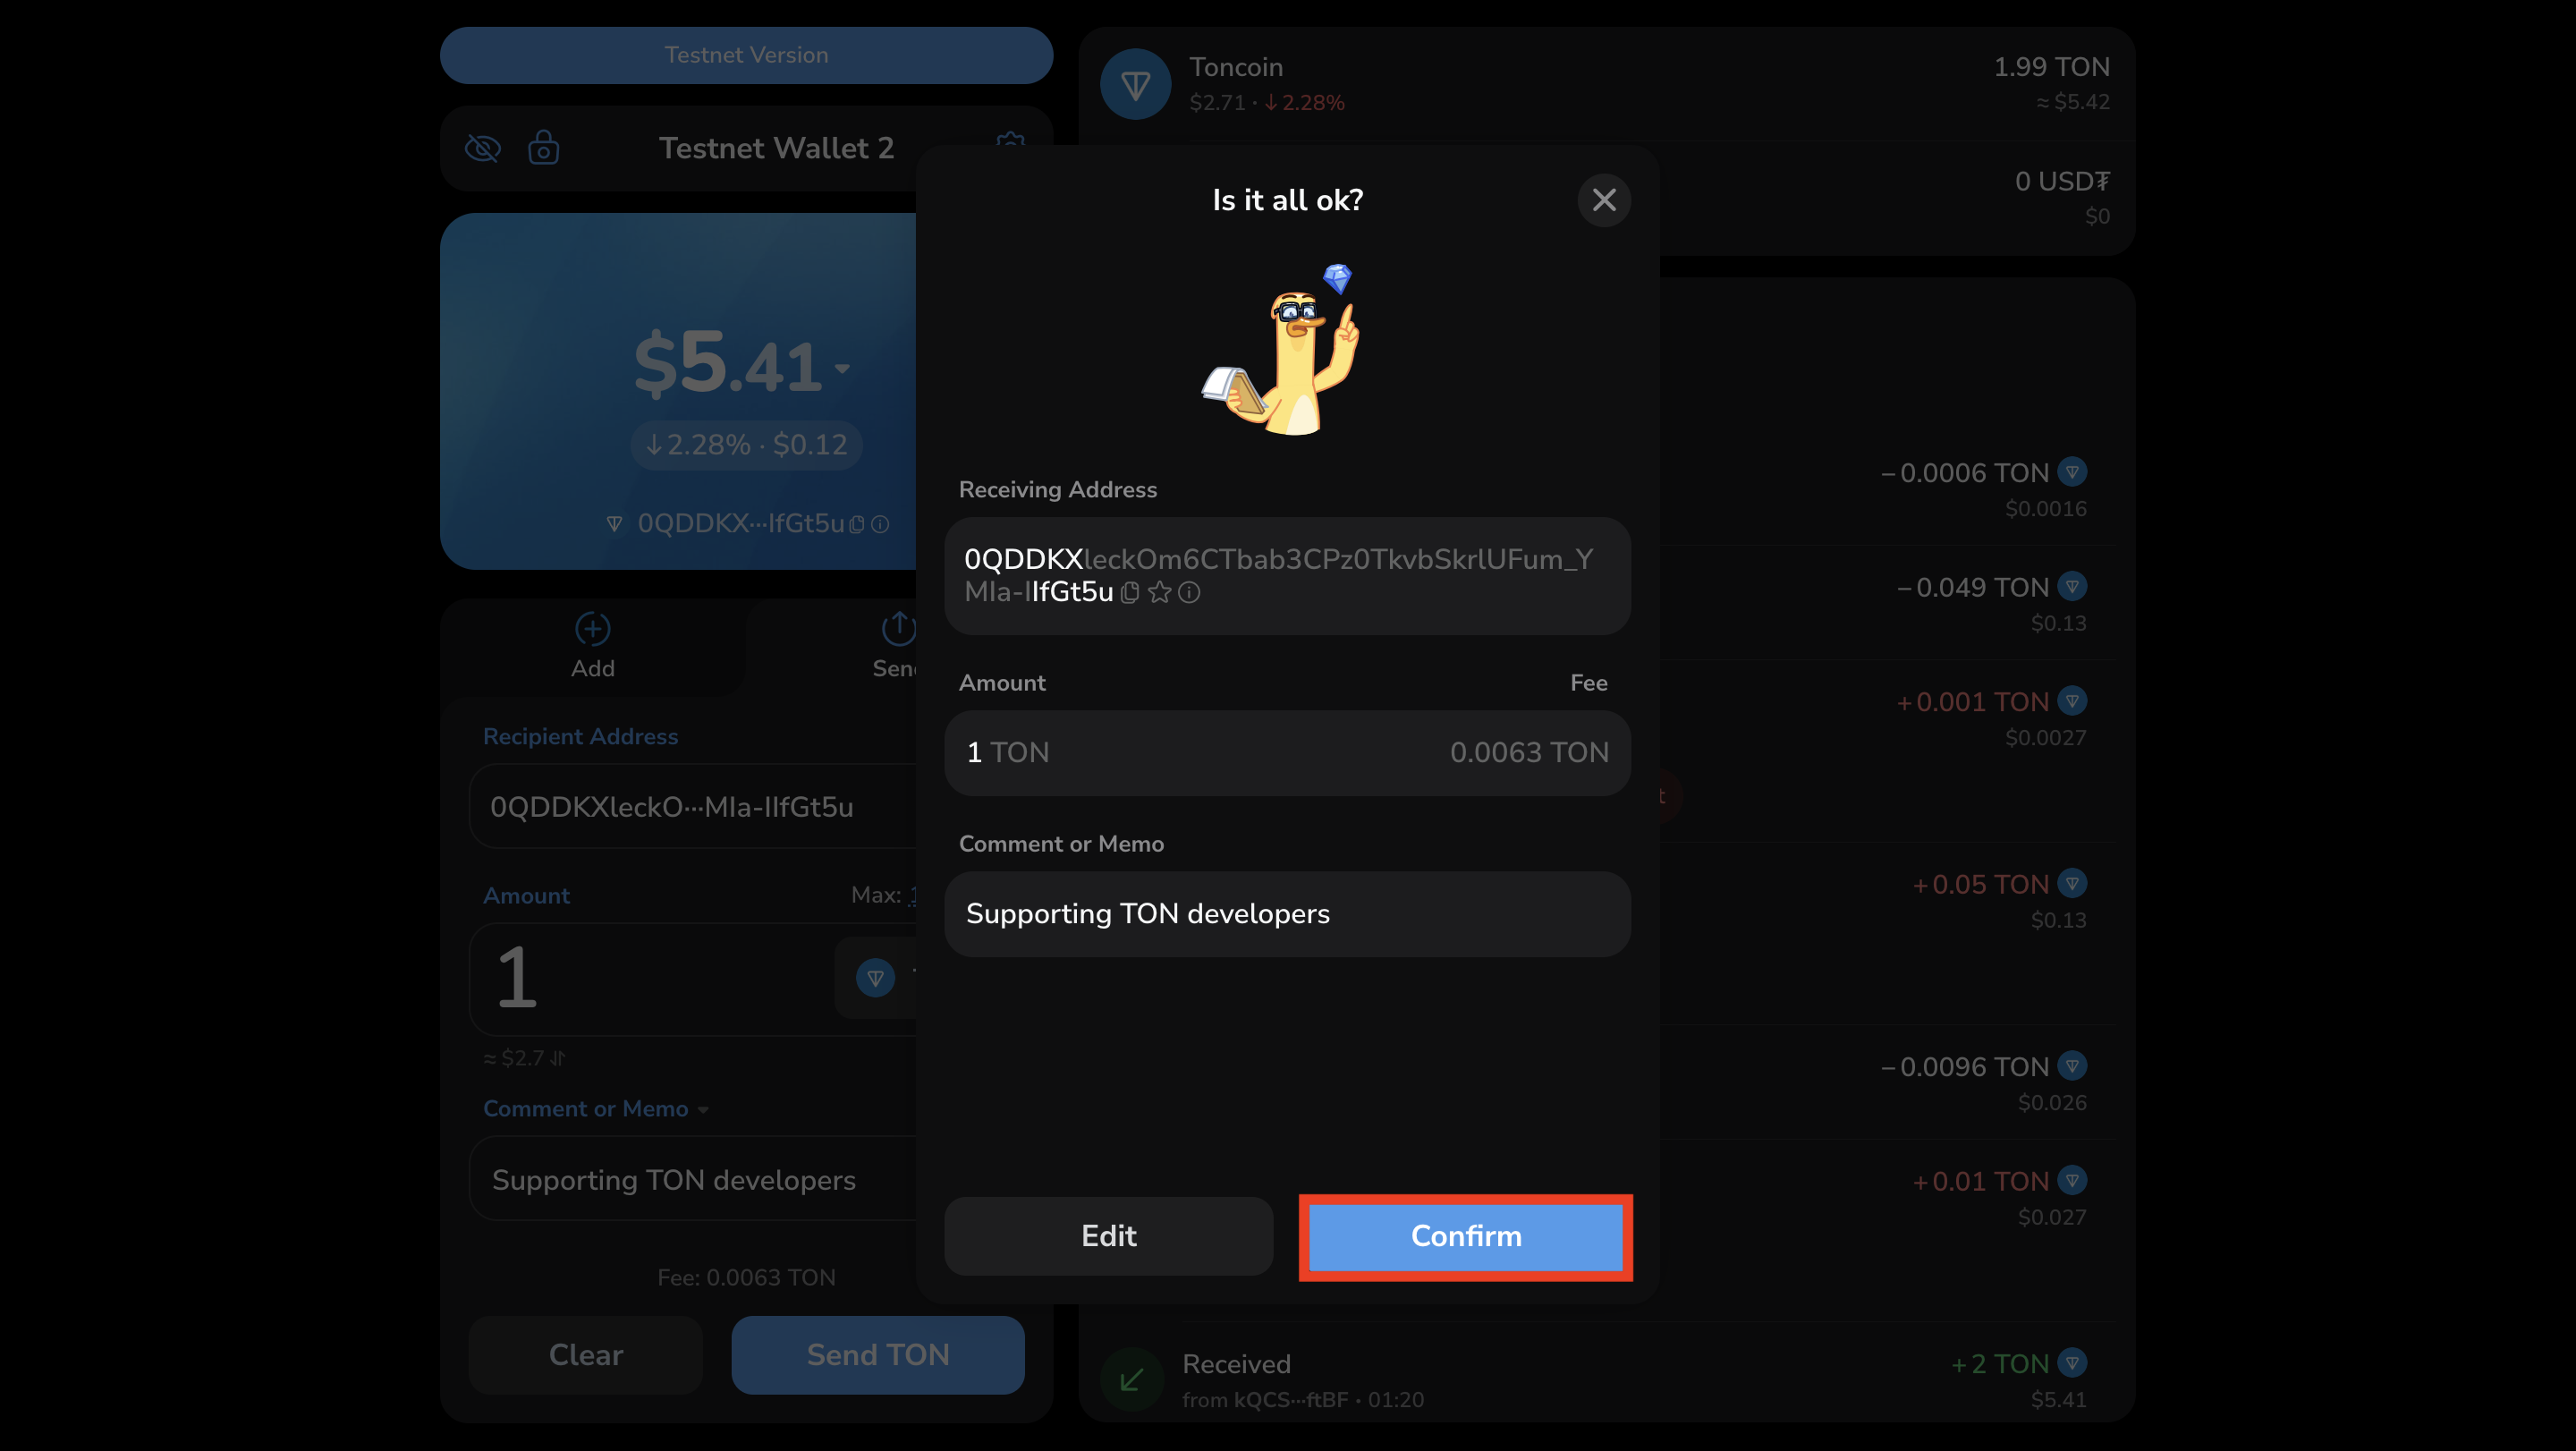
- In the confirmation popup, verify the transaction details and click “Confirm” if correct; otherwise, “Edit”.
- After confirmation, the wallet will display a notification: “Coins have been sent!”
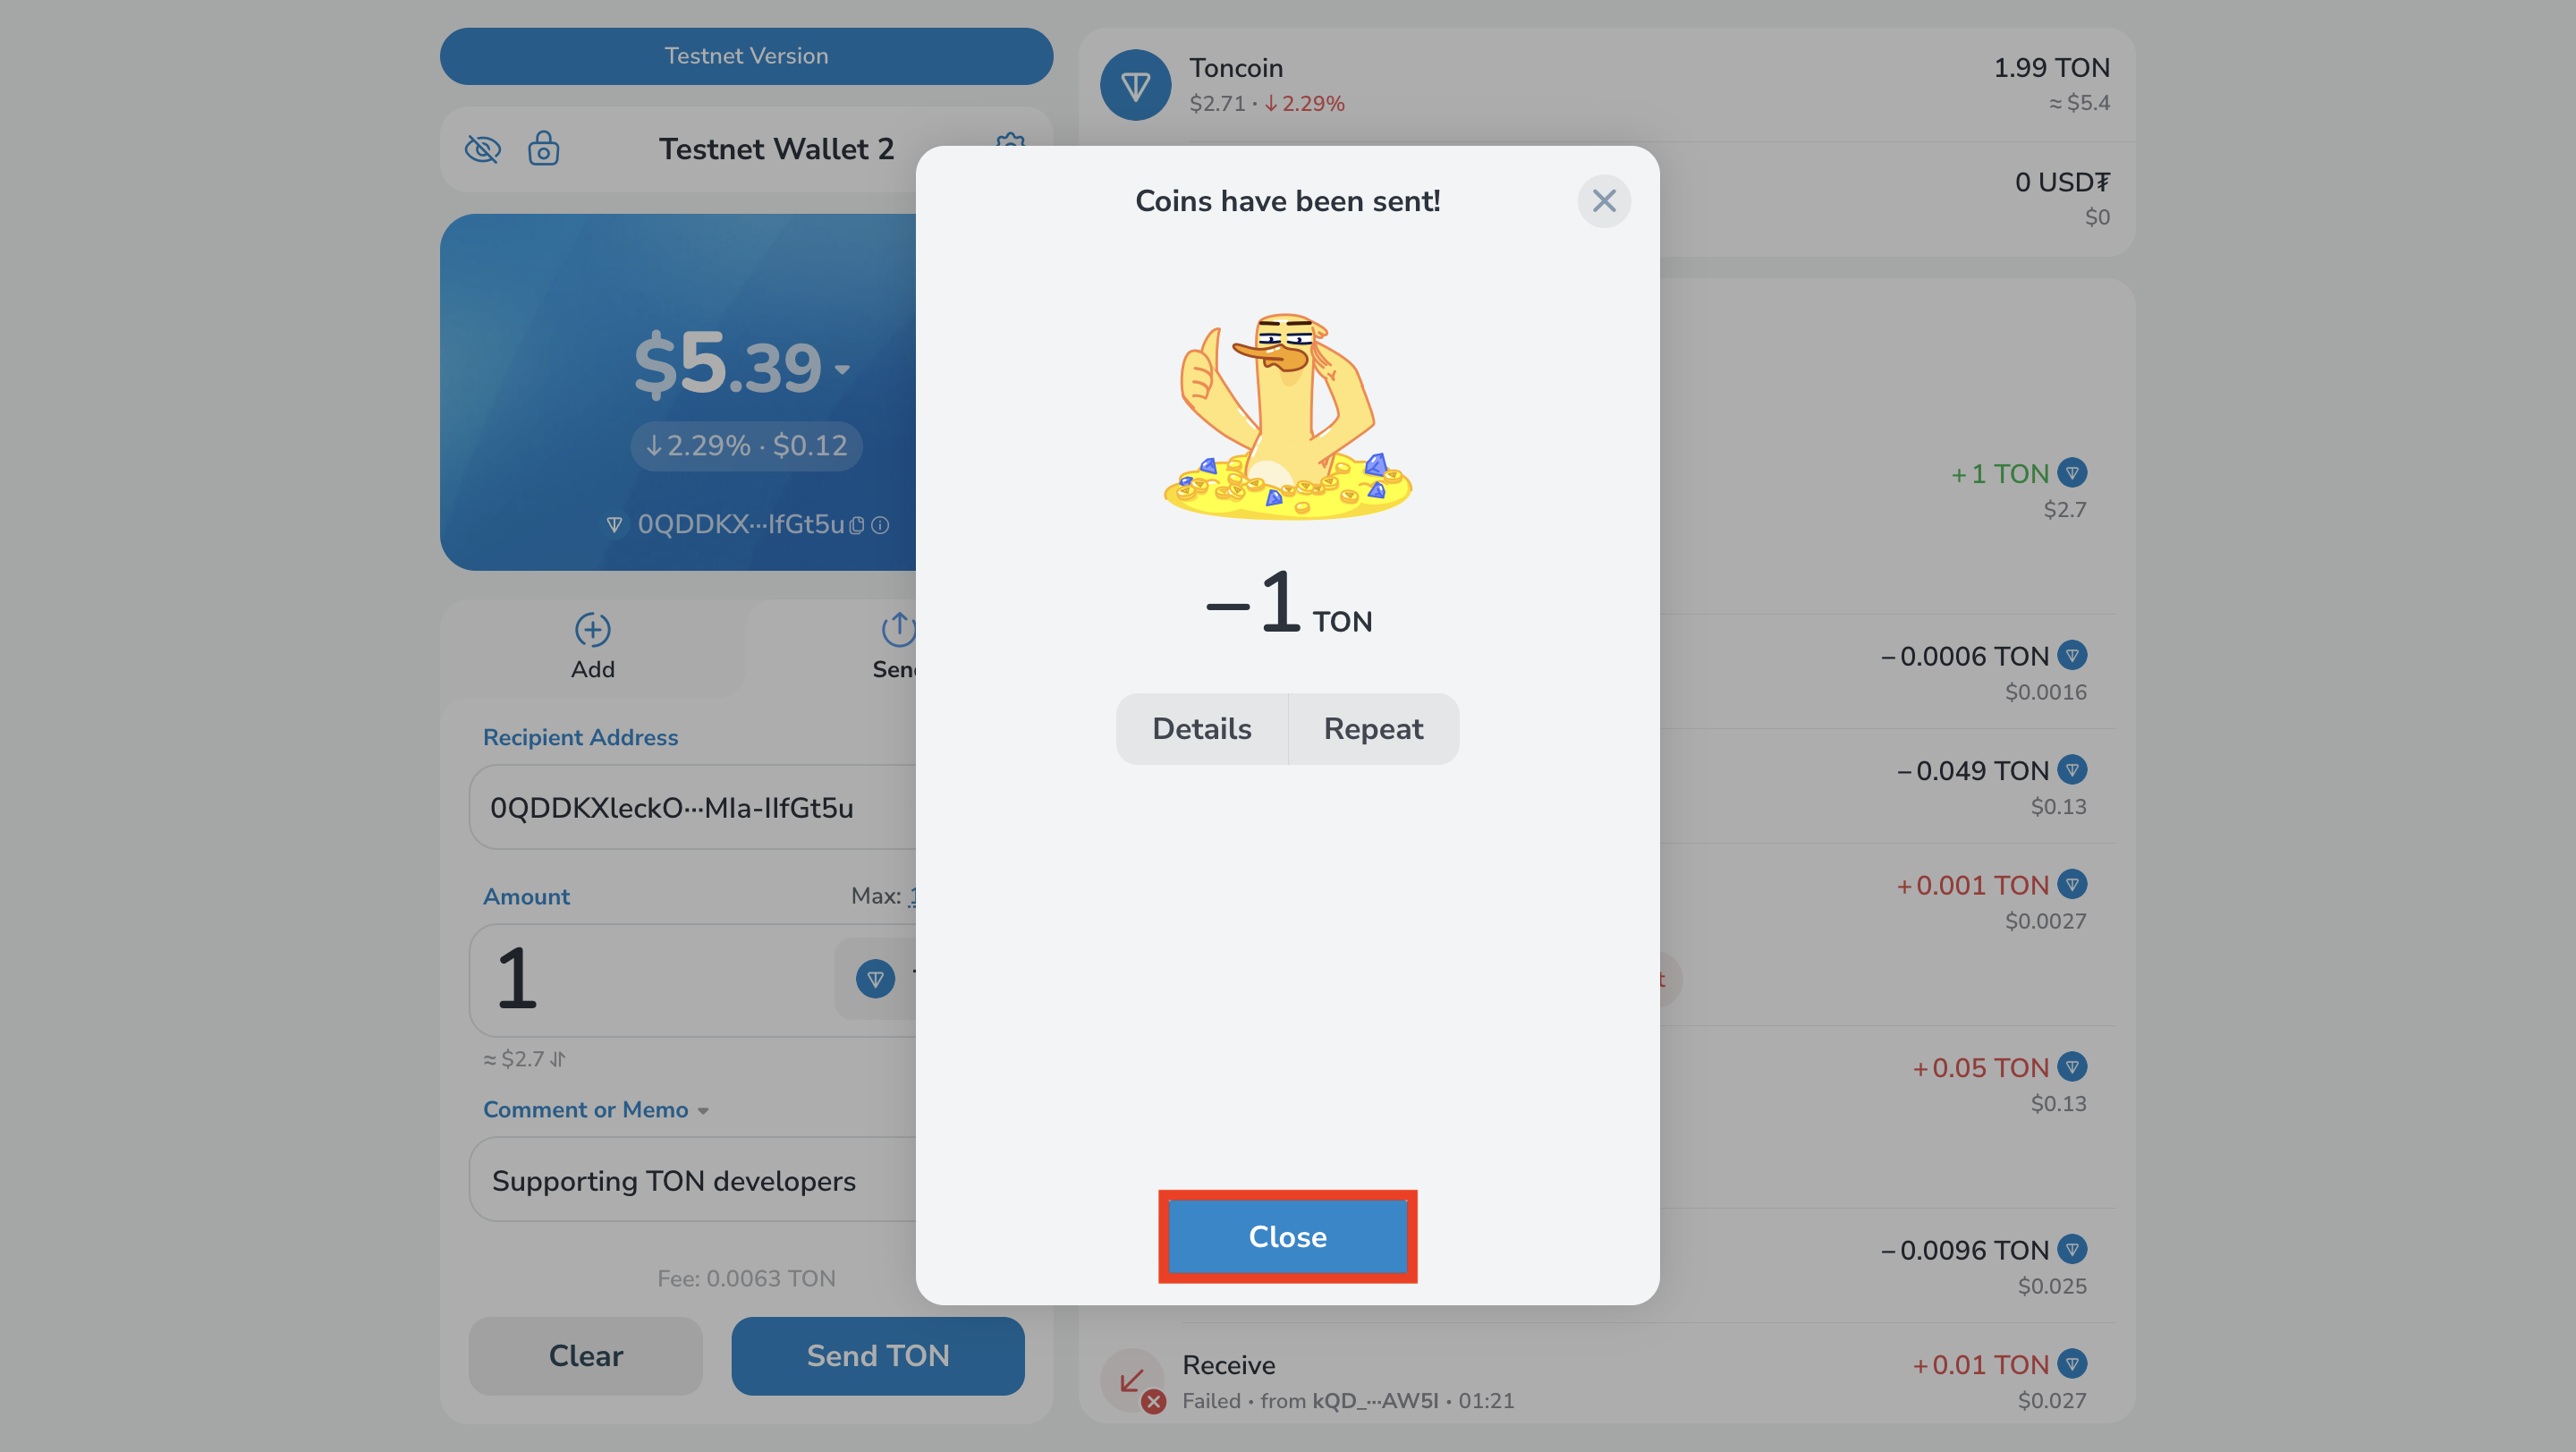
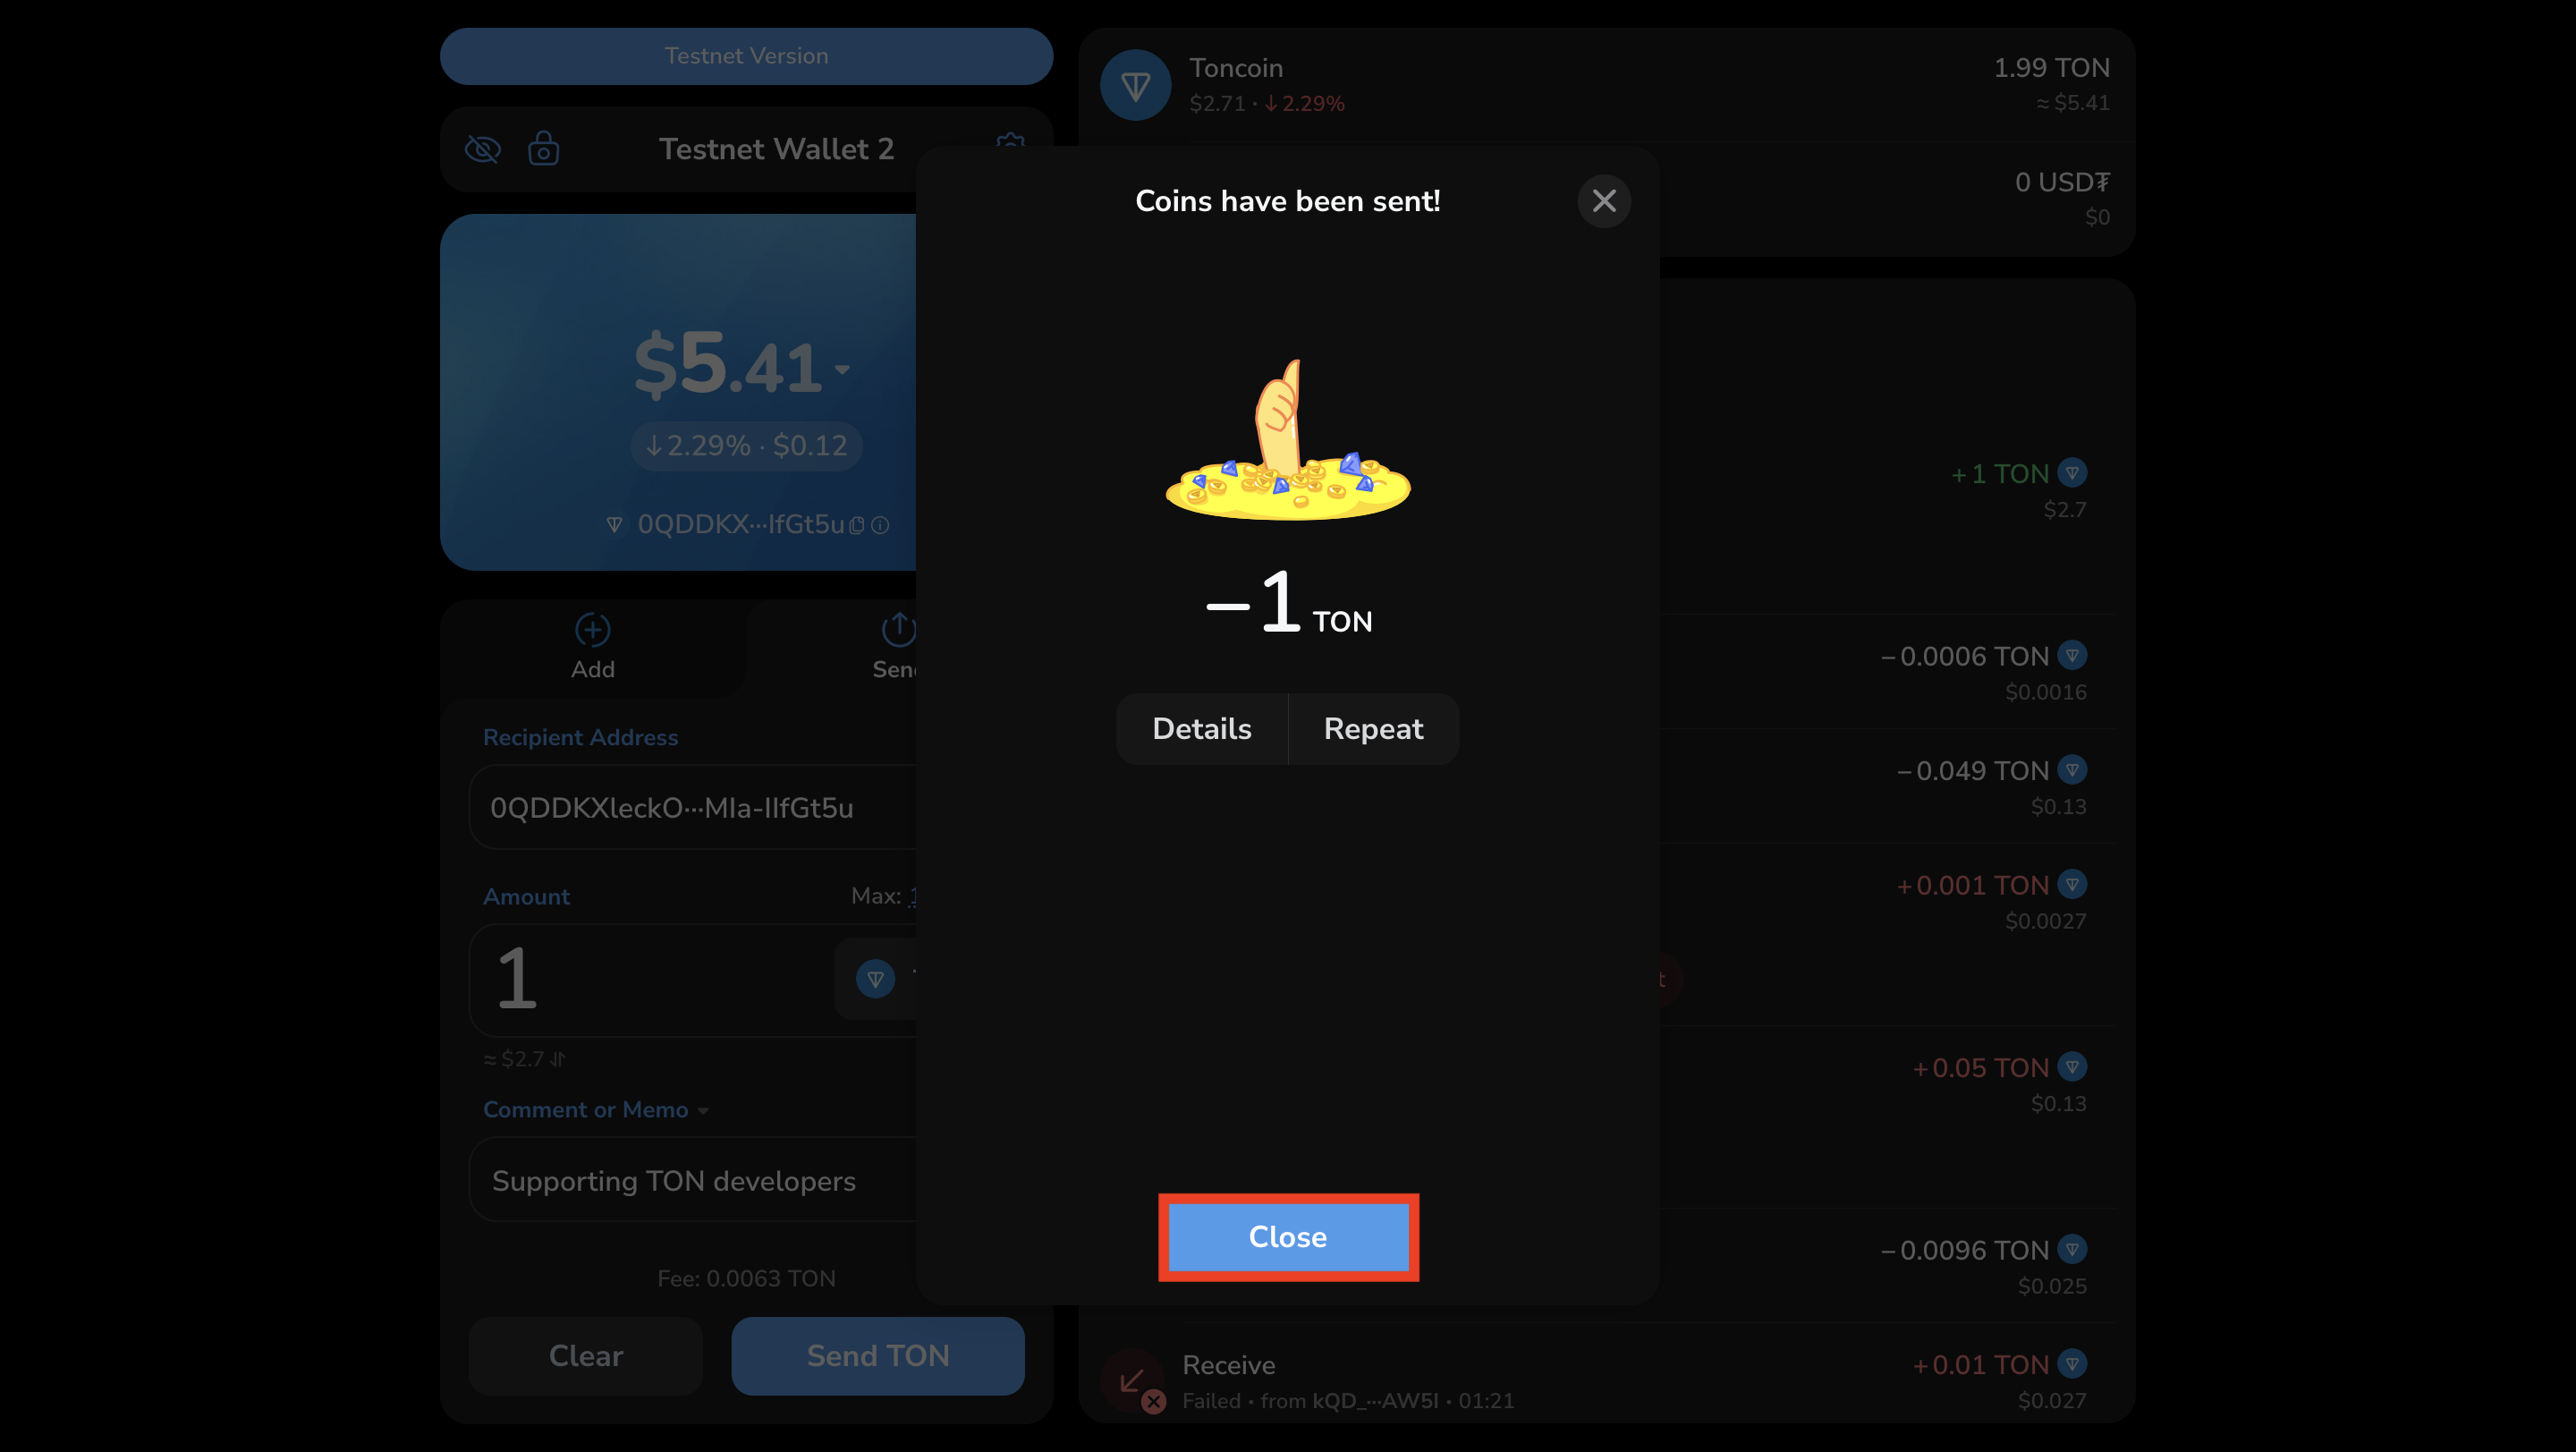 Next, check your wallet status in the blockchain explorer.
The wallet should appear as
Next, check your wallet status in the blockchain explorer.
The wallet should appear as active. Congratulations, you have successfully deployed your contract!

 You will also see a “Contract Type” field indicating
 v5.
For details, see Wallet v5.